
I am converting an old van (The Donkey) – taking an unloved work vehicle, I am creating a home on wheels, a magical palace of dreams and unicorns… or, rather, a place I can sleep without having to get arrested, pay any money, or worry about the weather (because I hate when it snows on my tent).
After cleaning the van out thoroughly – which it needed very badly – I decided that working on the floor was the first step. Someone suggested that I should build the walls first so that I wouldn’t damage the floor, but I wanted an even surface to work on and thought it would look better if the walls sat above the floor. It is also much easier to build walls over a floor than to cut a floor that fits in exactly with the walls, especially with a van as unusually shaped and curved as this one is. To avoid damaging the floor once I build it, I will cover it with dust sheets and try not to drop heavy, pointy objects, like power drivers or narwhals.
The Shell
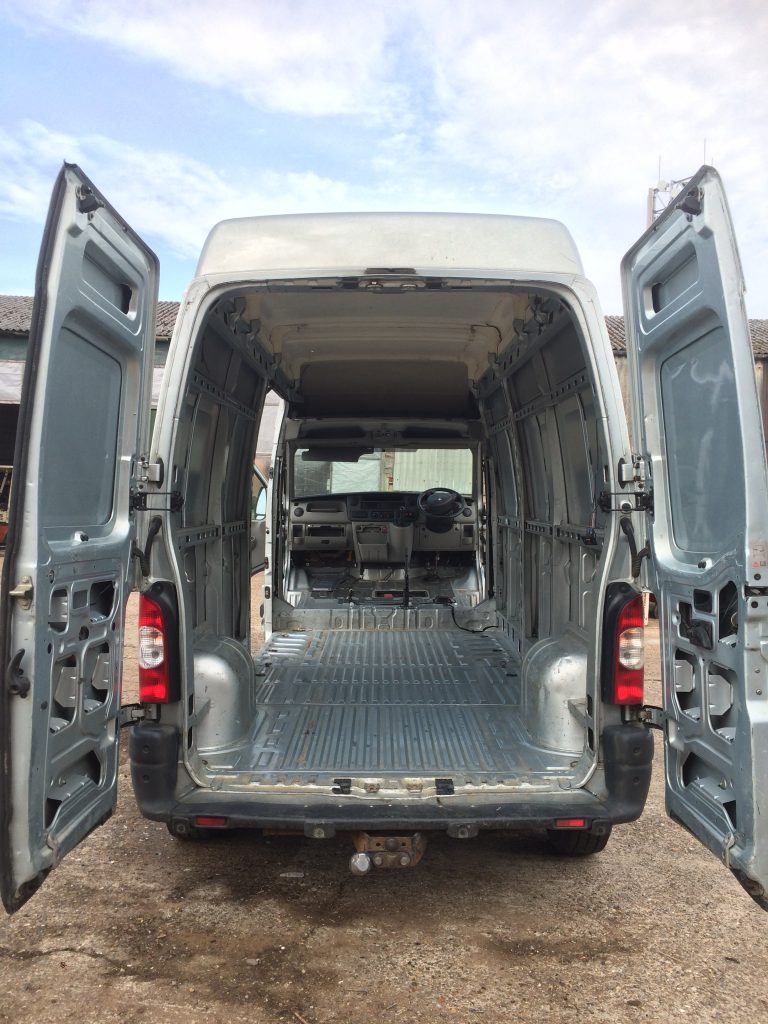
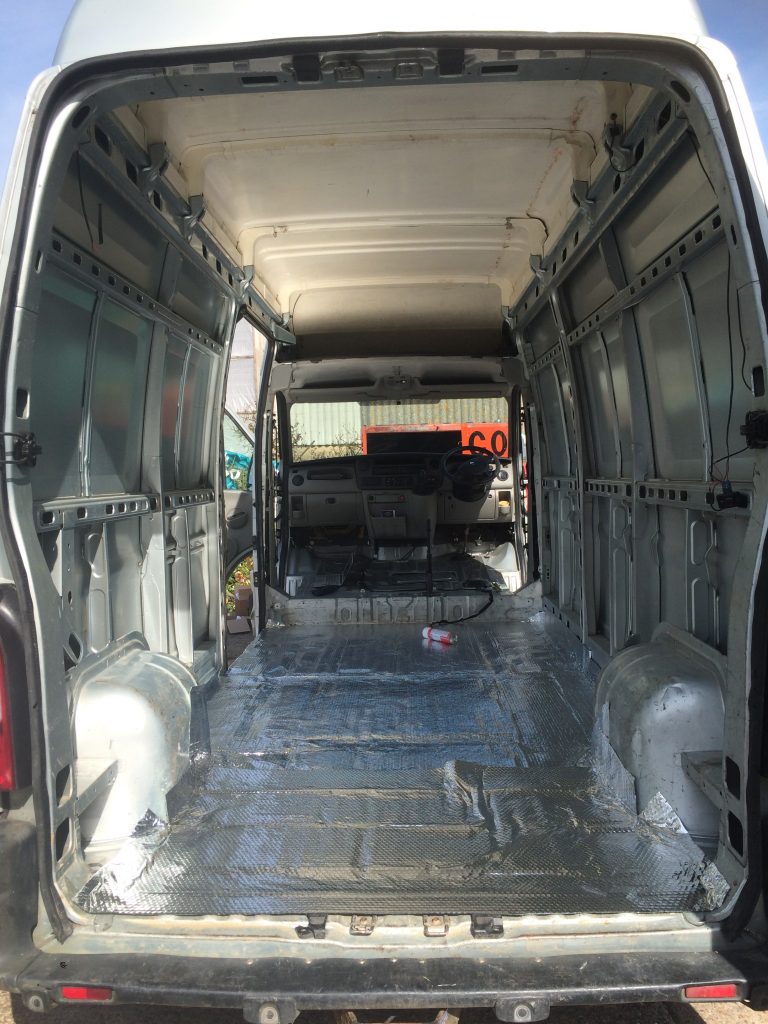
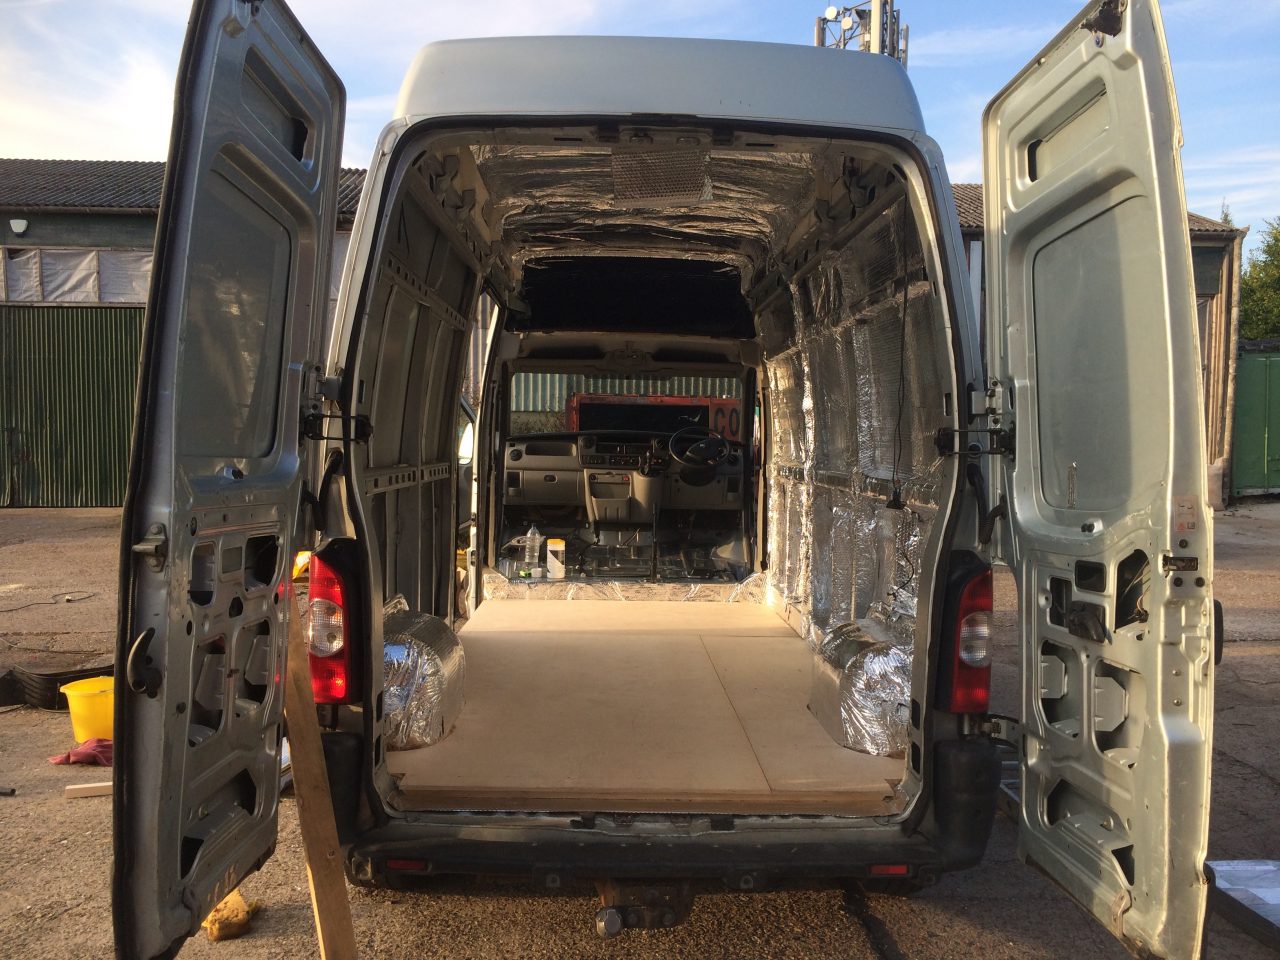
Below is a picture of what we started with when building the floor. It looks shiny (ish) because we spent a couple of days scrubbing it clean [read about cleaning the van here]. As you can see, the floor is not smooth, but we decided to compensate for this by covering it with insulation.
Insulation
There are innumerable different options for insulating a van and I spent hours reading many ‘riveting’ articles on the subject. If you find life entirely pointless, I suggest that you read about the pros and cons of every type of insulation that exists, then cross reference the articles with secondary sources to evaluate the validity of manufacturer claims with regards to R-values – you will find you fears validated. After this joyous task, I decided on using a combination of bubble foil and (recycled glass) fibre wool. I’ll elaborate on why in a later post, but in short, this combination seemed to offer the optimum combination of heat retaining properties and reasonable cost. It’s not that I’d already bought the bubble wrap (because it was excellent) when I read that it was more useful as a halloween costume than as an insulating material…
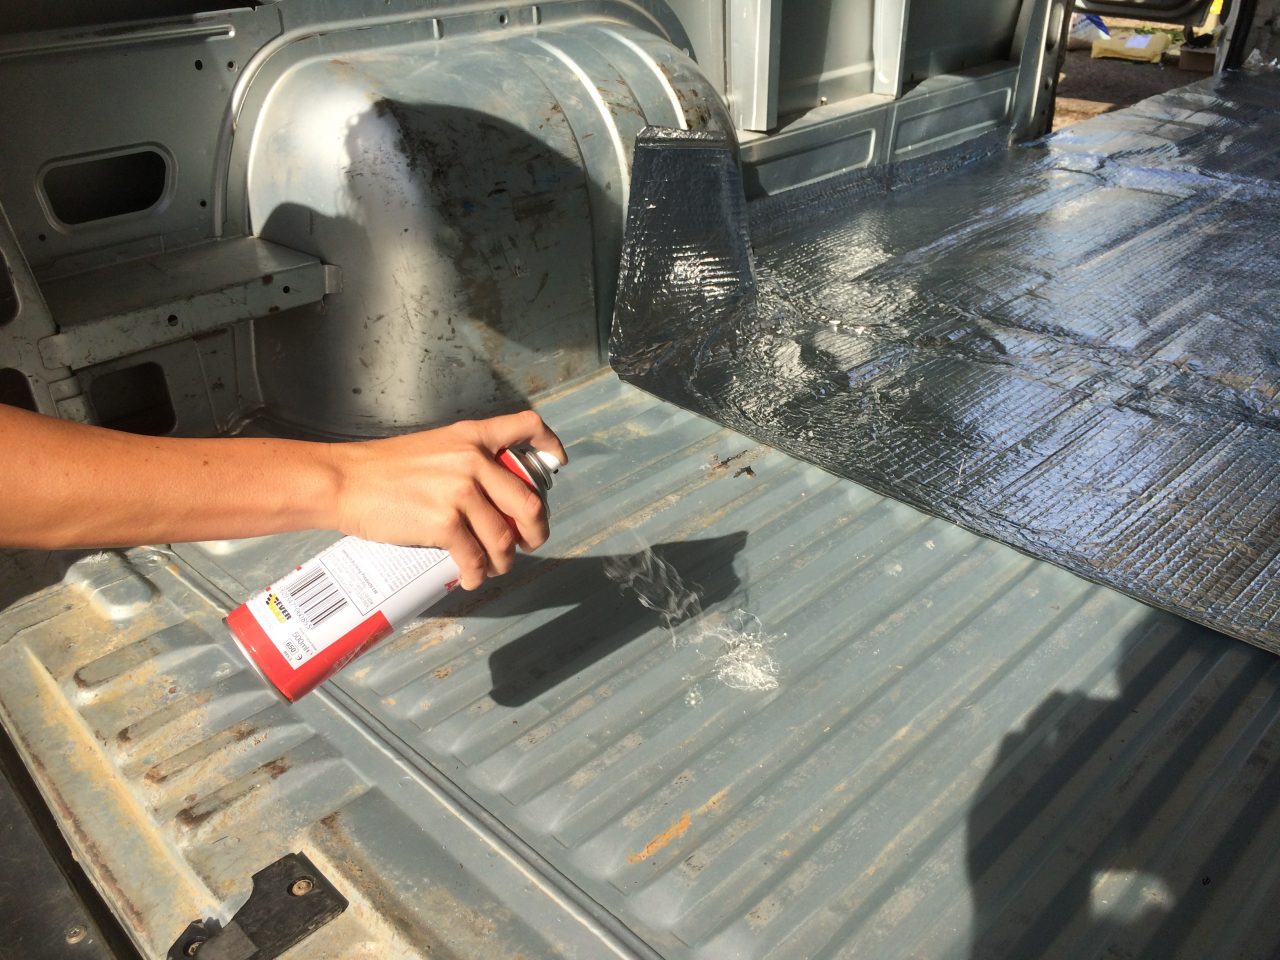
We attached the bubble foil by with spray adhesive. I’ve never used this stuff before and it kind of went everywhere, but it got the job done. If you have children, never give them spray adhesive or you will find them tied in knots, stuck to the floor, but you won’t be able to get to them because you too will be unable to move across the sea of gunk. If you’ve ever seen a long legged insect get stuck on a sticky fly sheet, this is what it would be like – with humans. I expect to see it as a horror movie one day.
After cutting a piece loosely to size, we sprayed the target area and left the adhesive to become ‘tacky’ for a minute or so, then pressed it down. By making cuts in the foil, we were able to cover all the tricky parts of the van.
The curviest bits were the most difficult. My comfort came in knowing that I could cover them with walls or furniture so that I wouldn’t have to see them again.
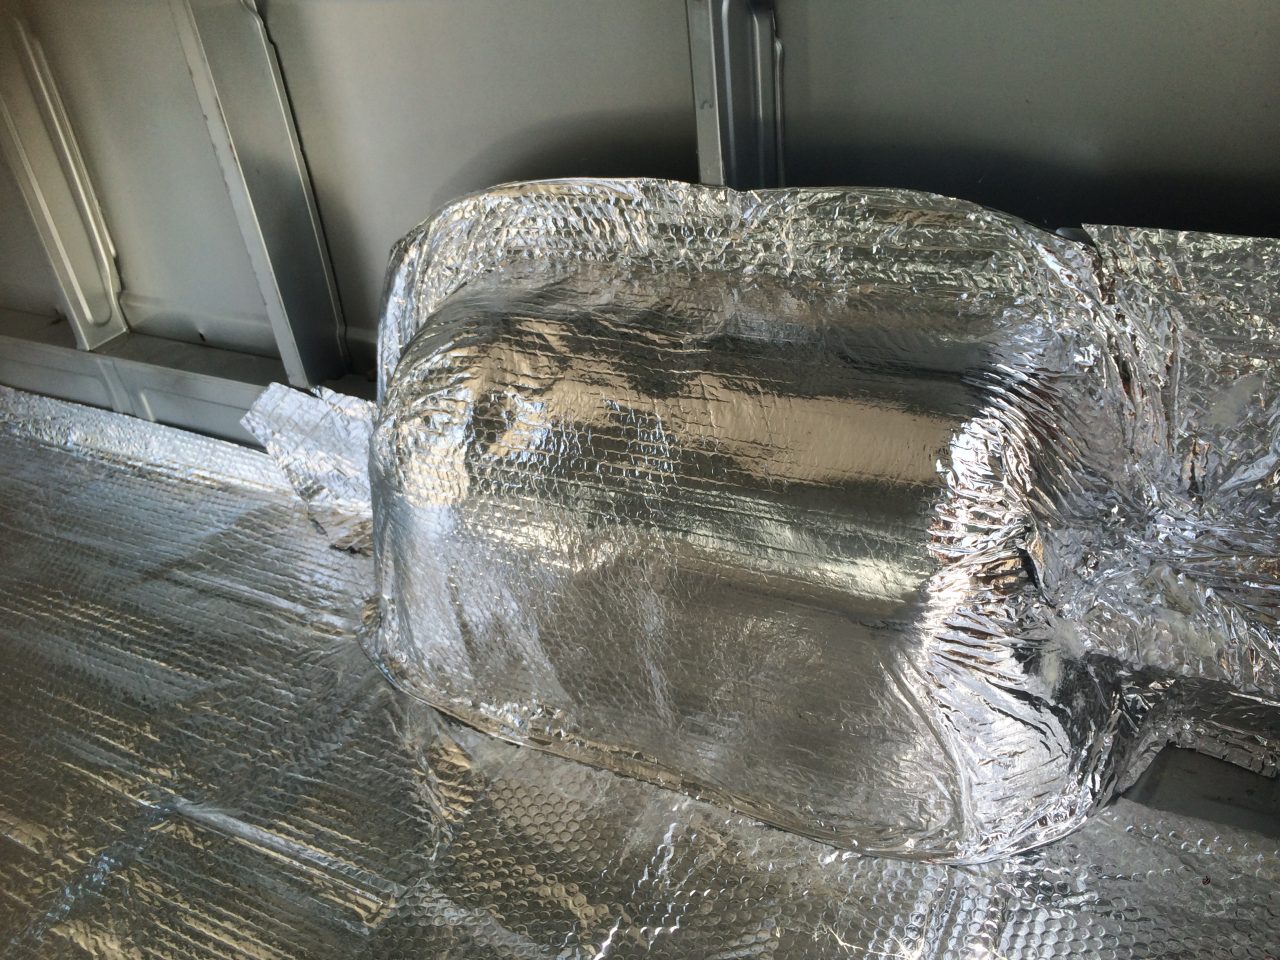
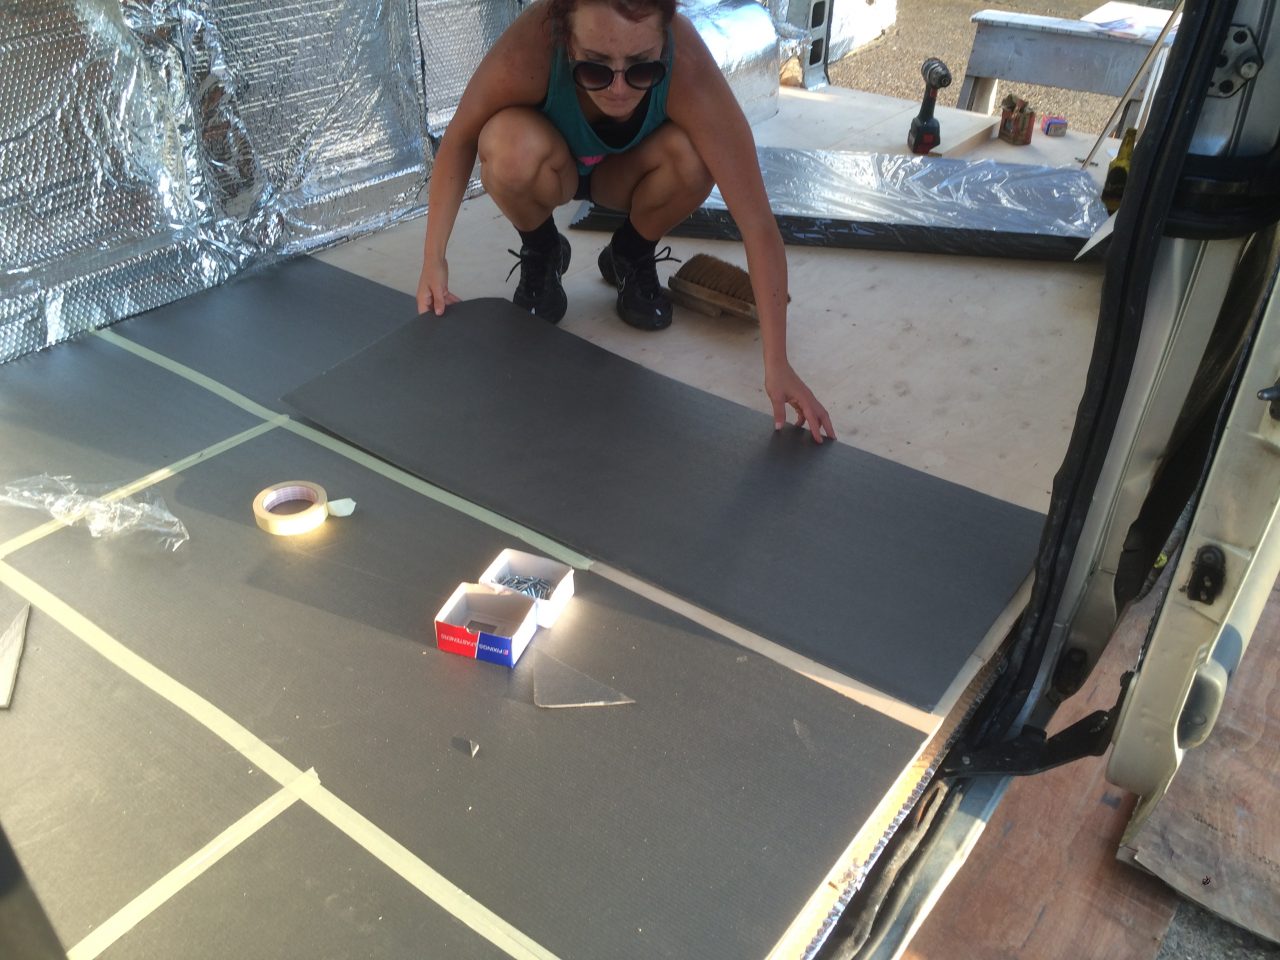
Bubble foil is really easy to lay on big flat areas and laying the floor was a breeze. You’re not meant to cut it too often (for the heat retention properties) which is impossible with a van as curved as this, meaning it got much trickier as we proceeded around the rest of the van, but it was great for the floor. I kind of wish I had a luton (a square van), because everything would have been easier.
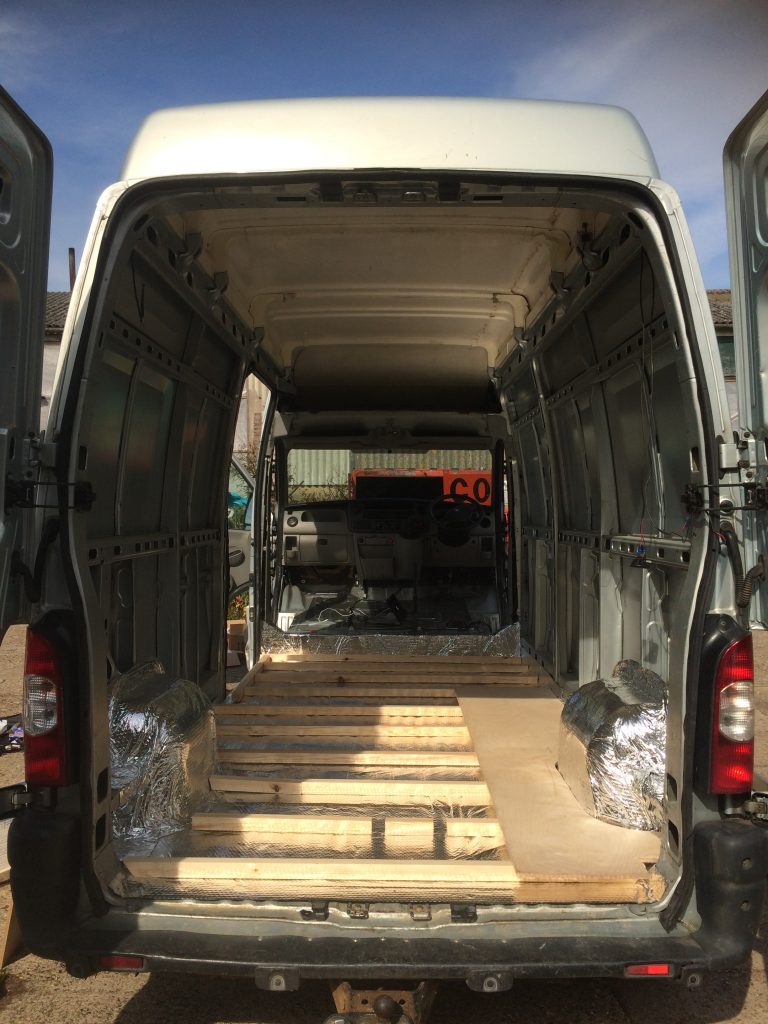
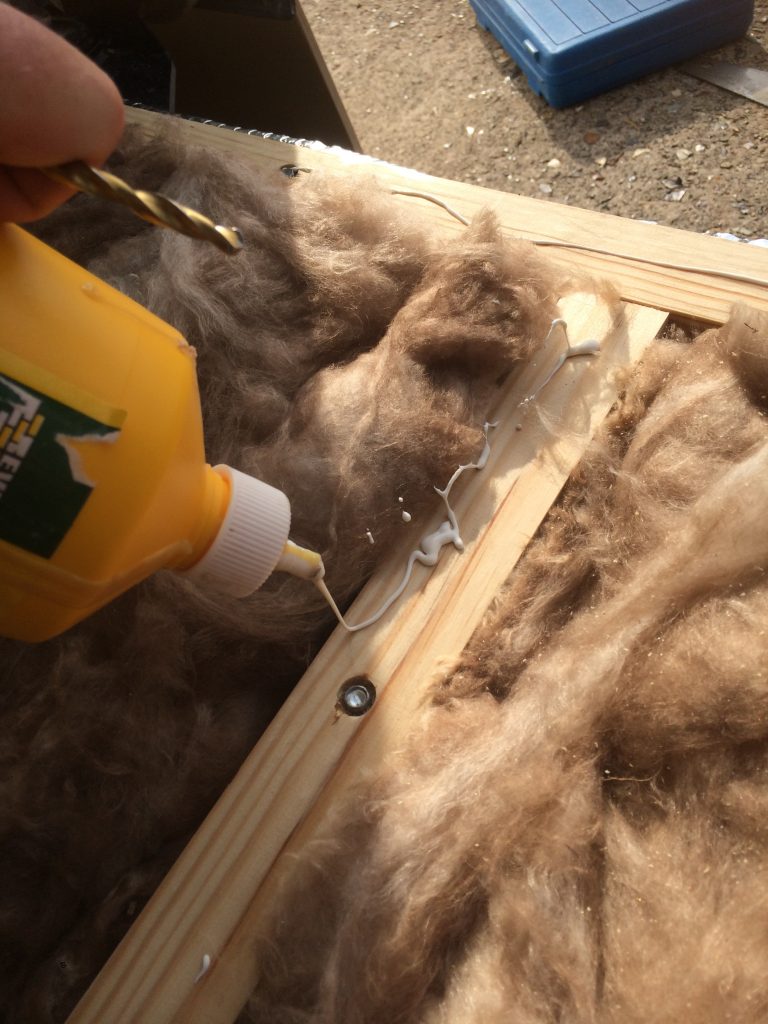
The recycled glass fibre wool was the next layer, but it was important that we put batons on the floor for two valid reasons: firstly, it would allow the wool to work better as compressing fibre wool reduces the insulation properties; and secondly, the batons would give us a stable, flat (ish) floor – if we laid any other floor over wool without batons, it would move continuously and be unpleasant to walk on. We decided to keep the batons quite close together to give a stable base and drilled straight through them with long, self-tapping screws. These screws went into the metal floor of the van and held the batons securely in place. [If you’re wondering why the penultimate baton is in pieces, it’s because I messed up and ran out of wood, so had to use the offcuts for this strip!]
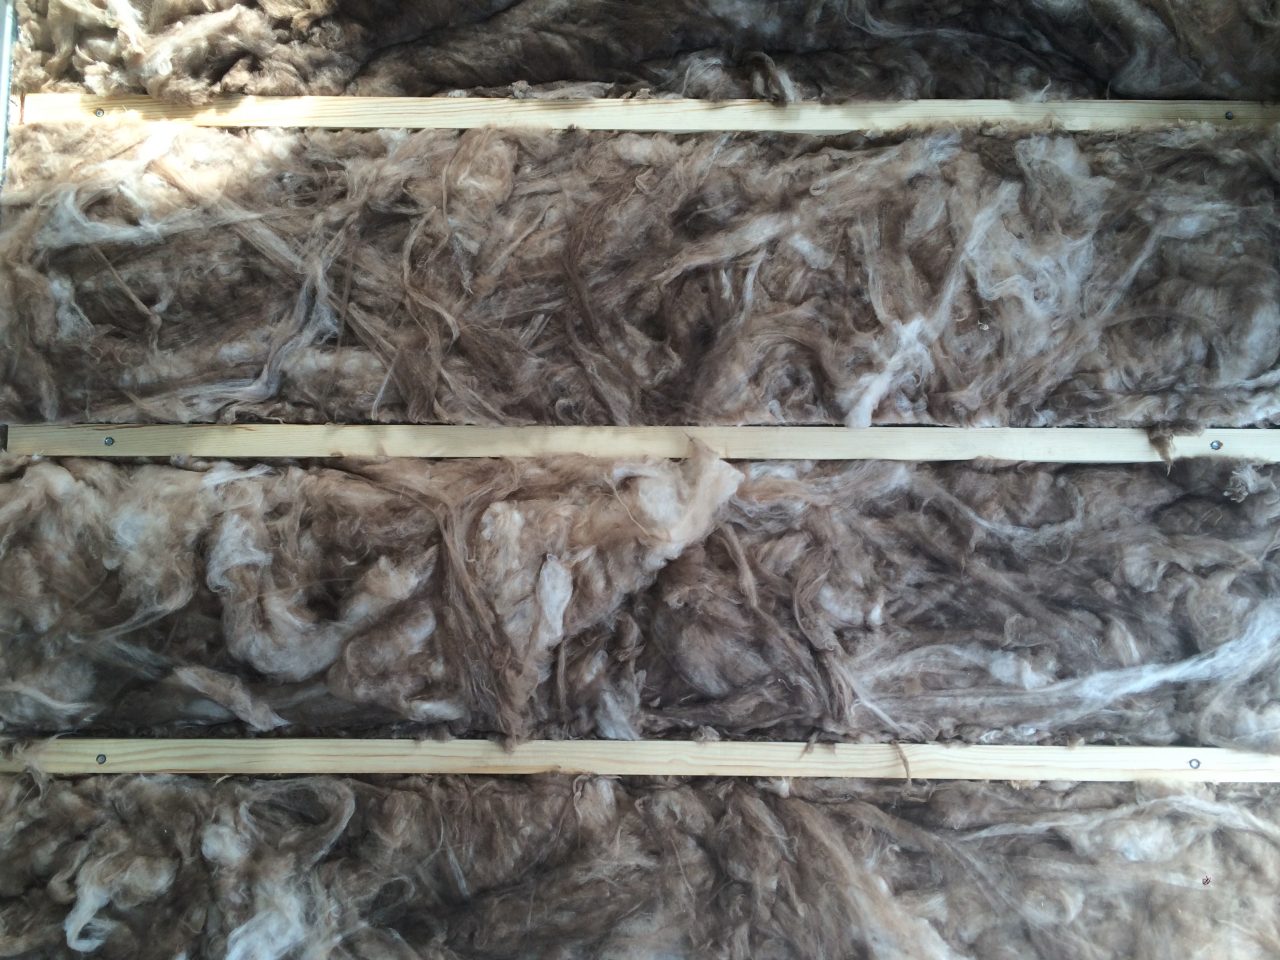
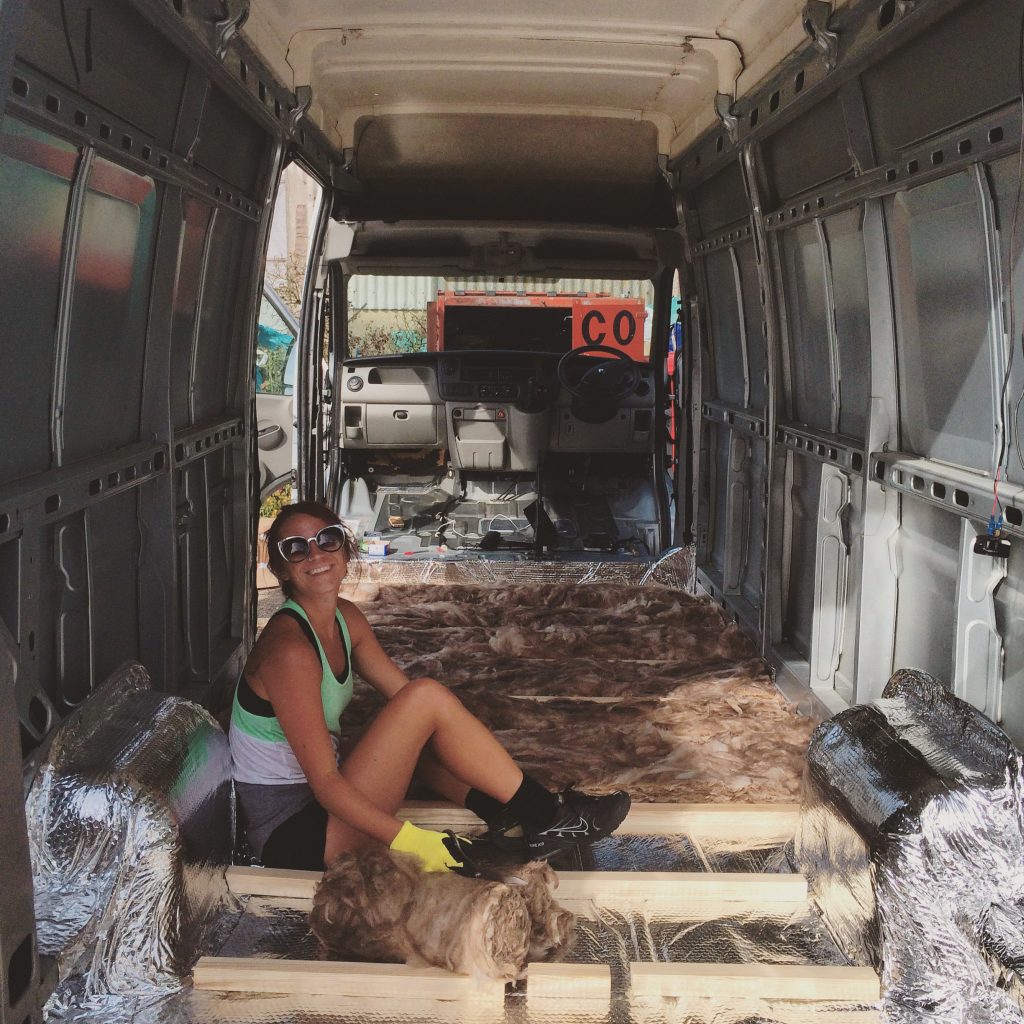
Once the batons were laid, we filled all the gaps with the fibre wool. Avoiding compressing the material would (we hoped) help the overall insulation of the van. As you can see, it was a pretty snug fitting with the fibre wool, but we tried not to overload the cavities. I like this picture because it looks like stuff is in the right place and we can pretend we know what we are doing. It also covers up the badly cut bubble foil.
Laying Plywood
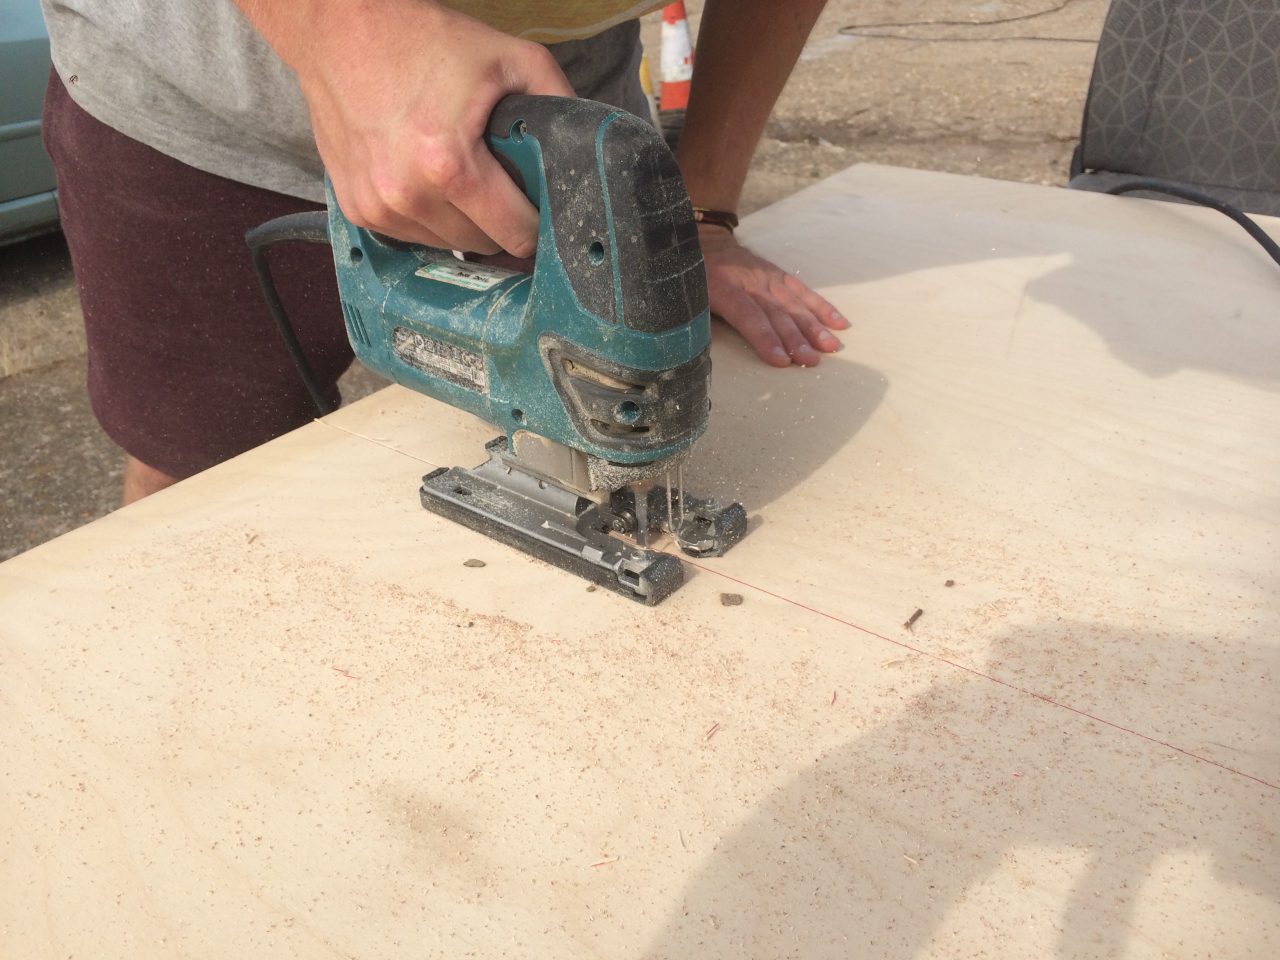
To give a stable base, we laid plywood across the batons. Fortunately the van previously had a plywood floor that was nailed straight into the metal. Although the ply was mouldy, dirty, and severely damaged, I was able to use it as a template to cut the correct shape for the new ply floor. Pressing the old ply against the new ply felt like wrapping a puppy in a snot rag that I found in a urinal, but I didn’t see any other way to make a good shaped cut without having to put masking tape everywhere, so I closed down my senses and got on with it. [Pulling the old, discarded ply from under many rubbish bags in the skip was particularly unpleasant.] I cut the new shape out with a jigsaw, although this splintered the edges and I had to sand off the splinters.
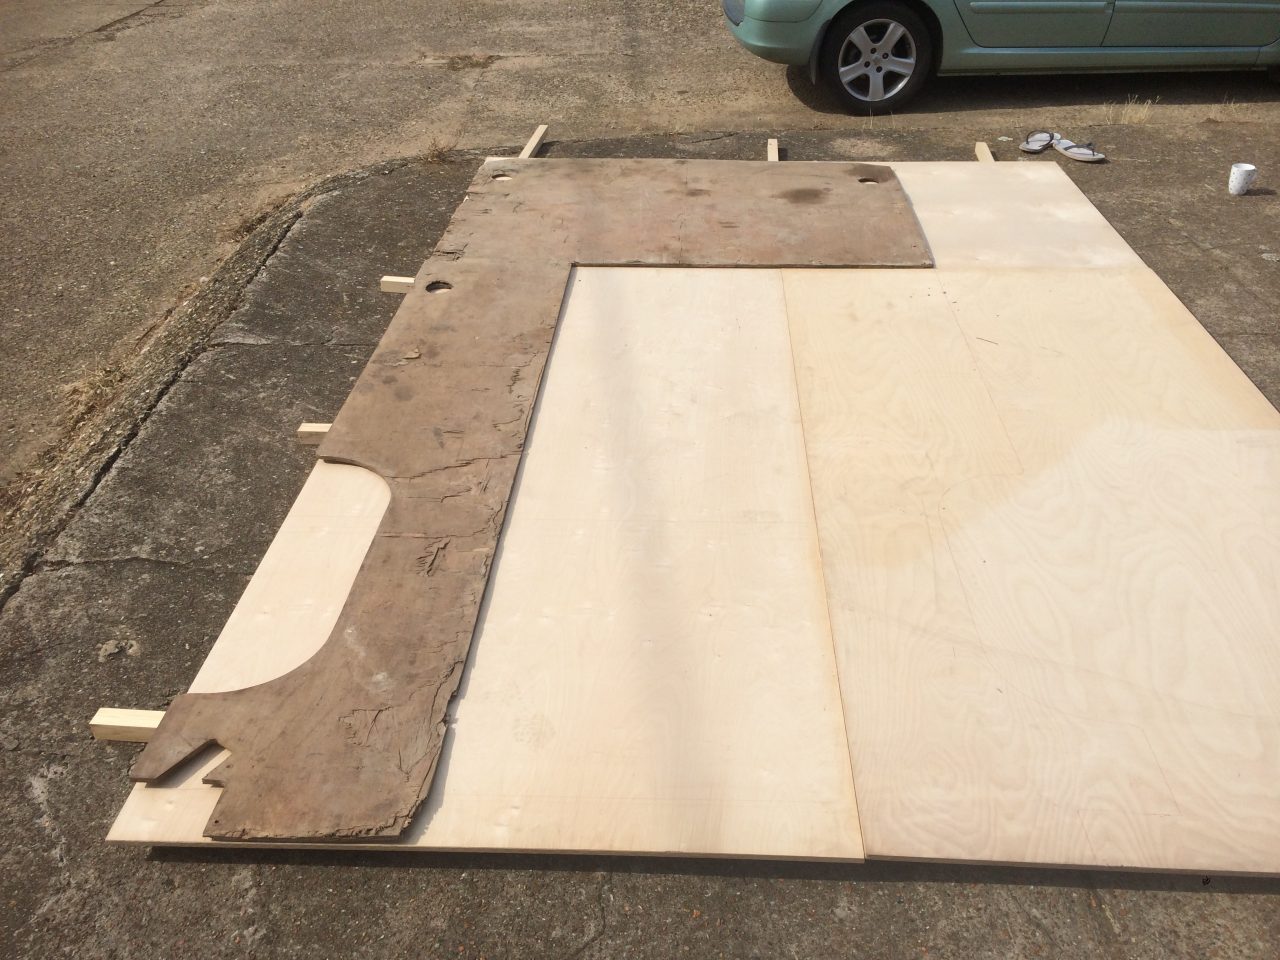
Plywood comes in large sheets meaning that we could cover the whole floor in less than two and a half sheets which is very important for the stability of the floor. By using a medium thickness ply, it ensured that the floor was stable, and to be doubly sure, I used glue when laying down the sheets (before screwing them). I don’t think this was necessary, but it didn’t take long and definitely couldn’t have made the fixing worse.
The most sensitive part of the floor is the joints between the ply as the edges could be unsupported. To try and offset this, I added offcuts of batons where the plywood joins another piece, so that each joint fell across a baton. This means that if anyone is to tread on this part in future, the floor won’t bend / crack at this point. I then screwed the plywood into the batons with short screws which gave us a good, strong floor.
Laminate
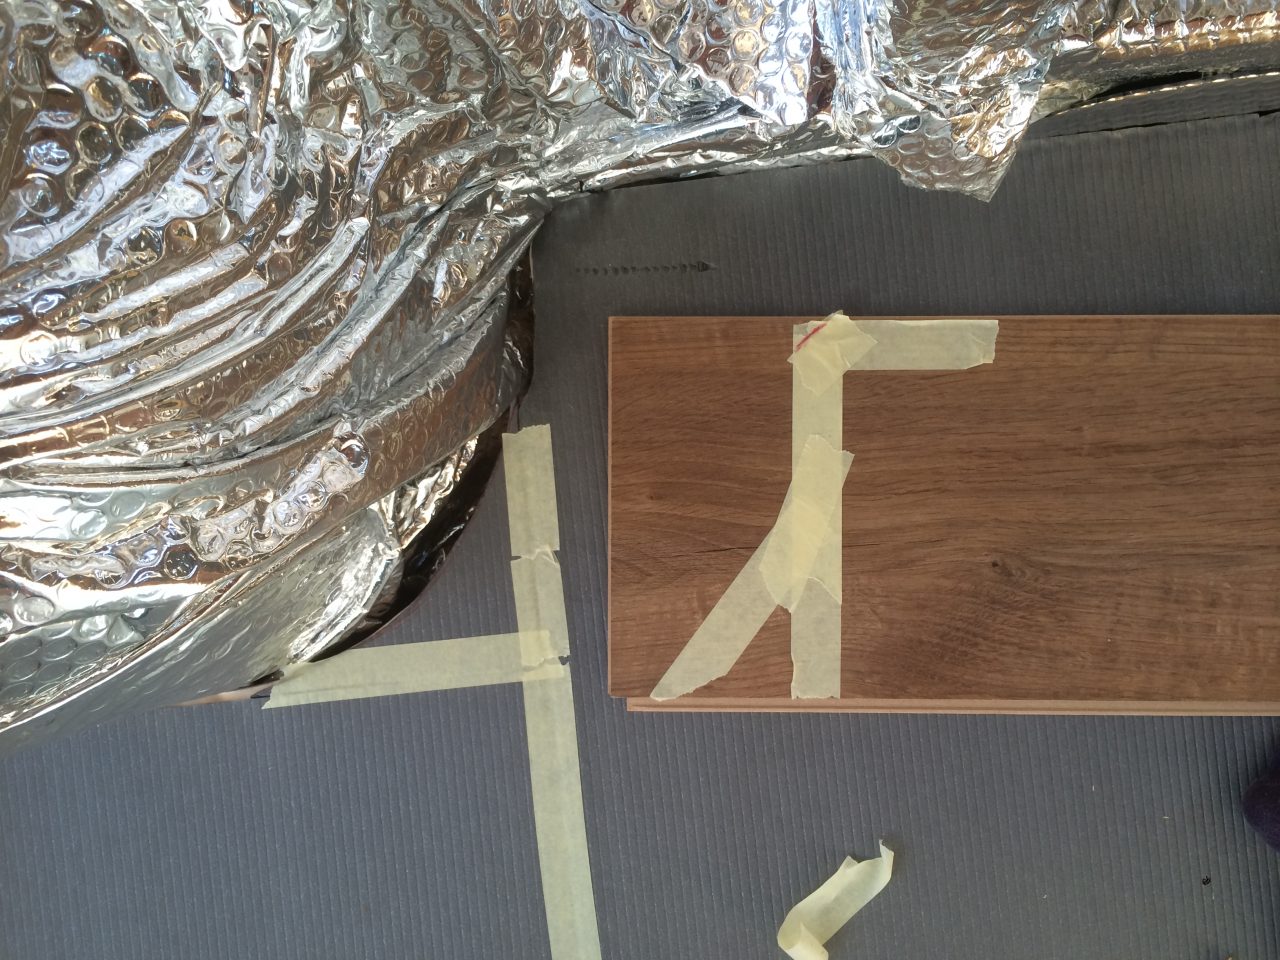
Construction wise, the floor is sound and we could have left it like this, but for aesthetic purposes, we decided to lay some laminate. This was purely to make the van look nice as we are hoping for a combination of practicality and attractiveness because there is the potential that we will be spending lots of time in the van in future. Plus, I also saw some pretty neat vans on the internet and wanted to have a go at making something nice. After hitchhiking for so many thousands of miles, I hope I one day pick up a hitchhiker in the van who looks back and says, ‘nice van.’ Then the struggle will have all been worth it.
Whilst laminate is extra cost and extra weight, I really think that the look will offset it. The weight is minimal when considering everything else that will be in the van and we found laminate that was heavily reduced (less than half price). The laminate we used is some kind of floating floor stuff, so we begun by laying the underlay. It’s pretty easy – cut the bits to size and put them in place. We used masking tape to temporarily secure them, knowing that the laminate would hold the underlay in place once it was laid. I thought of using the spray adhesive, but was worried the underlay would get stuck to the ceiling or my face.
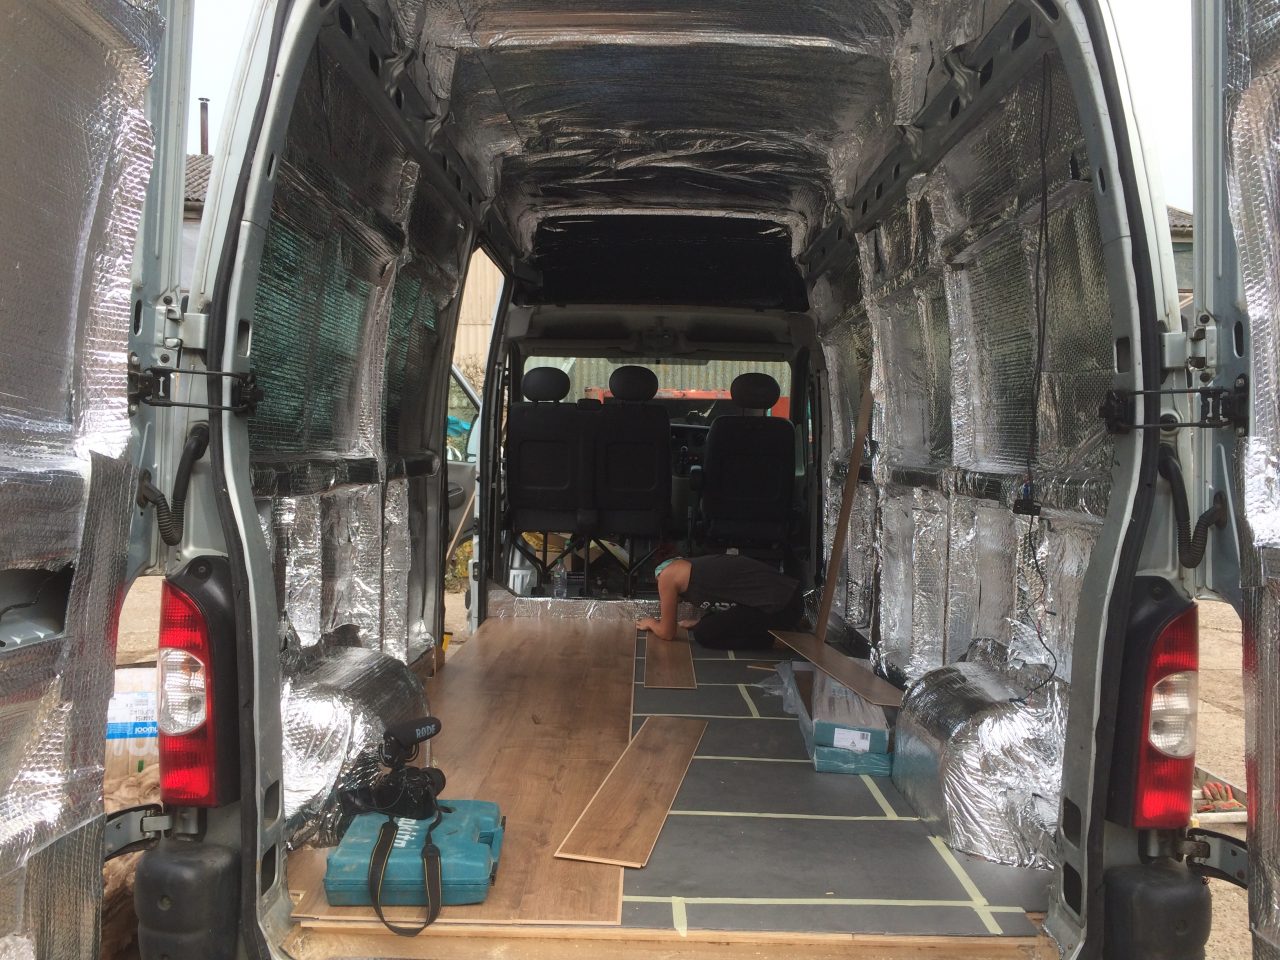
The van was a tricky shape, but I wasn’t too worried as furniture will be covering many of the tricky cuts. Despite this, you don’t want to be too far from the edge of the van, so we used masking tape to get the shape of the floor, cut the pieces with a jigsaw, and then clicked them into place. As it was cheap laminate, the tongues kept snapping and it was a real pain in the bum to try and get the floor down. I thought about taking the laminate back and saying ‘this is really cheap laminate’ but I was worried they might ask me to buy something more expensive, so I just kind of stuck with it until I got it to almost fit.
The Finished Floor
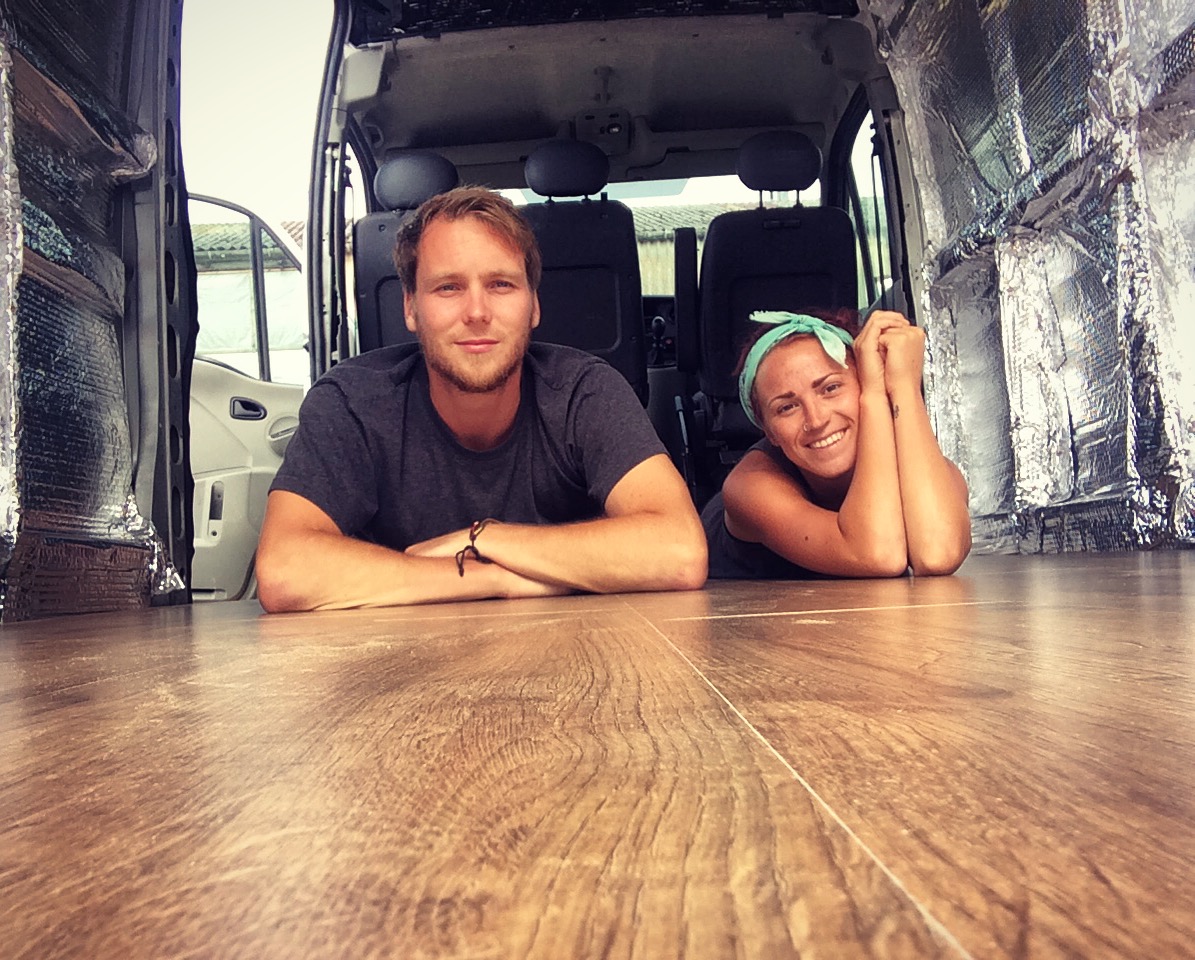
After several hours of struggling and cutting, we finally got the floor down, and I was pretty happy with the result. I had a little bounce around the back of the van to check the floor’s stability and it was excellent – there was no underfoot movement anywhere in the van which made me very happy (as I was expecting it to feel like walking on a paddle board at three in the morning after too many bin-tangs).
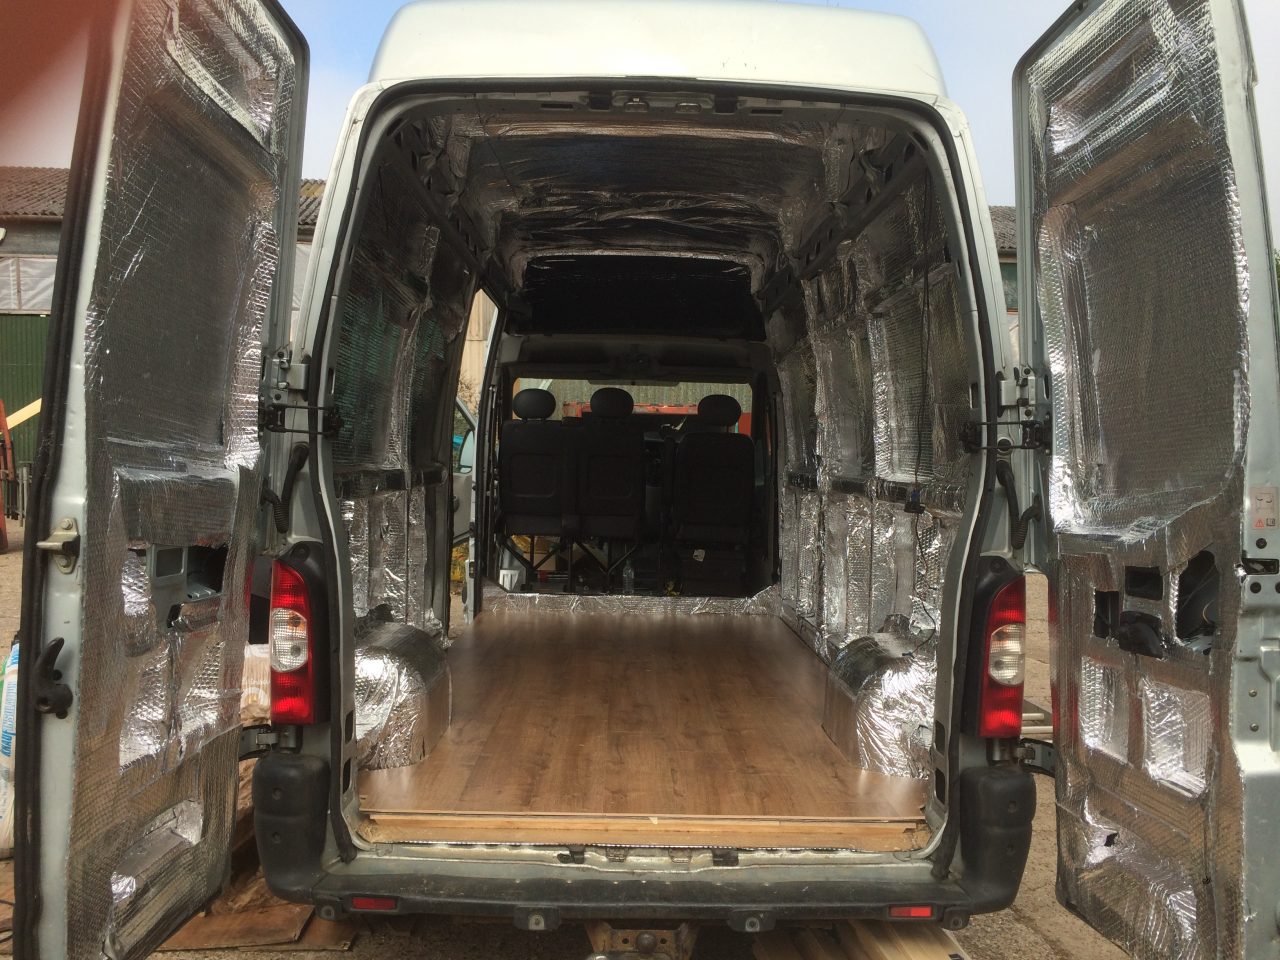
This was our first little achievement with the van, so we had a little lie down and indulged in the fruits of our labour. After all that work I considered leaving the van like this and would claim it was minimalism, but the impracticalities of sleeping on a wooden floor with my belongings in a backpack have been my life for much of the past six years, and I am looking forward to having somewhere to put a pillow.
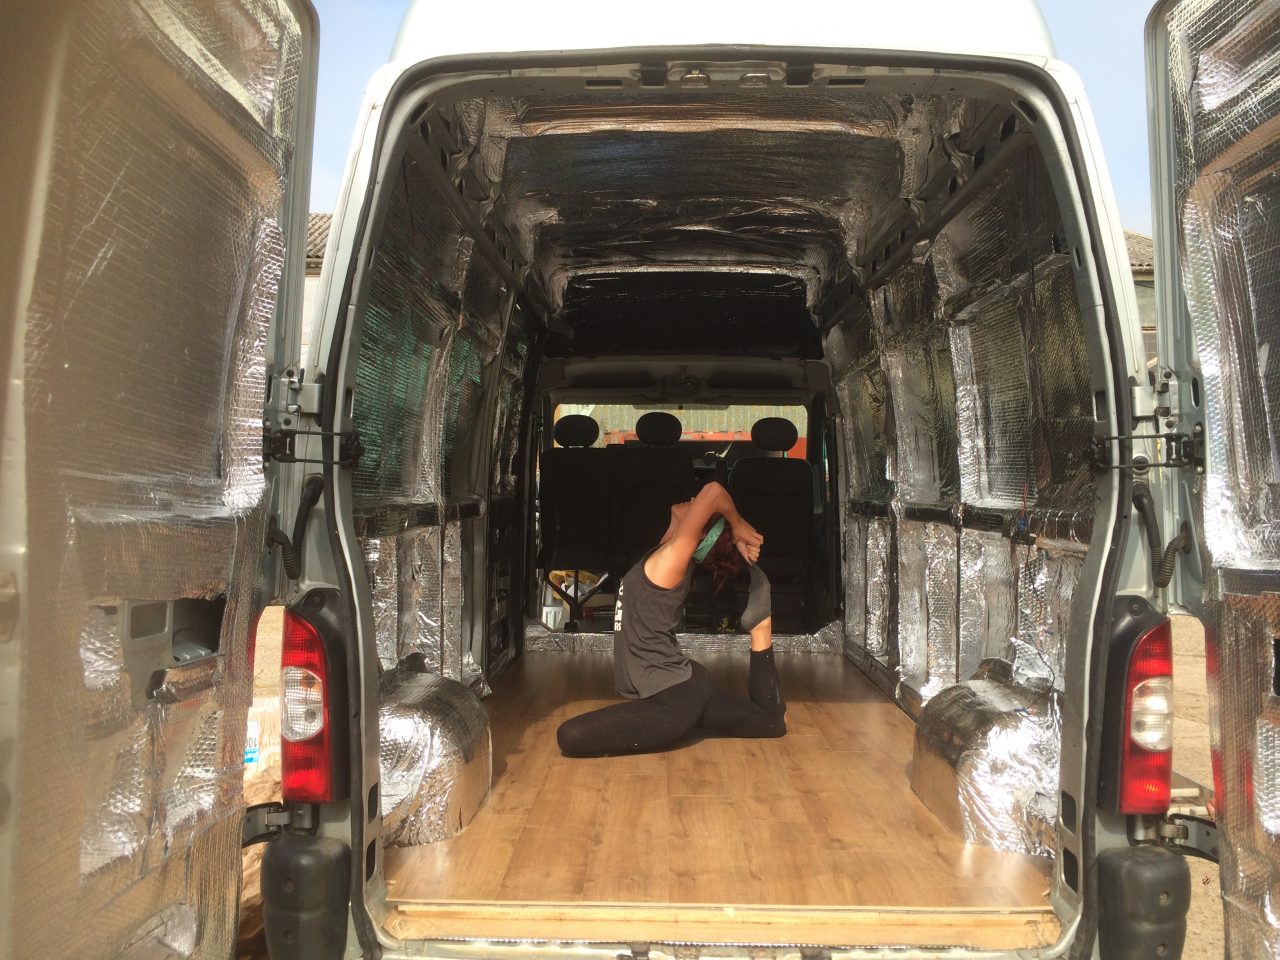
At this point Leah suggested we keep the floor empty and use it as a mobile yoga studio. I’m not very flexible so I said no.
The Van Conversion
The van conversion continues with walls and furniture. If you are interested in following along with this van conversion, I will be posting image updates on Facebook (Like GBSW) and Instagram (follow me), as well as video updates on Youtube (subscribe to my channel). If you are interested in converting your own van, I will also be posting extensive advice once the conversion is a bit more complete. Once again, subscribe to my social media channels above, or add your email to my mailing list (that I use about three times a year). Here is the main page for my van conversion: I call it The Donkey Van Conversion page because it is a page about converting a van named Donkey. Imaginative, eh?
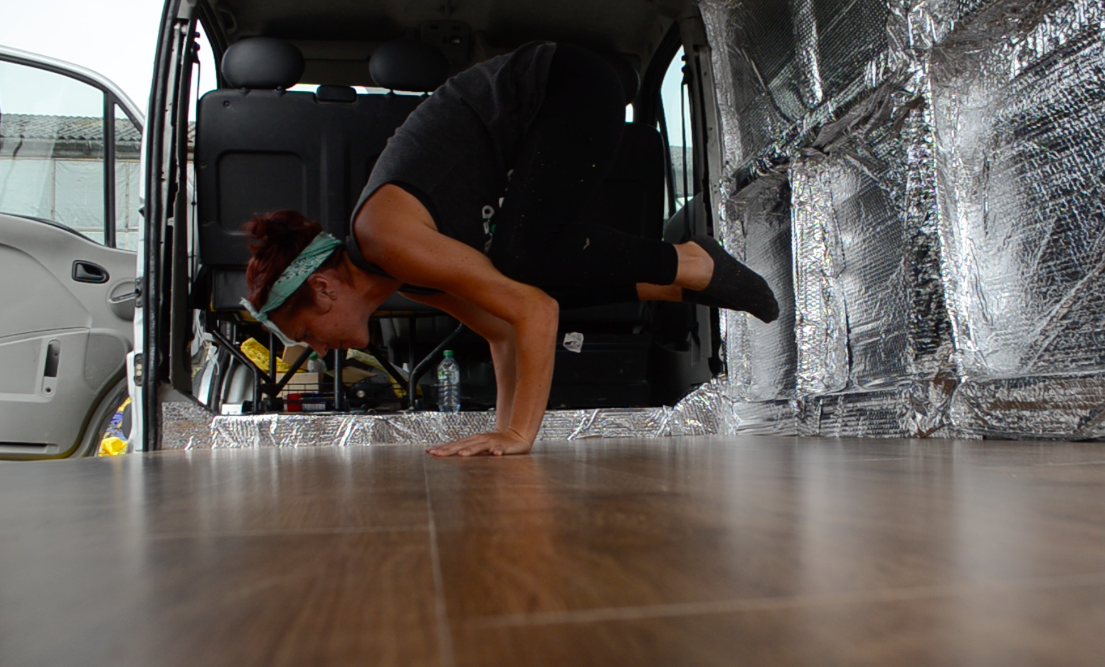
If you’re wondering who that girl is, her name is Leah. She runs a pretty cool site called The Vegetarian Traveller and I found her four years ago when I was hitchhiking in Poland. I even wrote a book about it.


Leave A Comment