
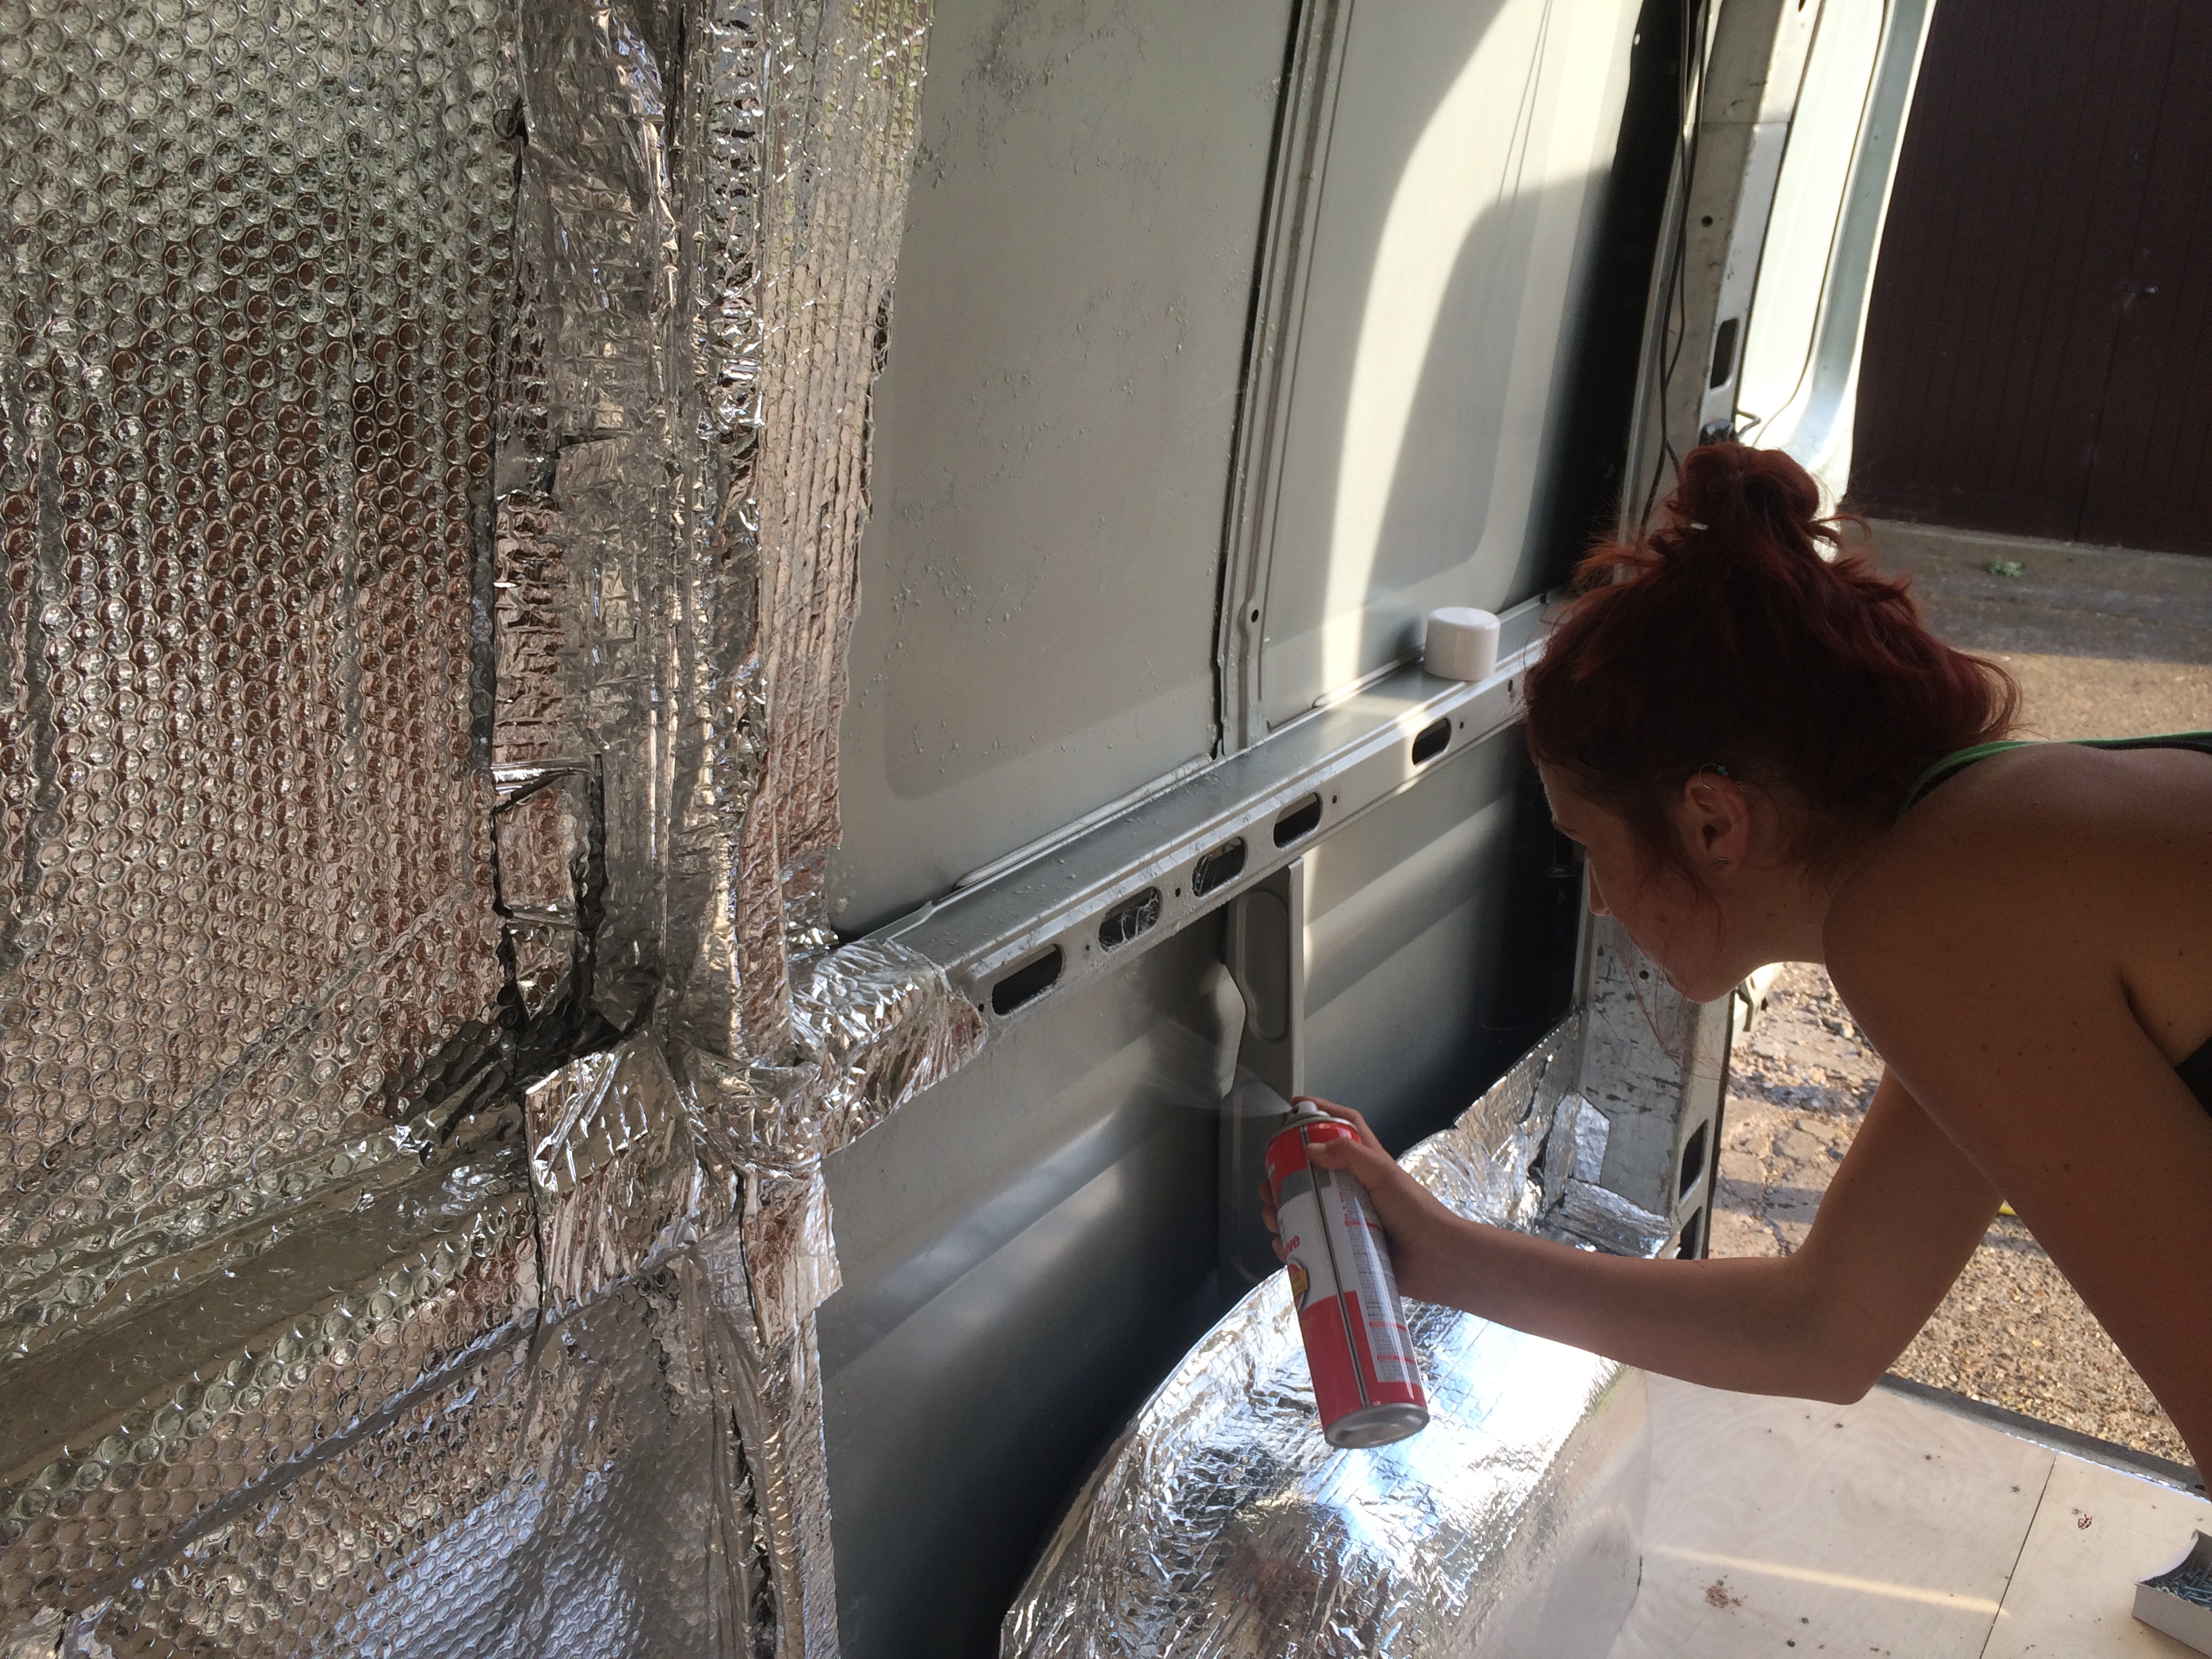
The electrics were something I was really not looking forward to when I started this van conversion. I put them off and put them off, waiting until as late as possible before working on them. I wish I had planned them out earlier by just deciding where everything would go, but that didn’t happen. Everything is clearer in hindsight. We begun by adding foil insulation to the walls of the Donkey with spray adhesive. The adhesive gets everywhere and I hate it, and I’m not sure if the bubble wrap does much, but as I had spent money on both things, so I decided to use them.
We then cut ply board into strips that we would use as ribs all the way around the van. These strips didn’t need to be straight, but I thought it was pretty funny when I gave Leah a jigsaw and asked her to cut them straight, and she came back with these…. (she didn’t think this was funny)
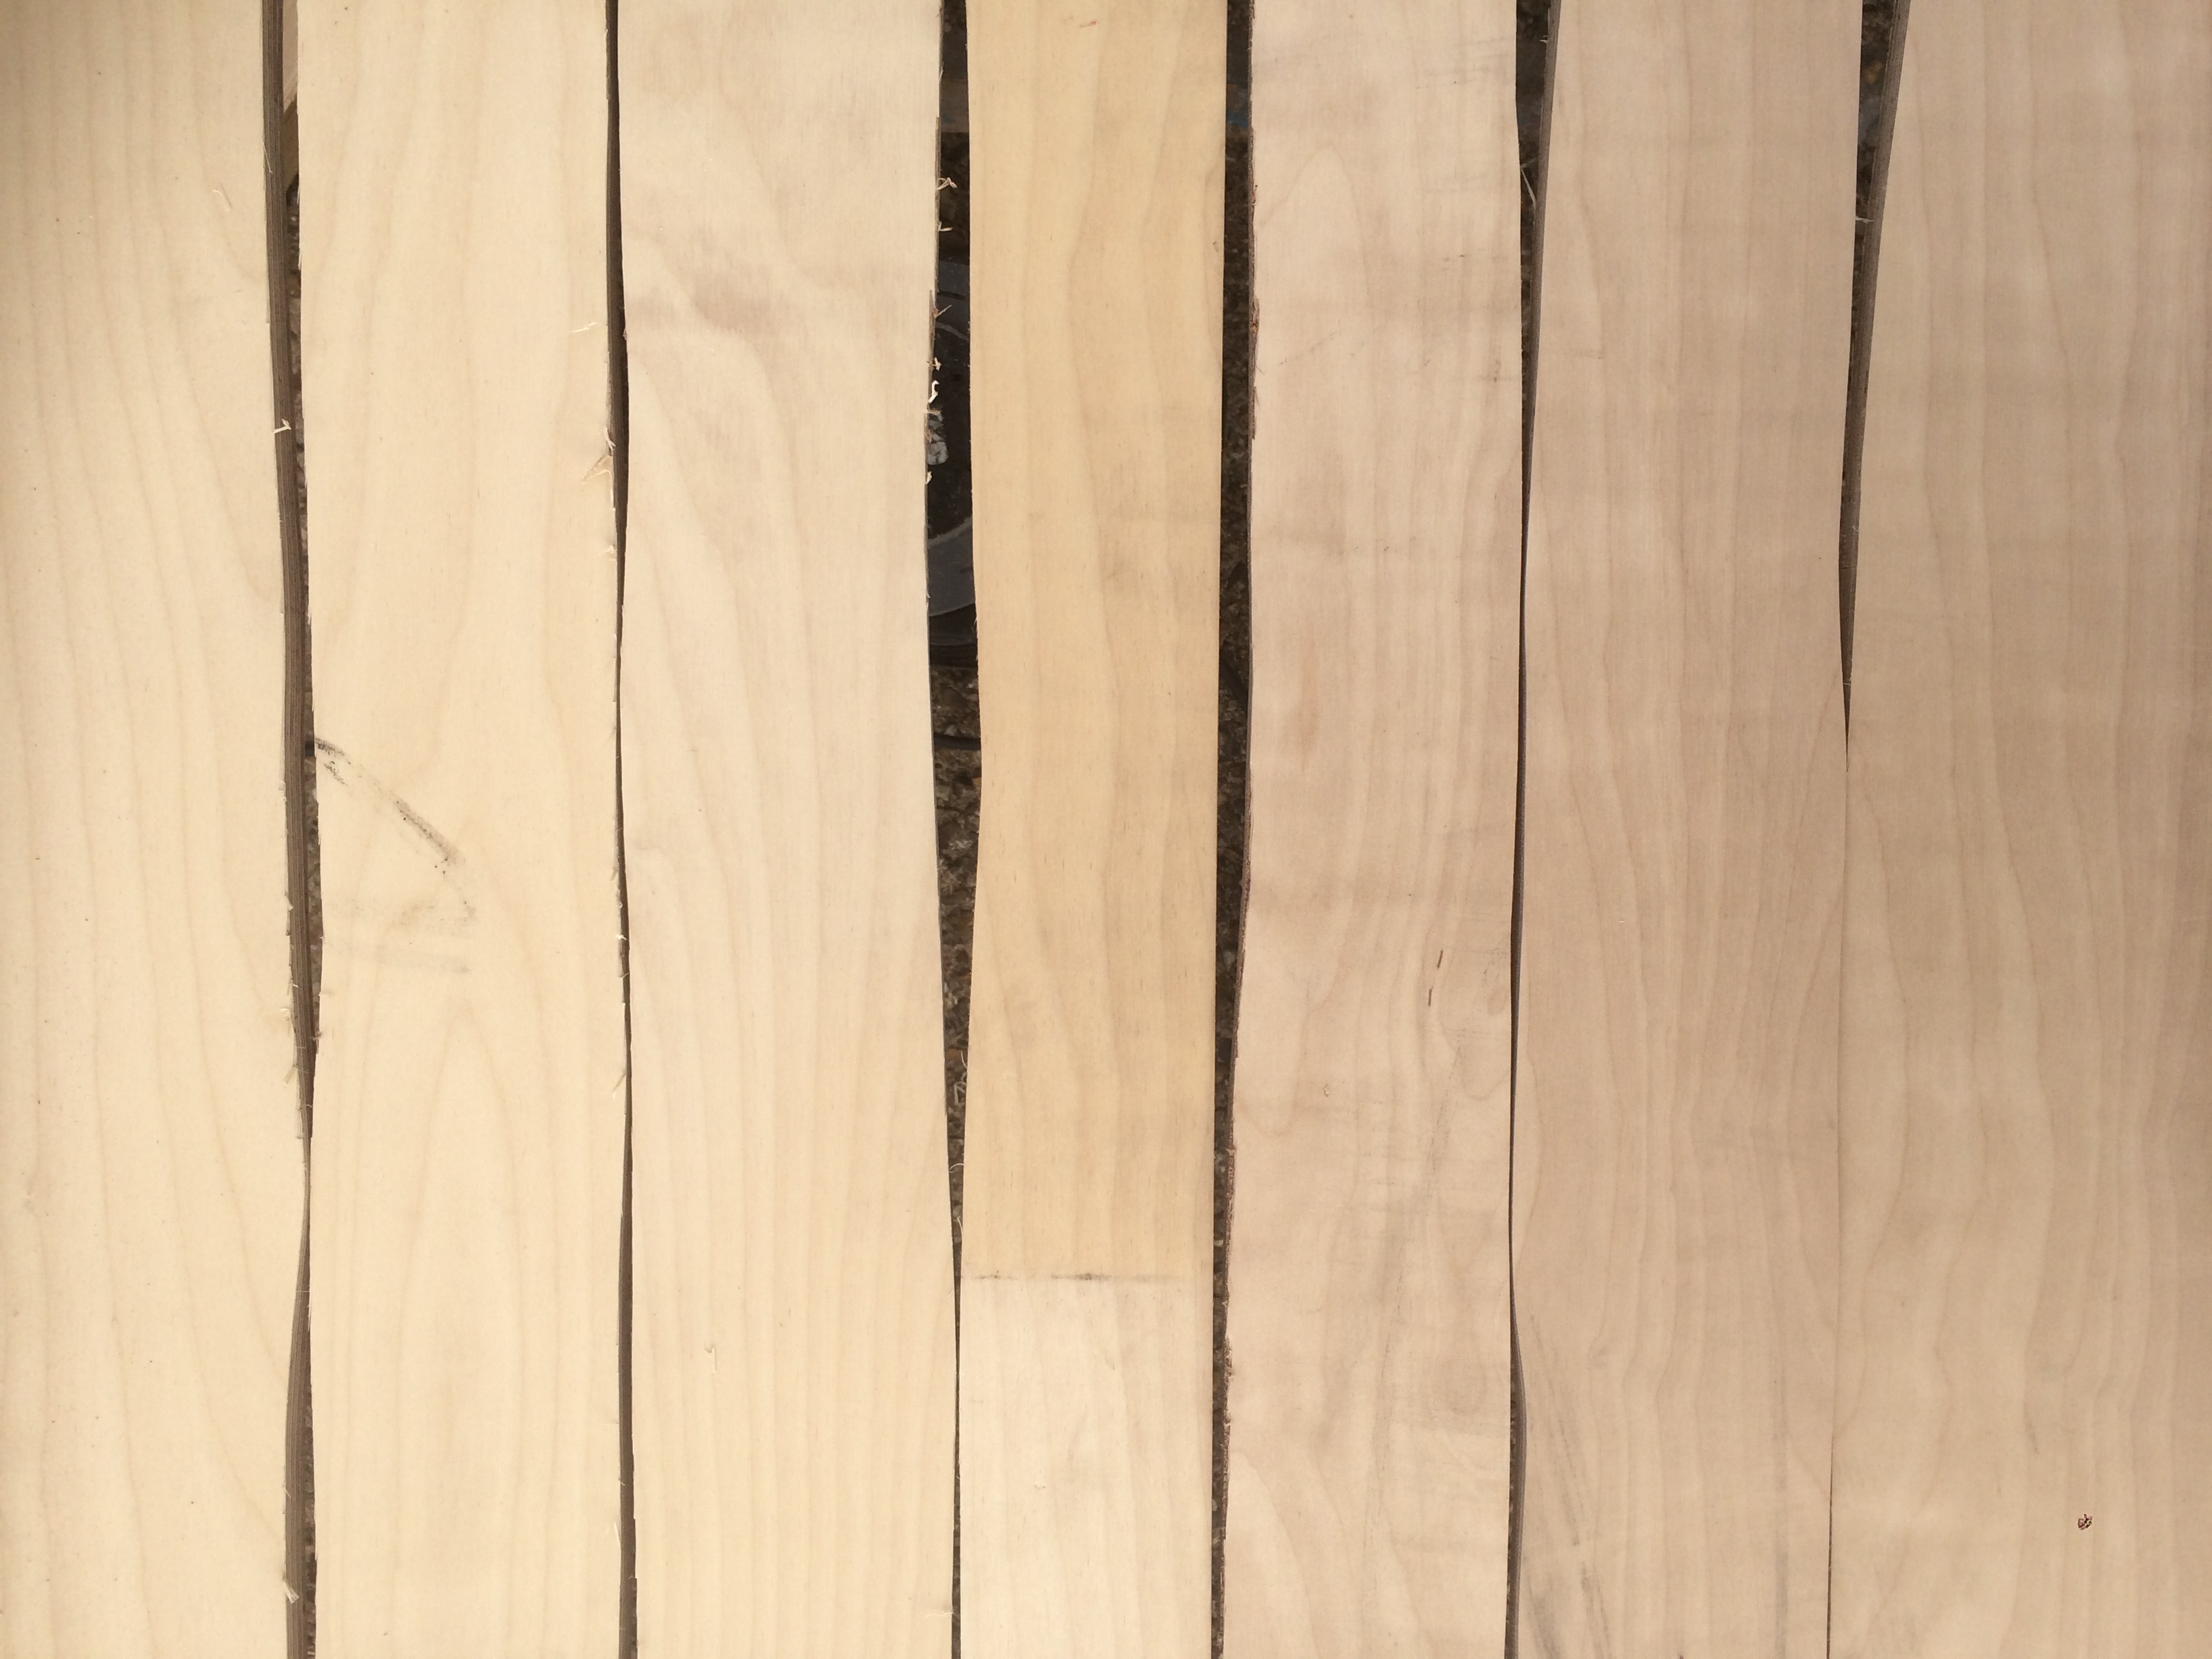
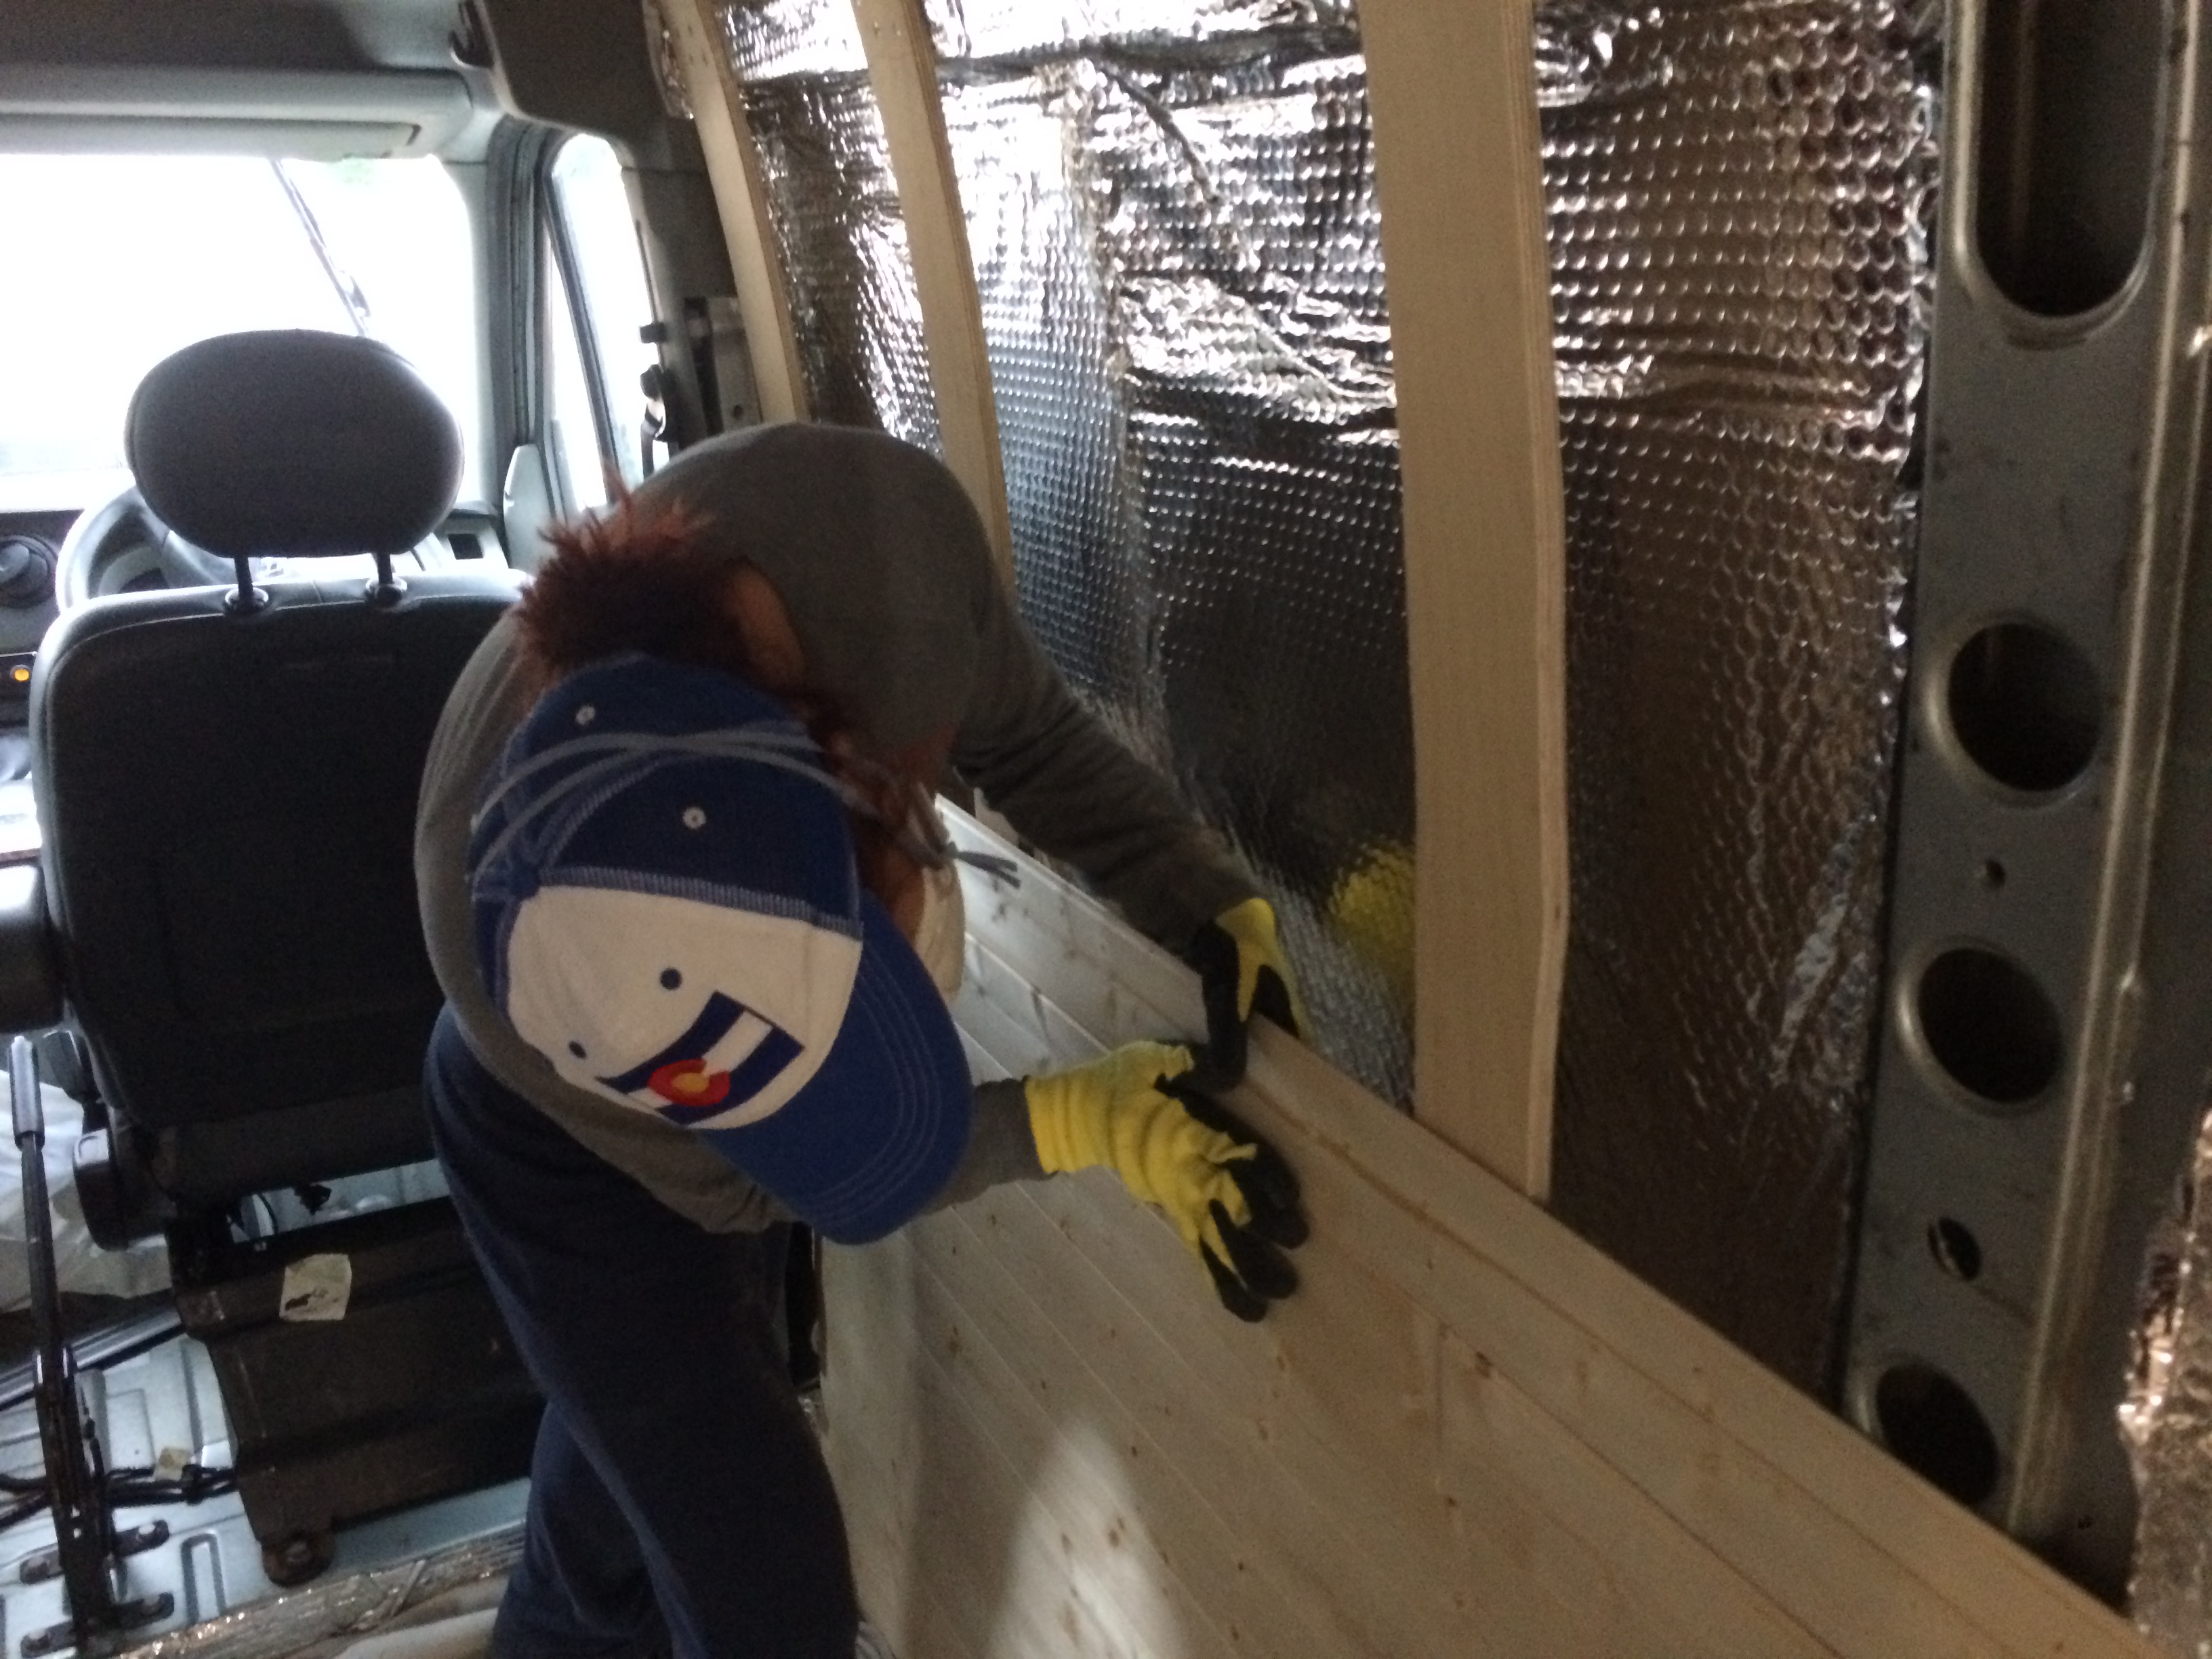
I ran the rest of them through the band saw which took a fraction of the time and ensured that they were straight and even. We piloted these strips and then screwed them into the metal of the van wall. We were careful to ensure that we fixed them to the van at points where the screws wouldn’t go all the way through the van, spacing them about 50cm apart. We then built up cladding from the floor, using a compression nail gun to staple the cladding to the ribs of the van that we had made.
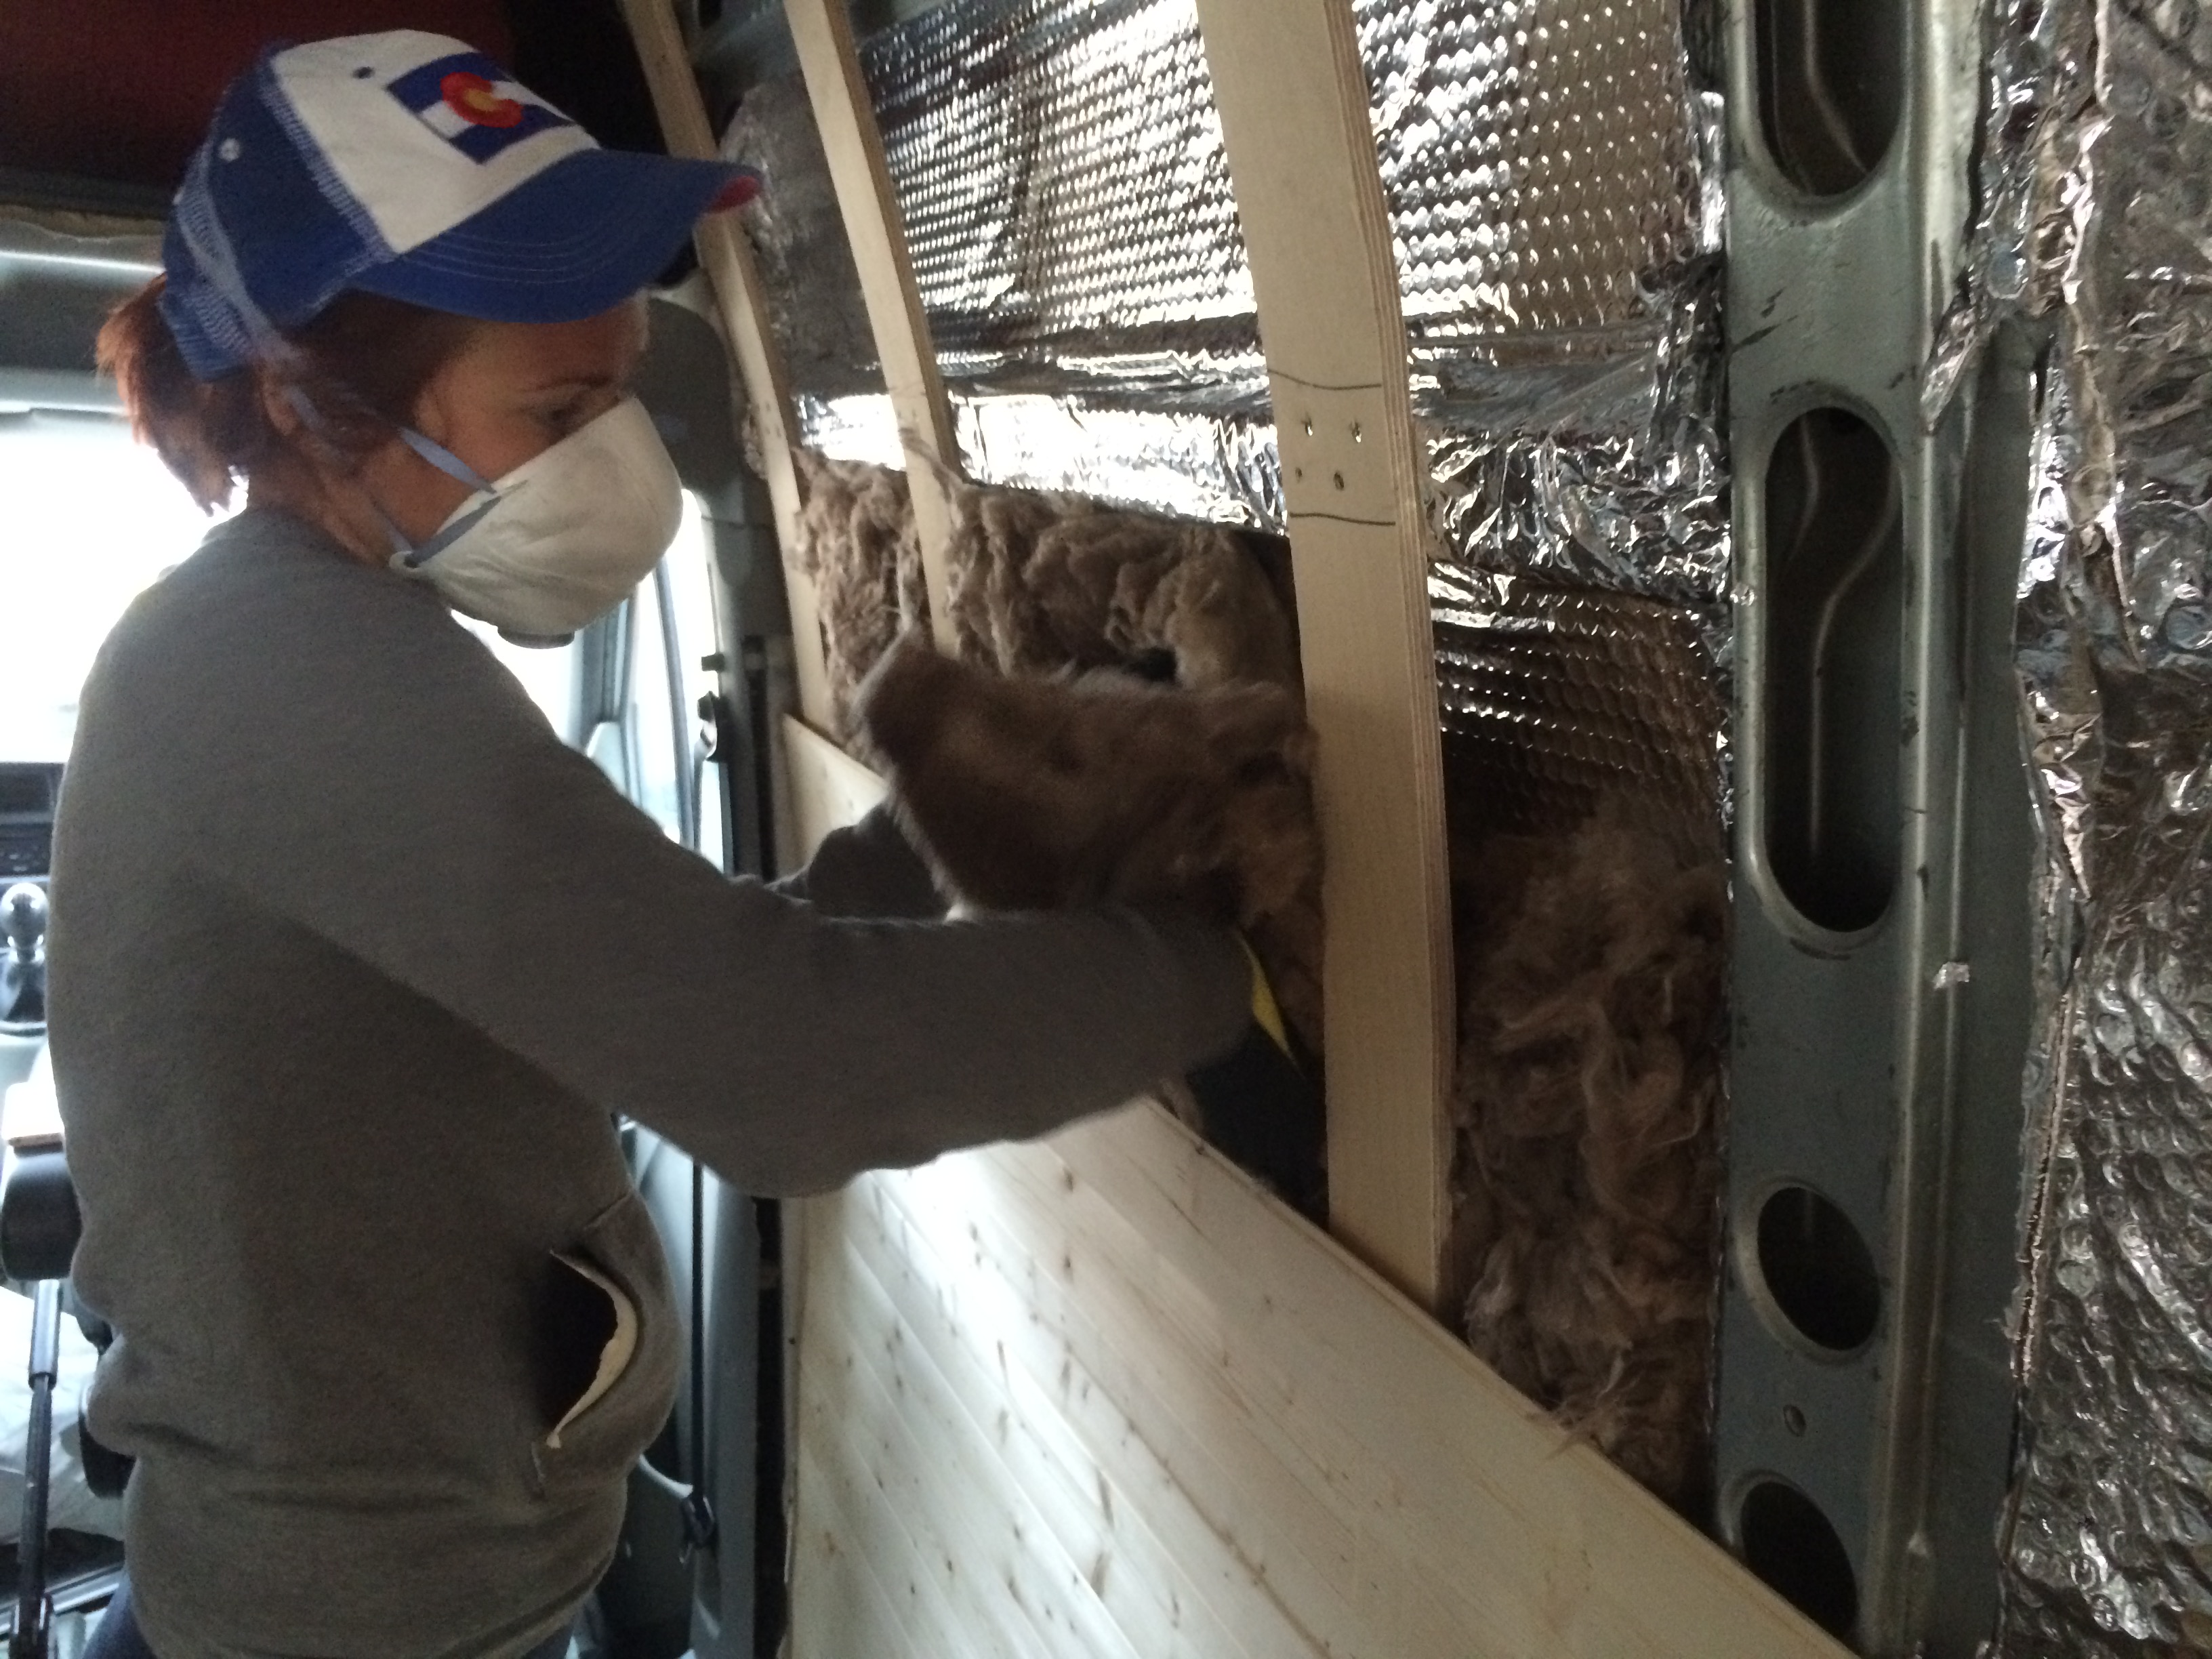
One key thing we wanted with this van was for it to be liveable and part of that meant ensuring it would be warm. After lots of research, I bought something called earthwool. I’m not sure how great it is (or isn’t), but it was reasonably priced and made from recycled materials which was enough for us to decide that this would insulate our van. There is debate about whether or not these fibres are bad for you, but we thought it best to wear masks to be safe.
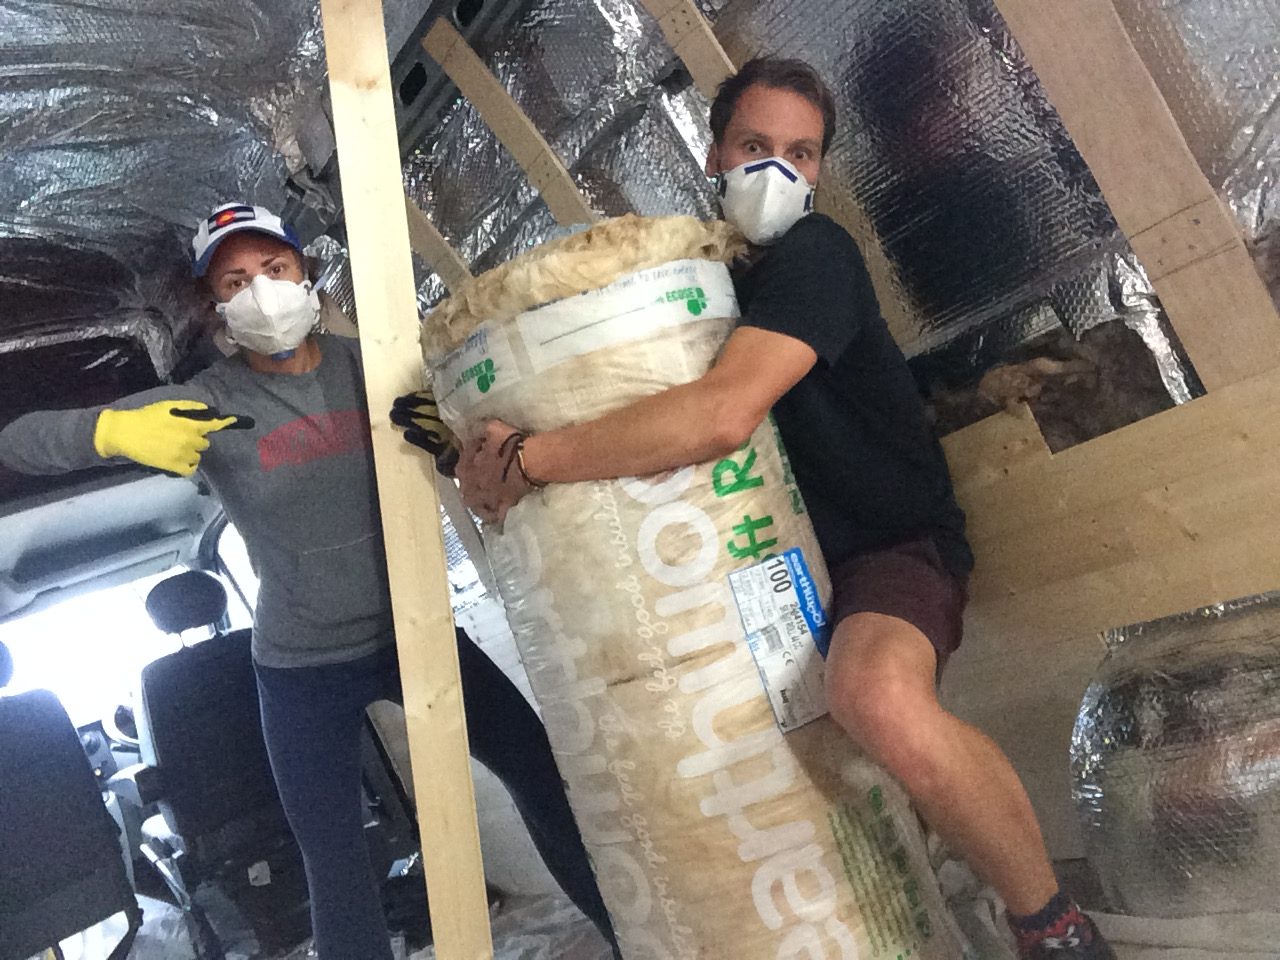
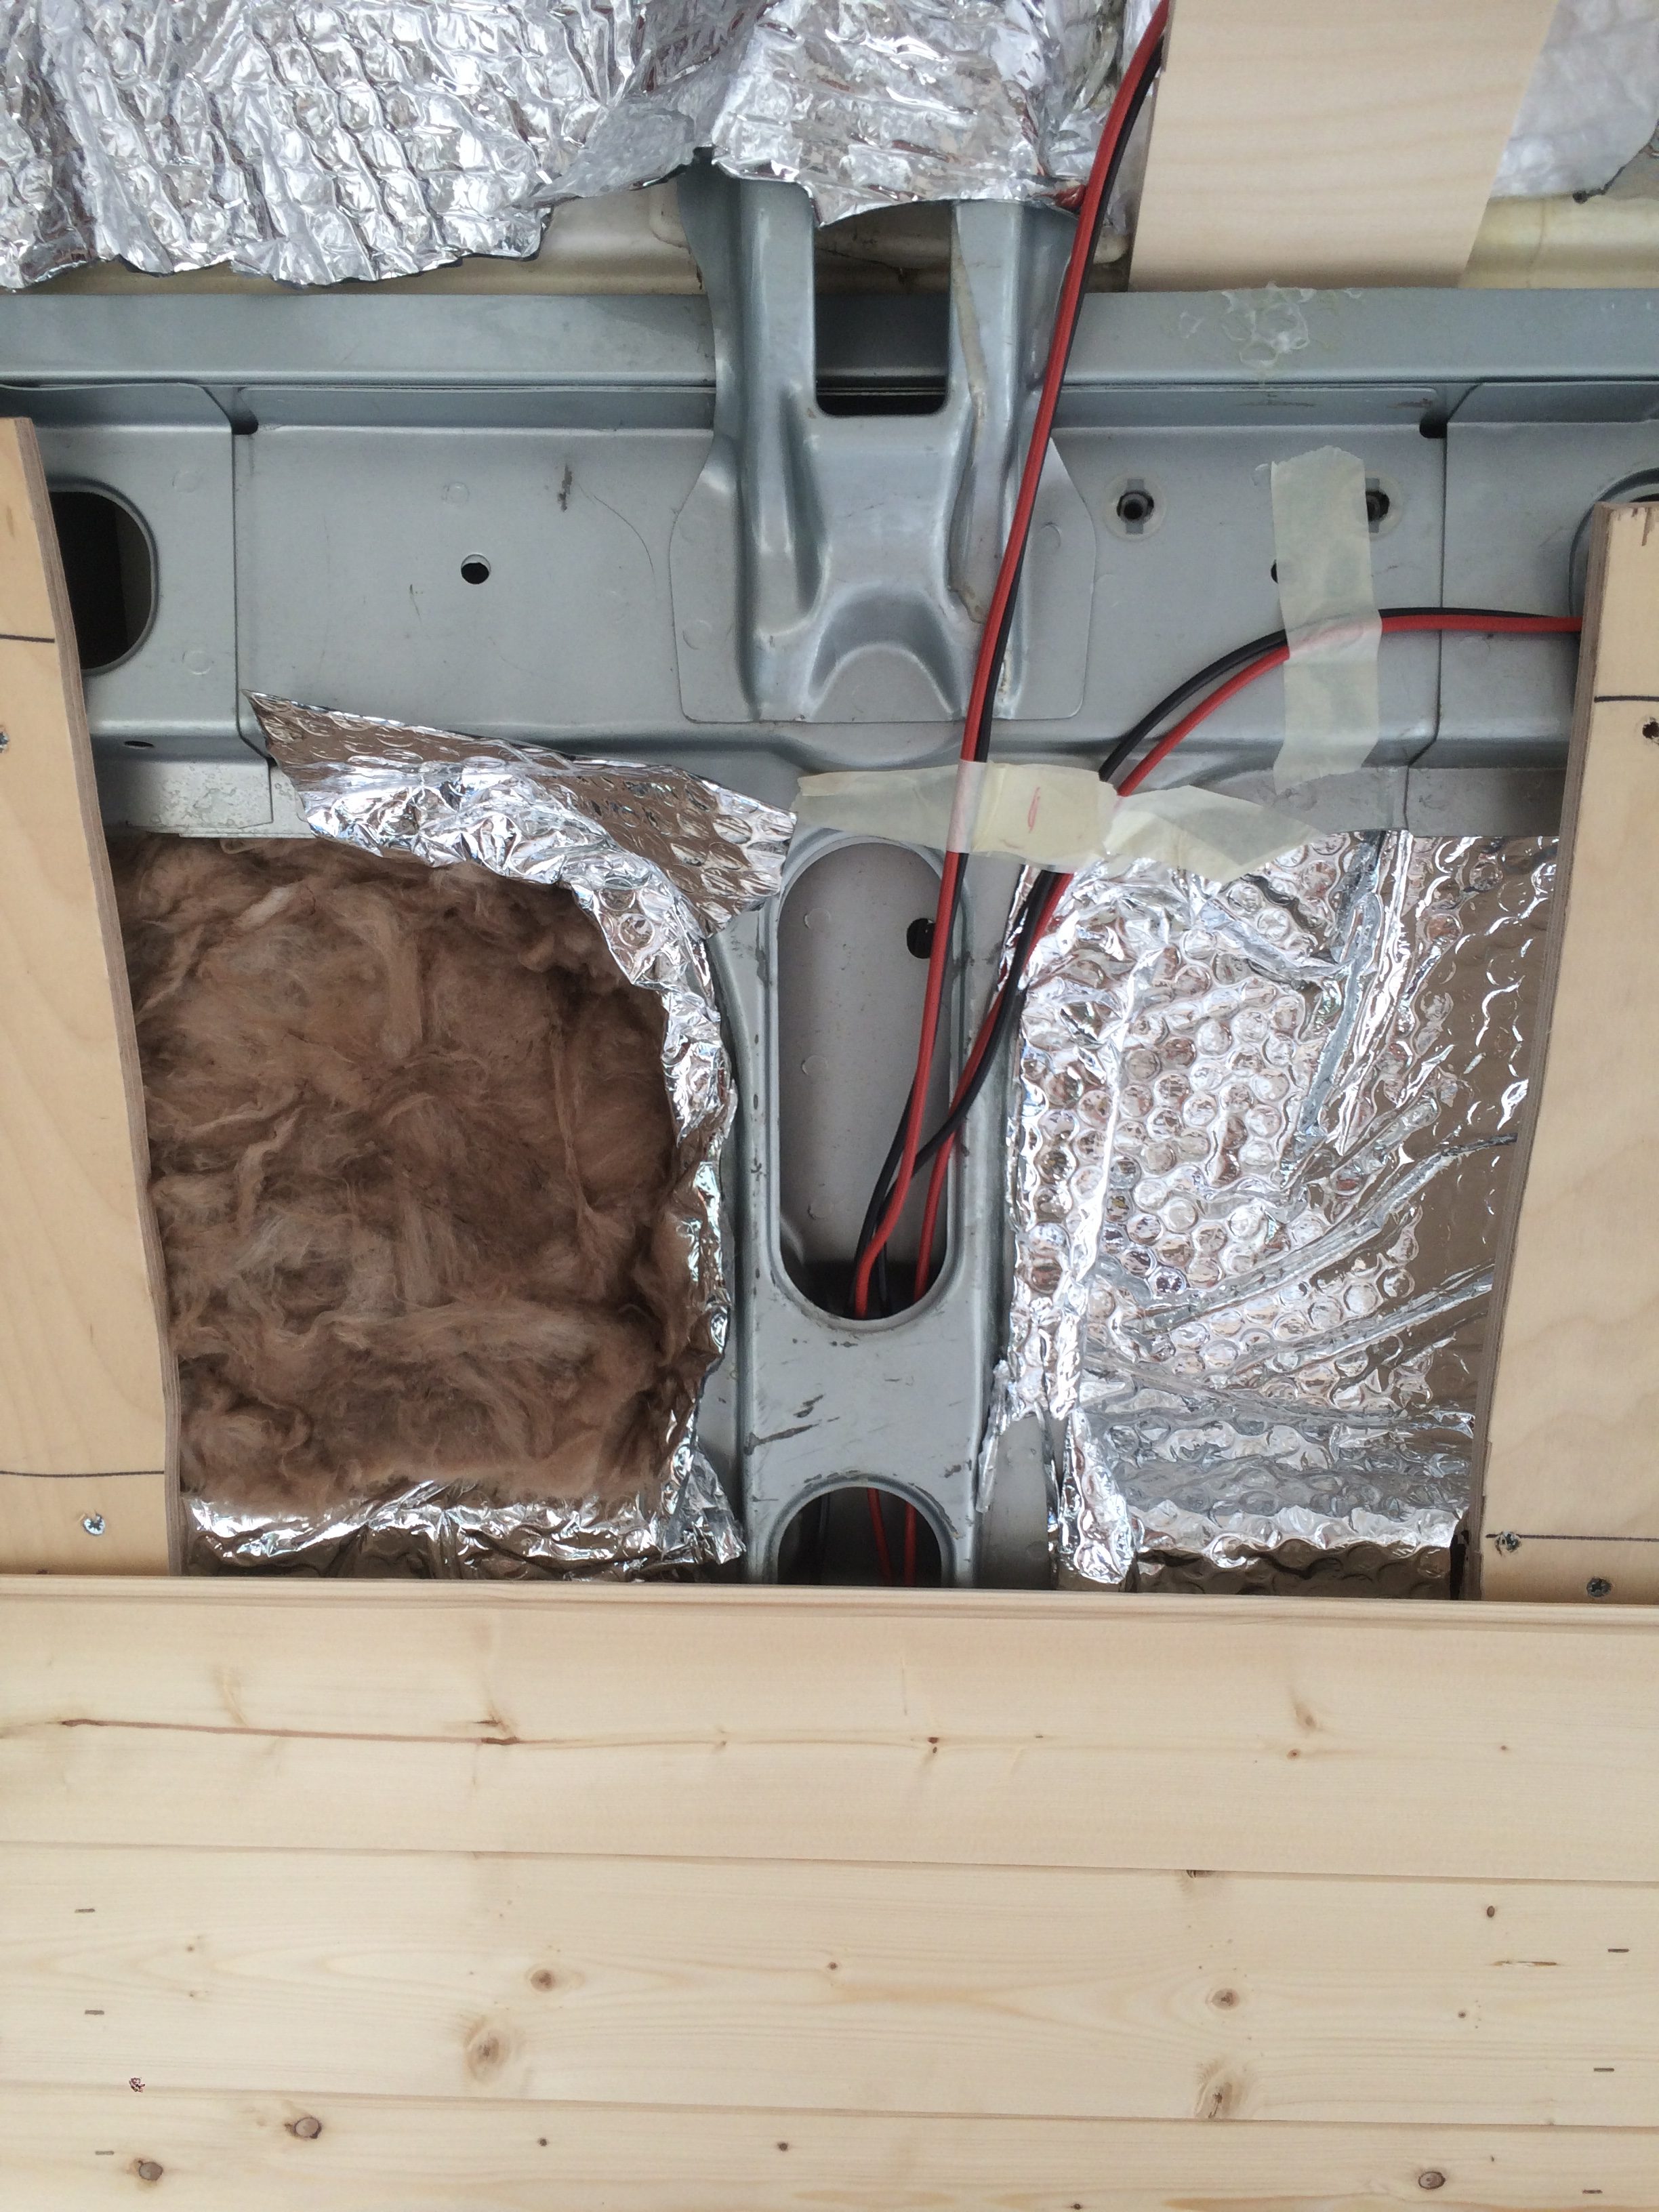
Every so often, we would stuff sheets of the recycled glass wool down the back of the cladding as we built it up. The thickness of the wool was slightly more than the cavity, so the wool is naturally held in place by the cladding and van wall.
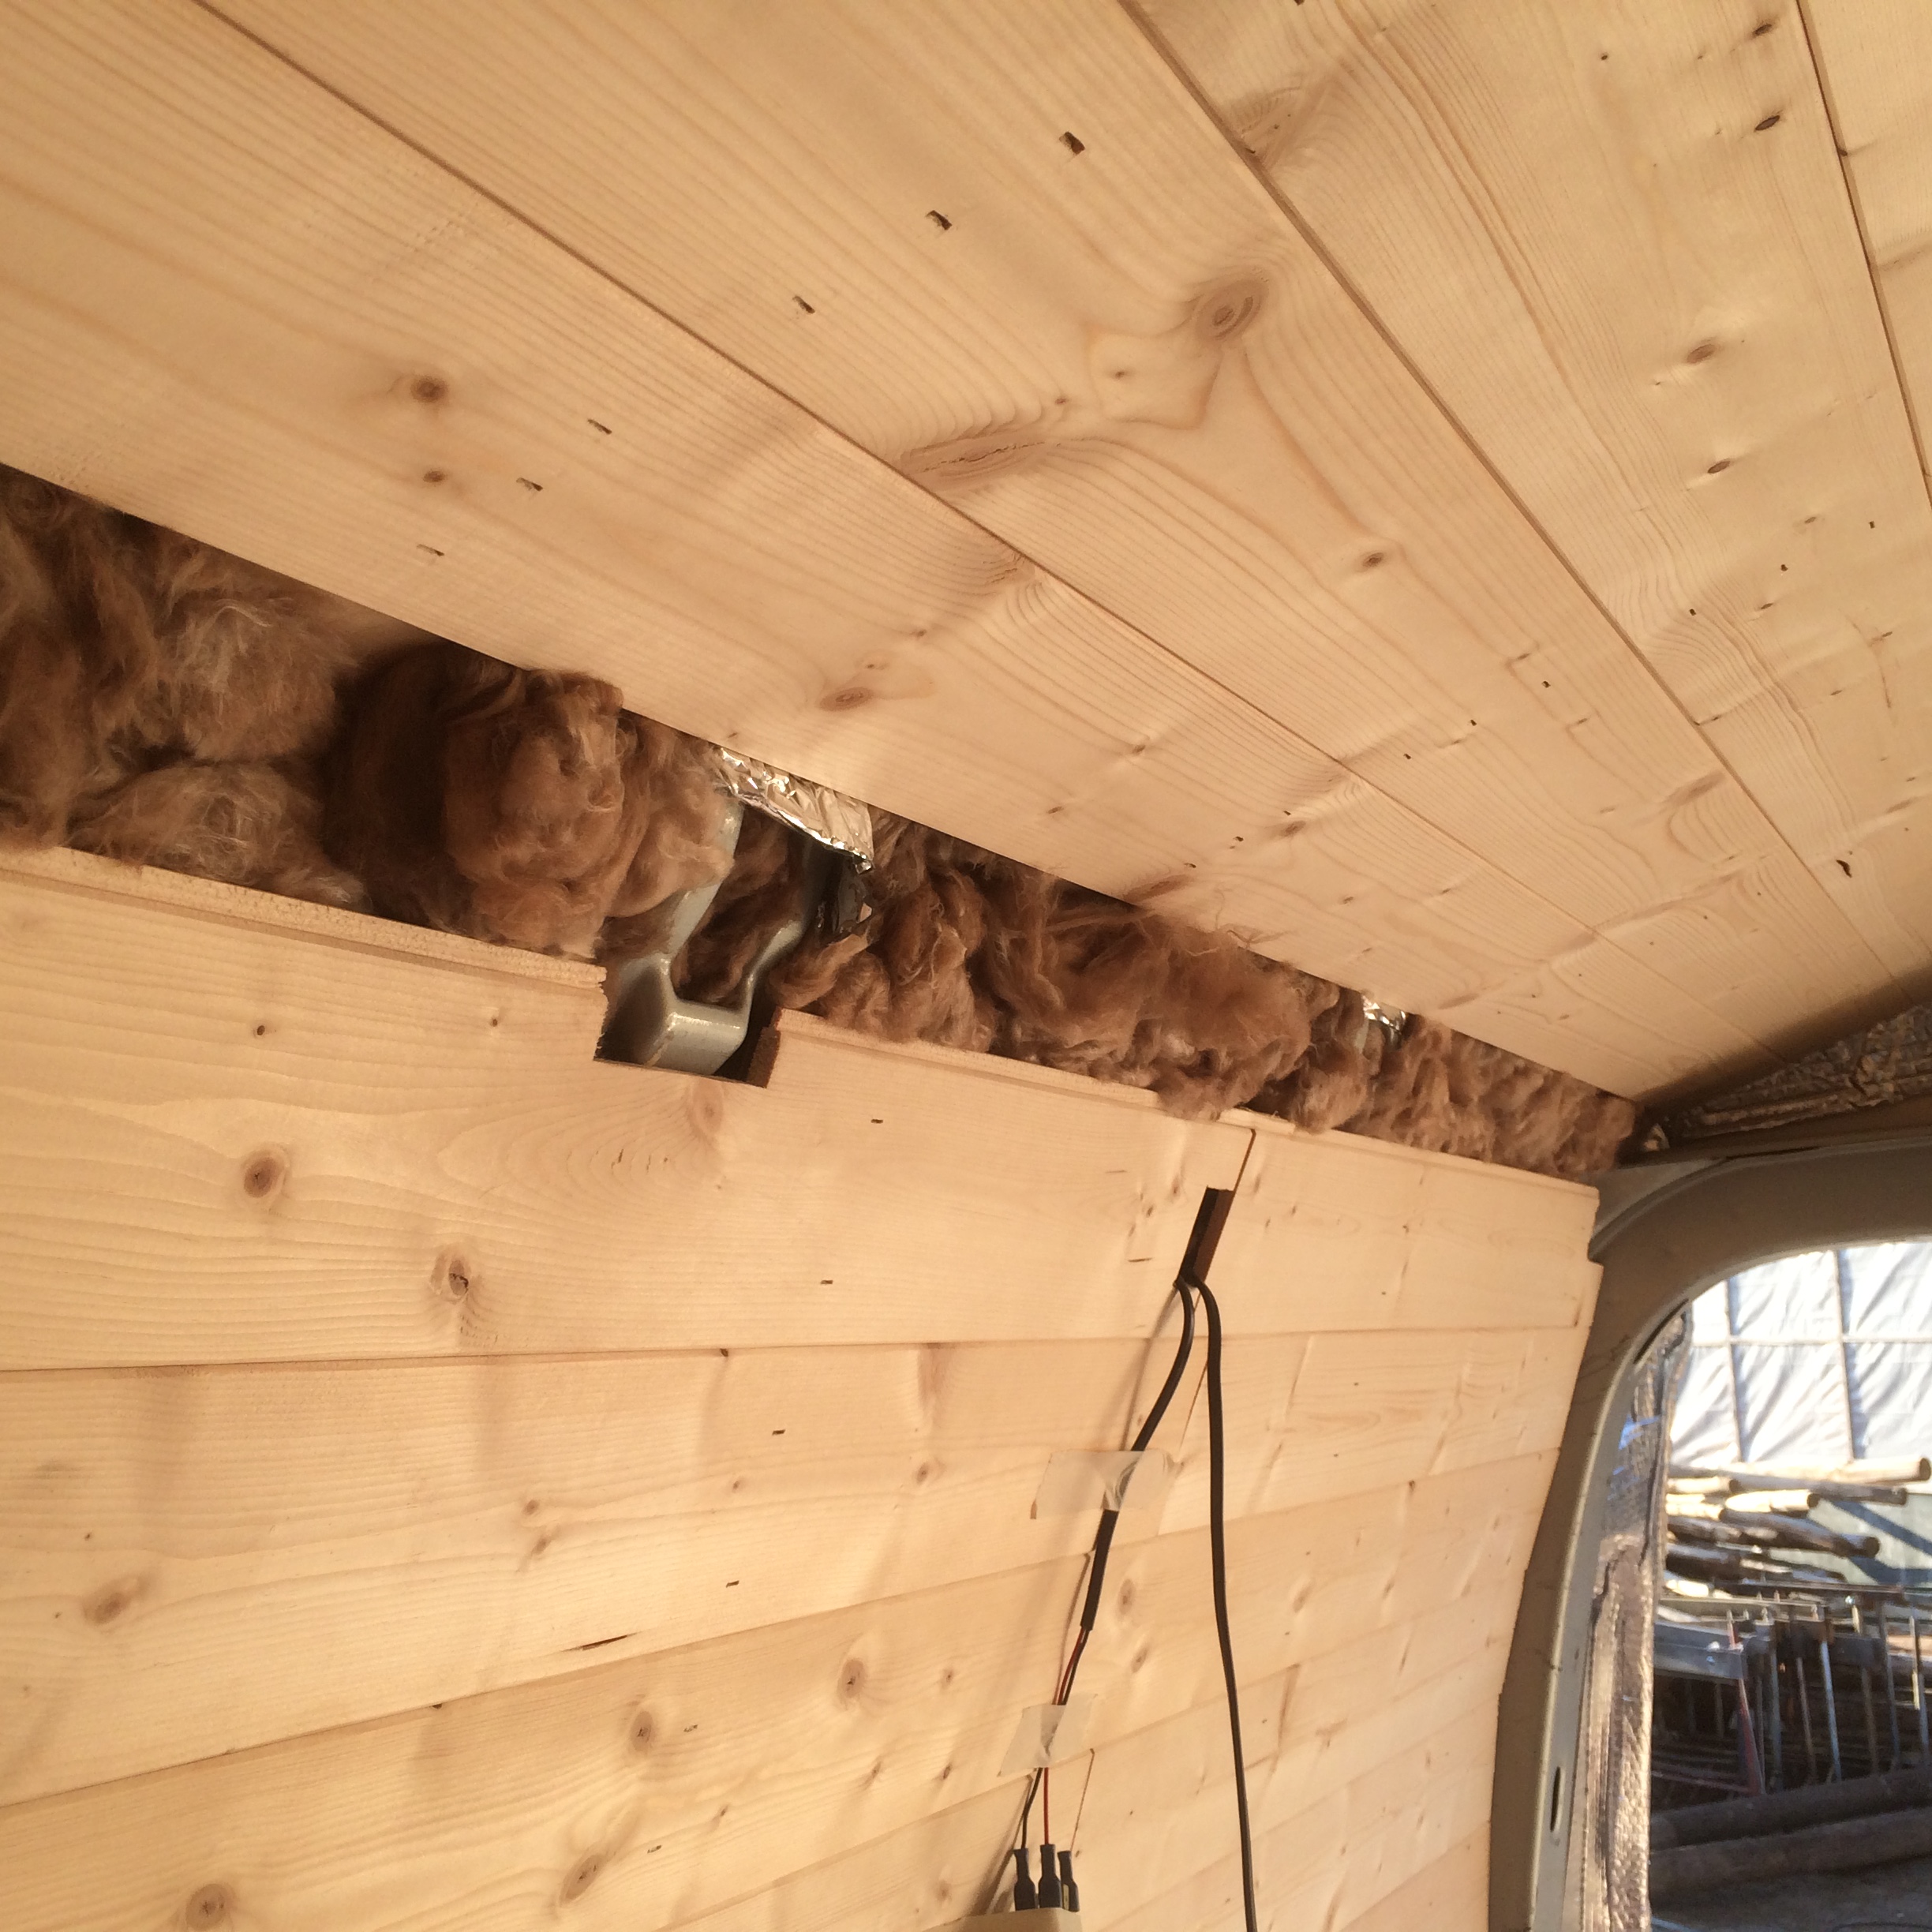
When we got to the halfway point with the wall, we had to fit all our wires for our lights, extractor fan, water pump, and anything else that we might need. With the help of my step-dad – I mostly watched as electrics are beyond me – we hooked the main battery up to a leisure battery and created an electrics board using an old basketball backboard that I found.
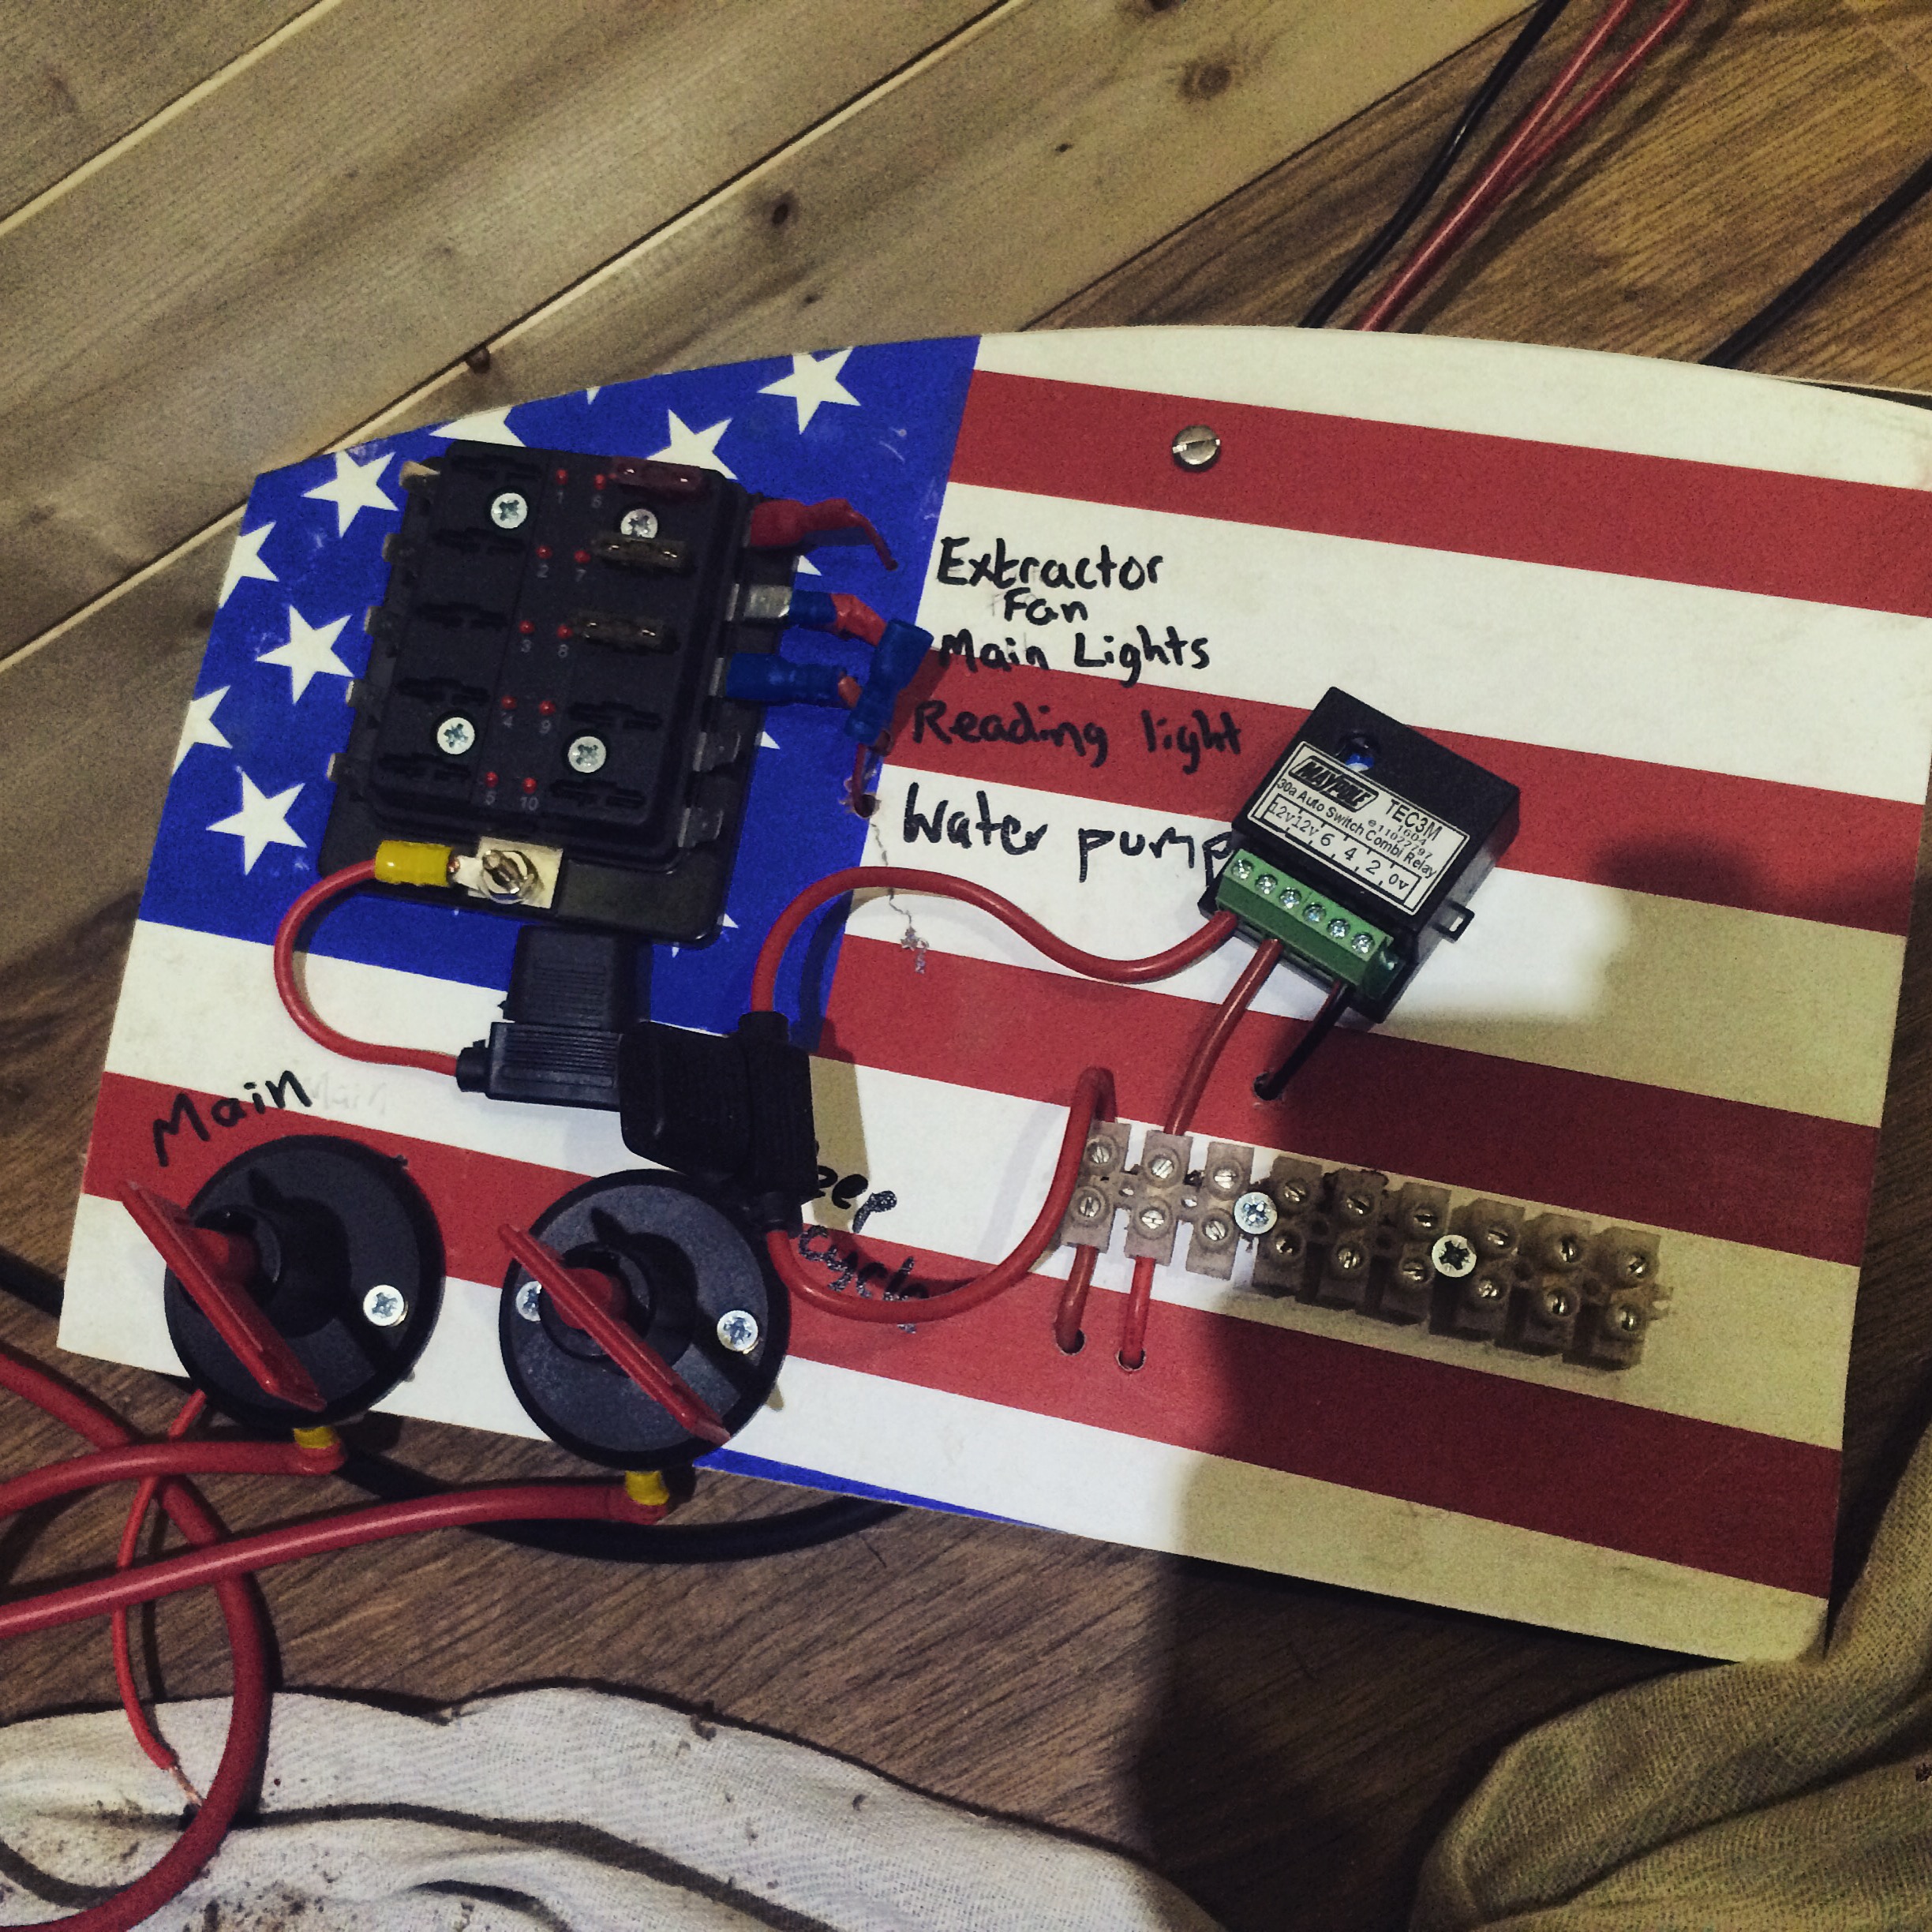
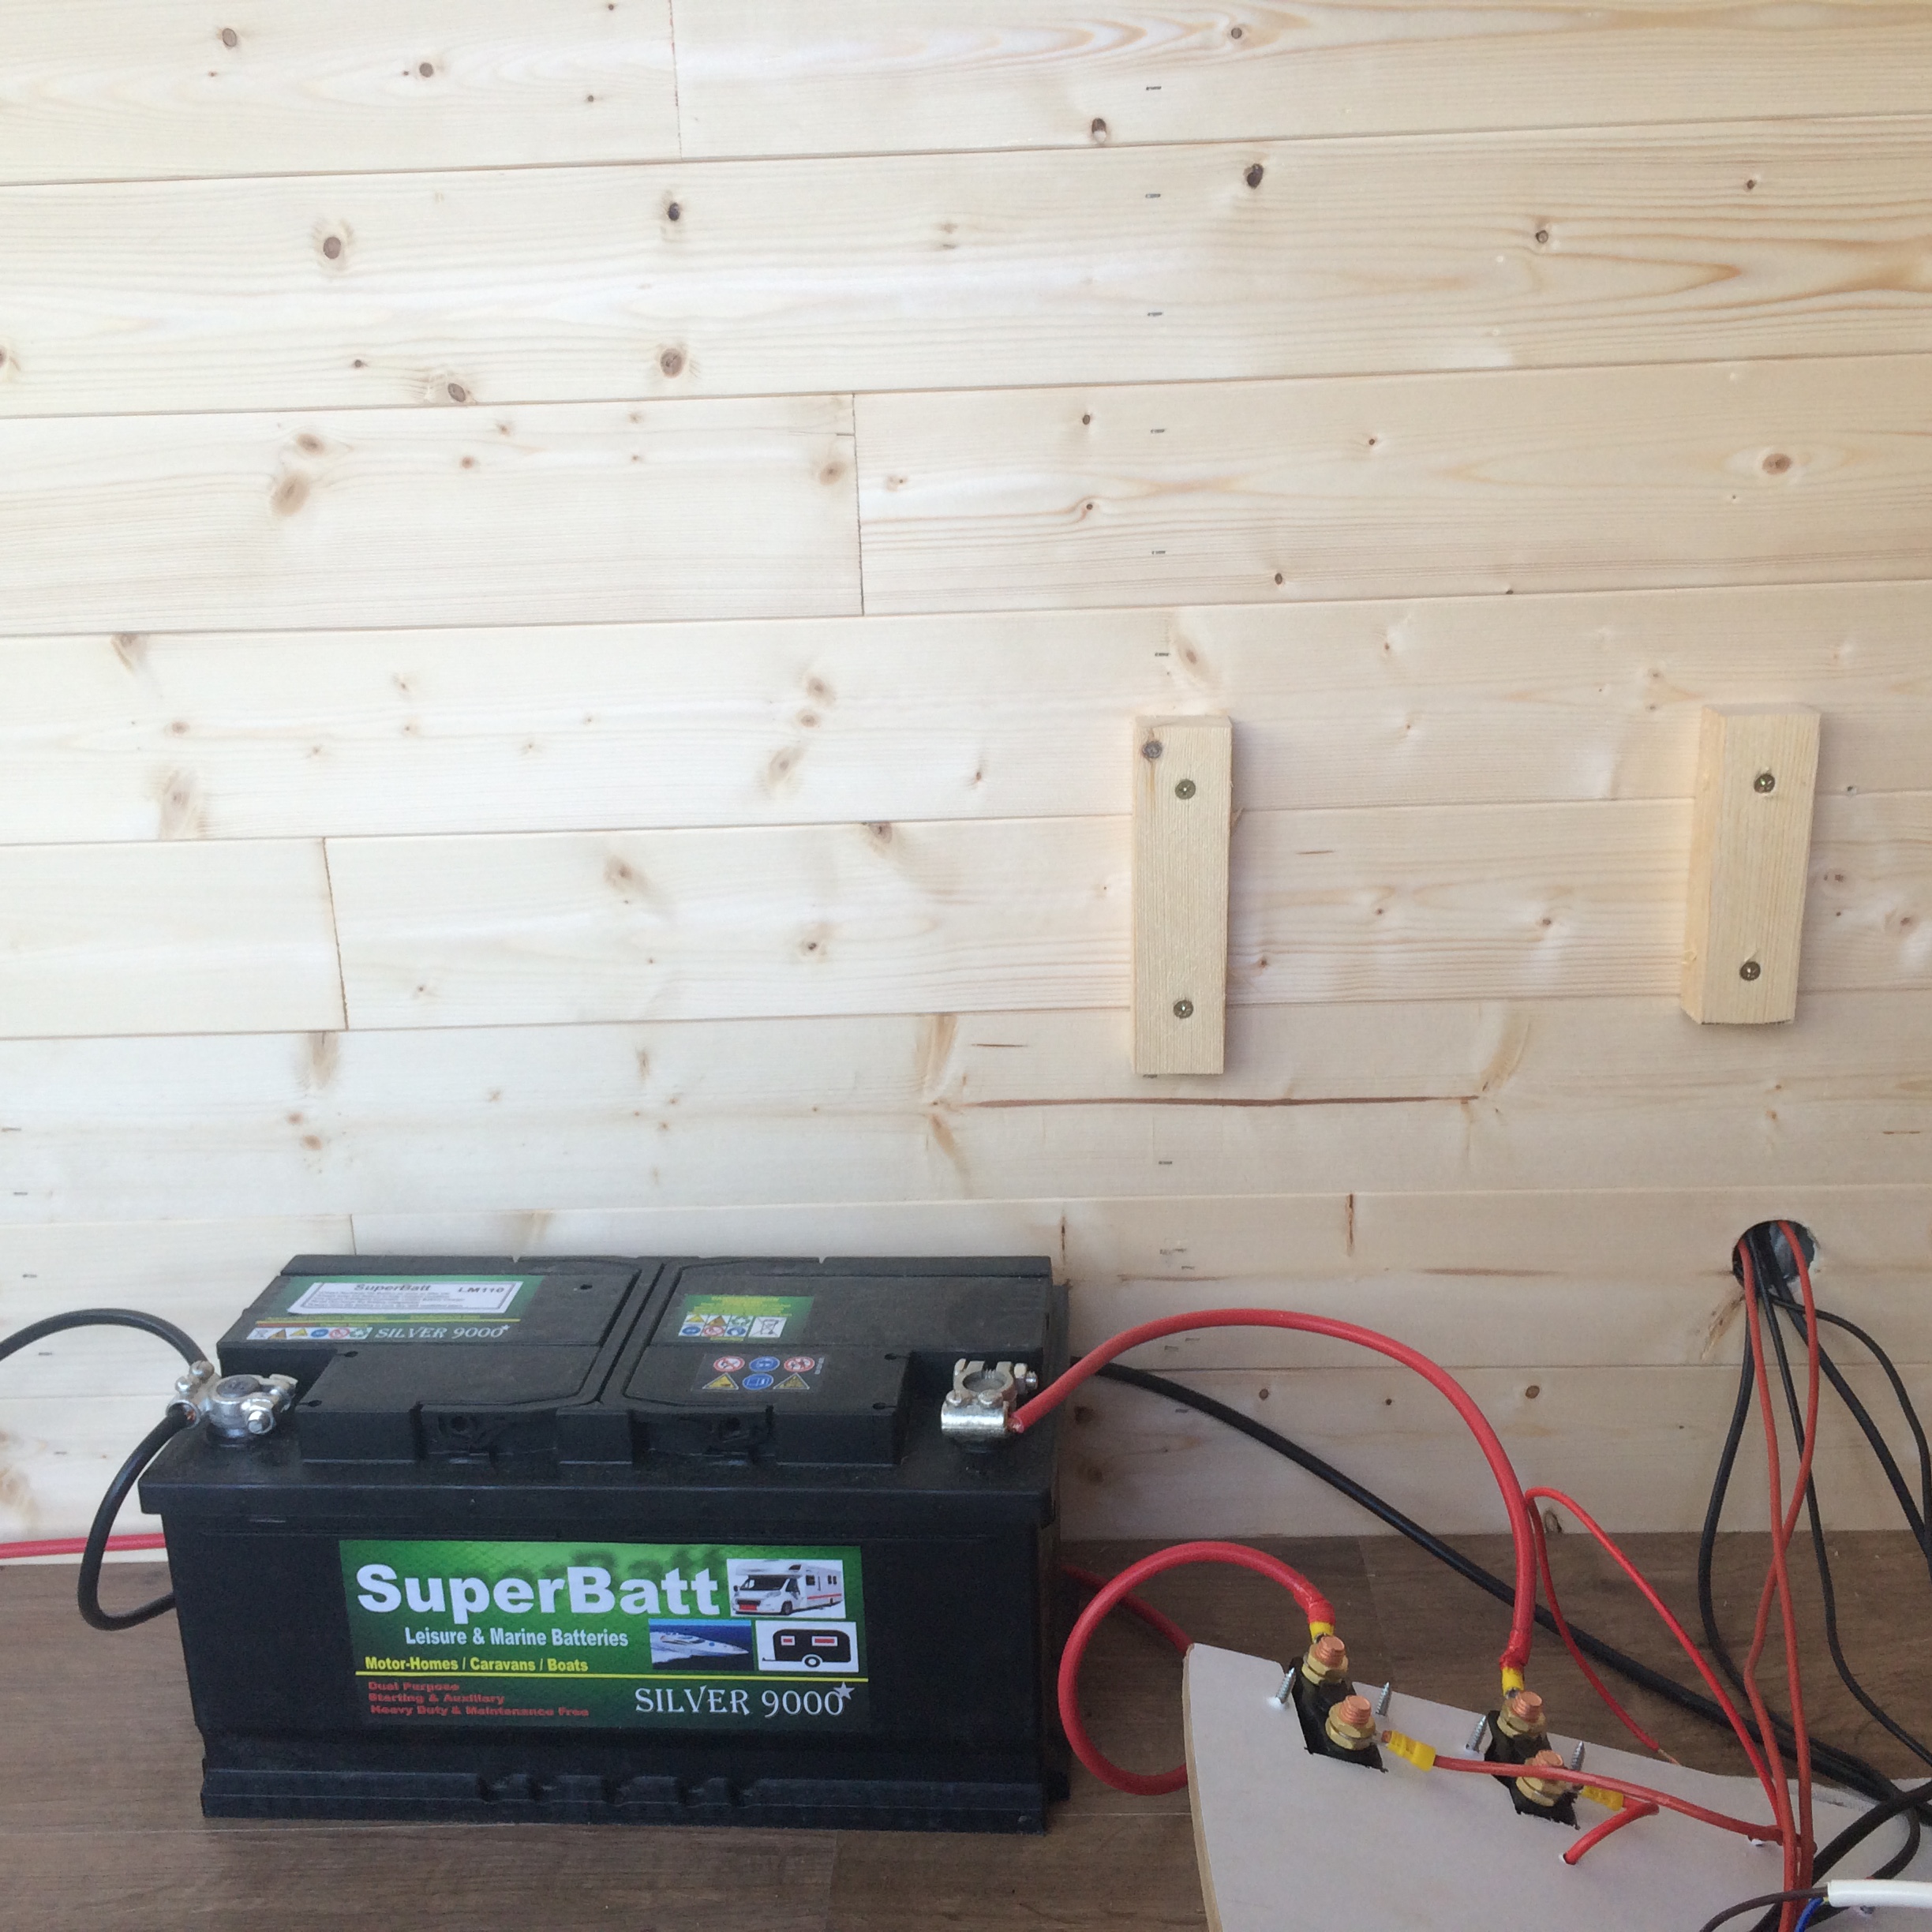
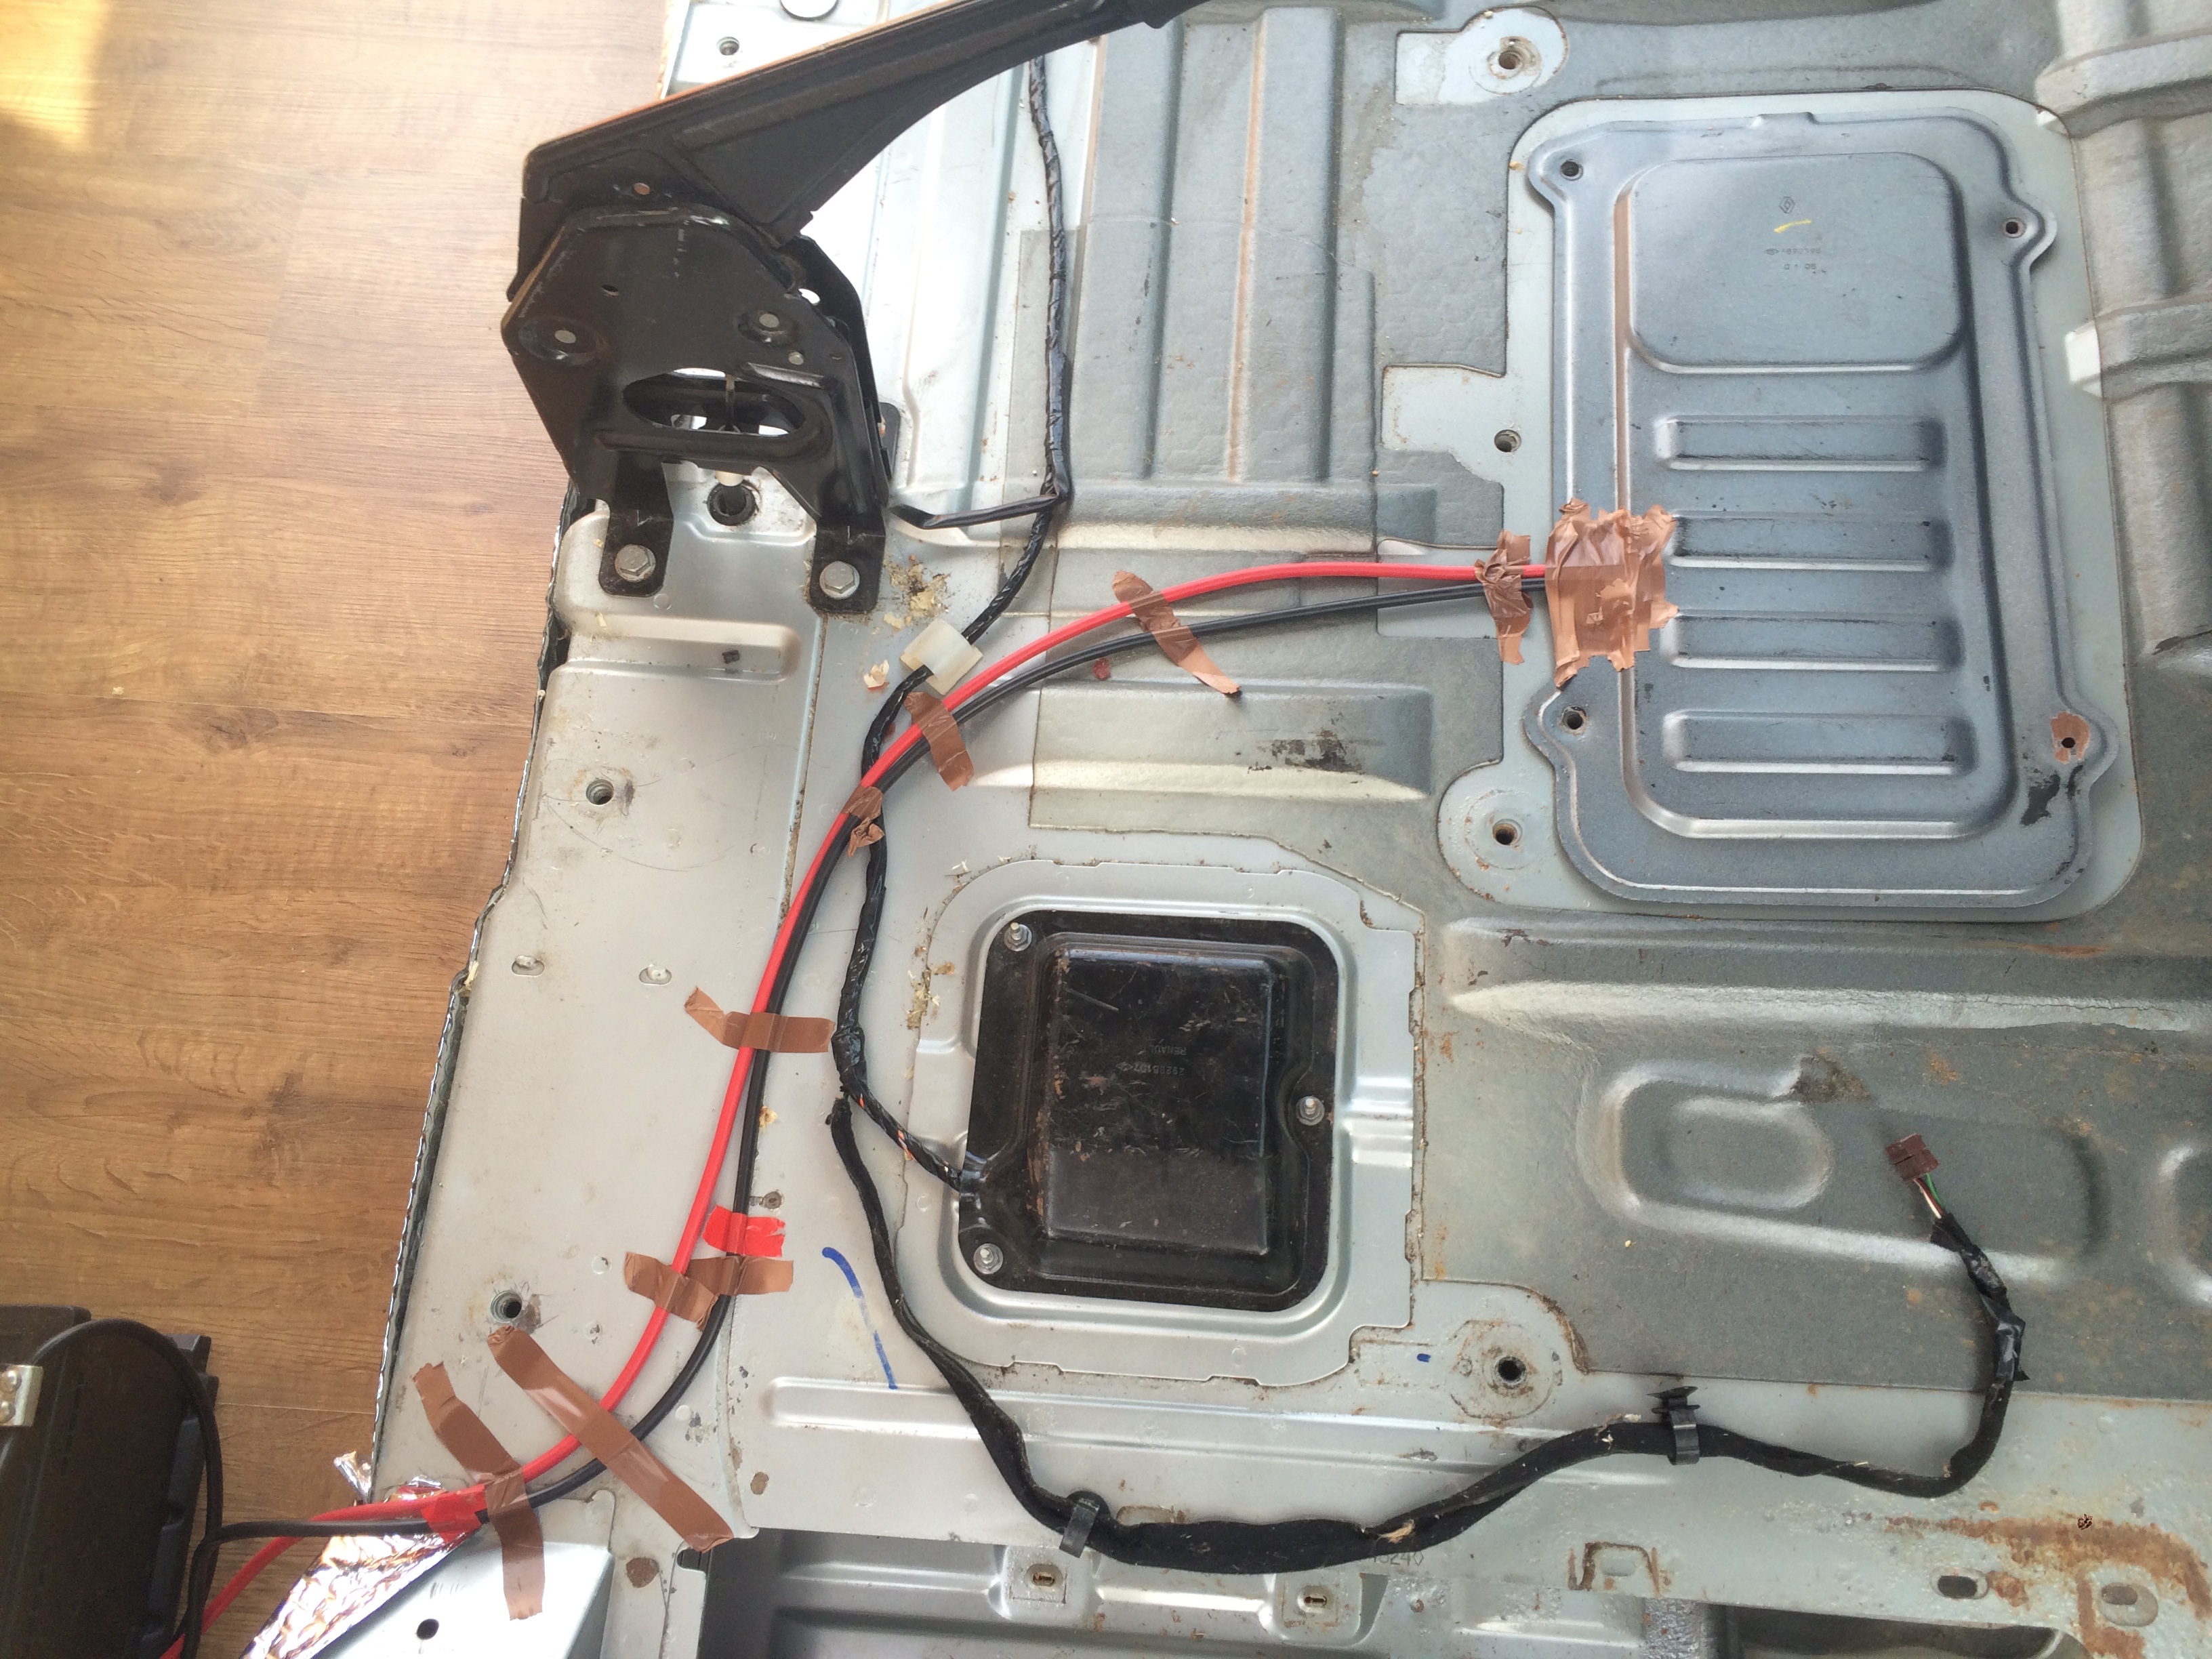
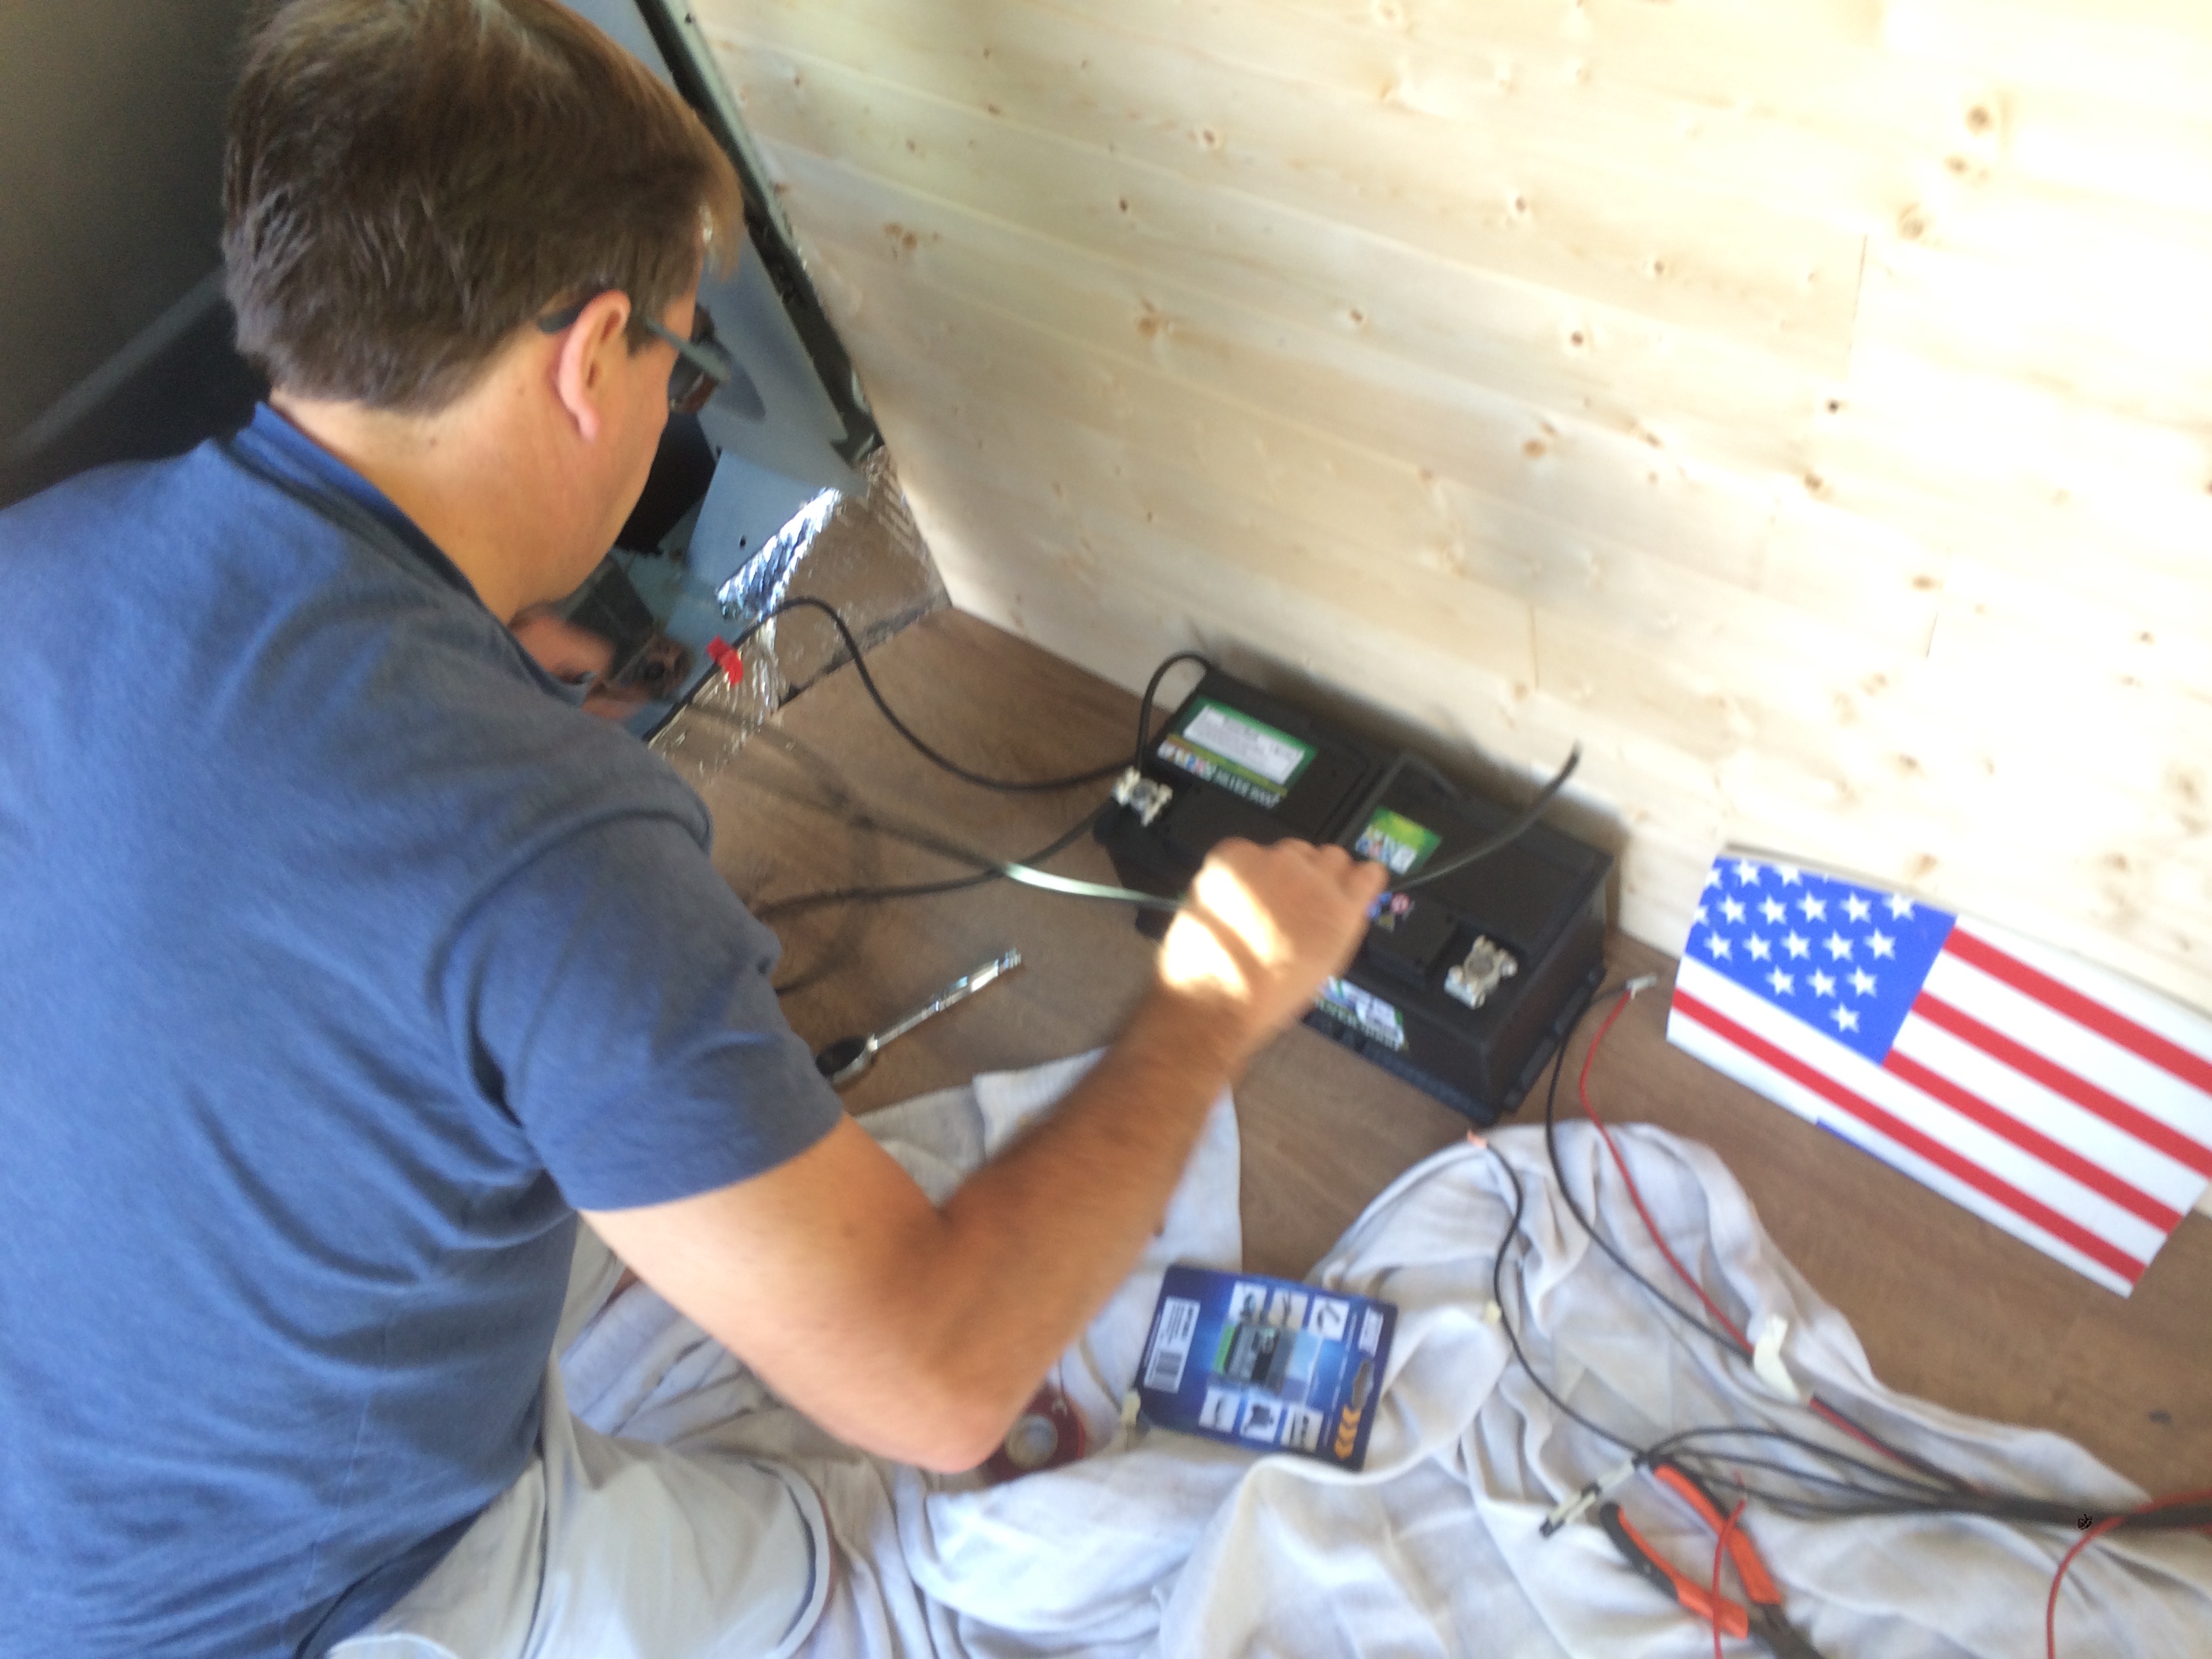
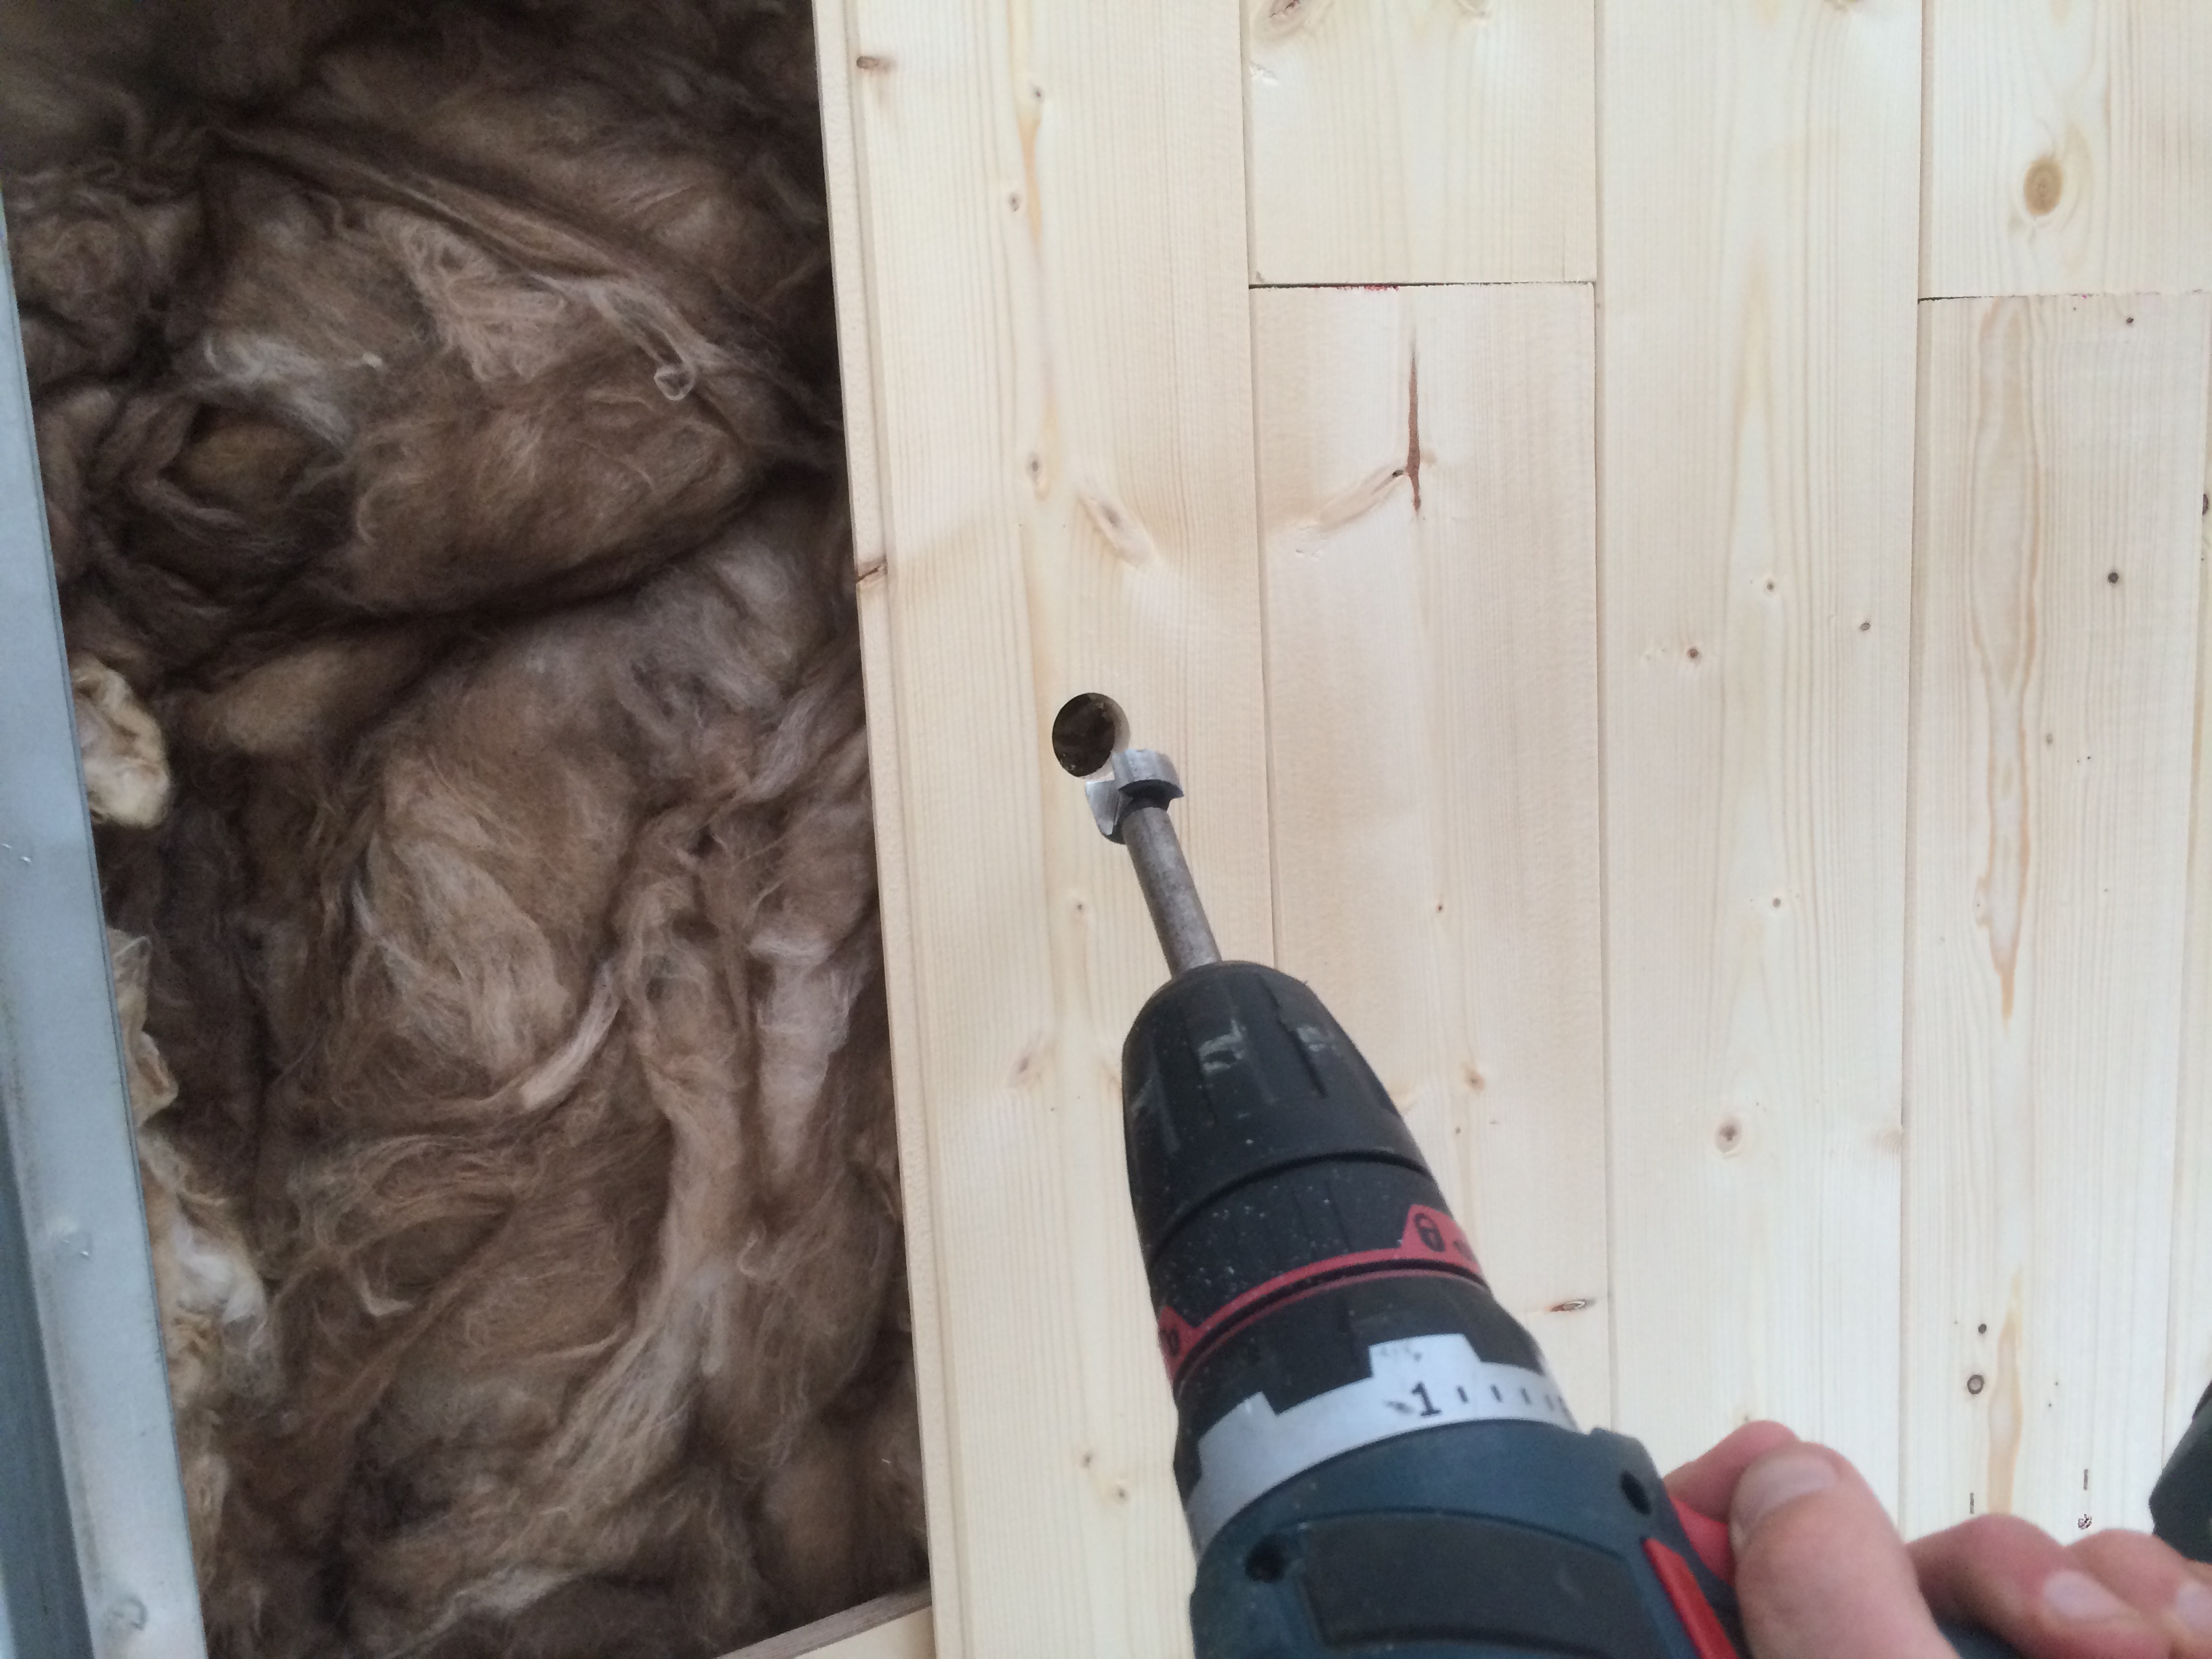
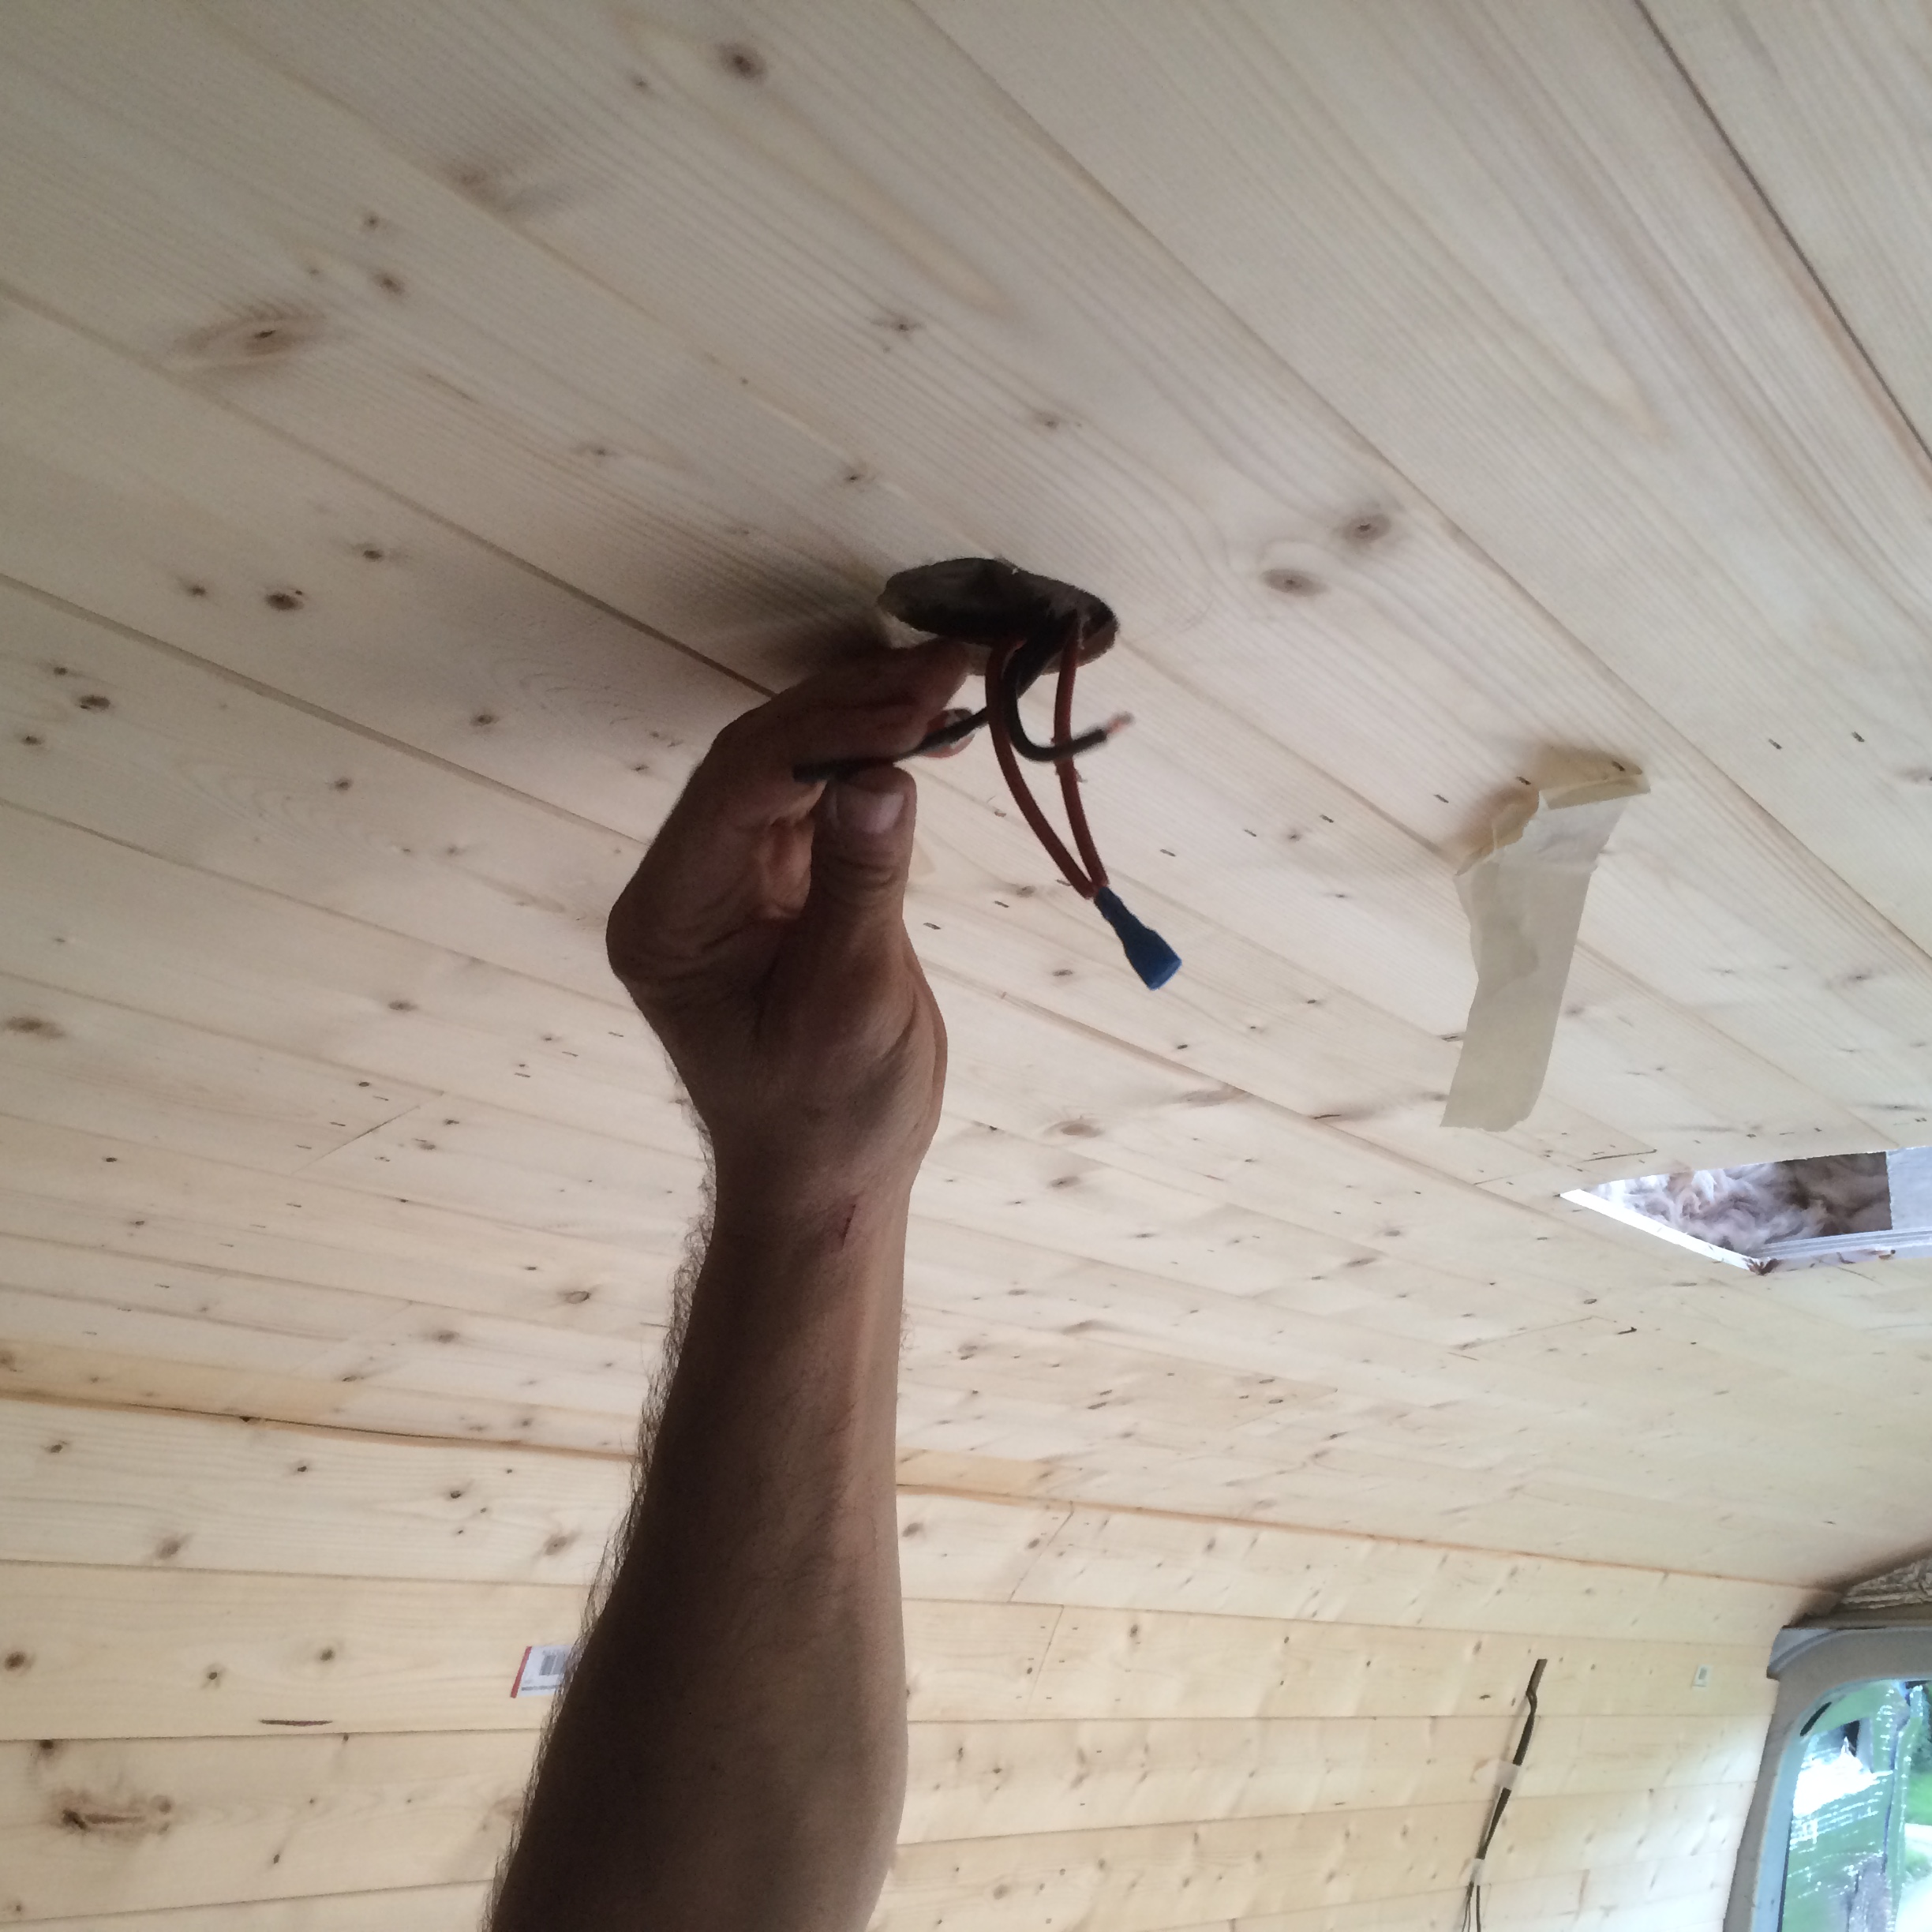
That little black and green box is the special bit. It ensures that the leisure battery charges only when the engine is running, meaning that we can’t kill our starter battery by using too much power when the engine is off. We drilled holes into the cladding using a hole borer bit and pulled all the wires through wherever they needed to be, using tape where necessary. It was important to do this now as we wouldn’t be able to access the wiring once the walls and ceiling were in place.
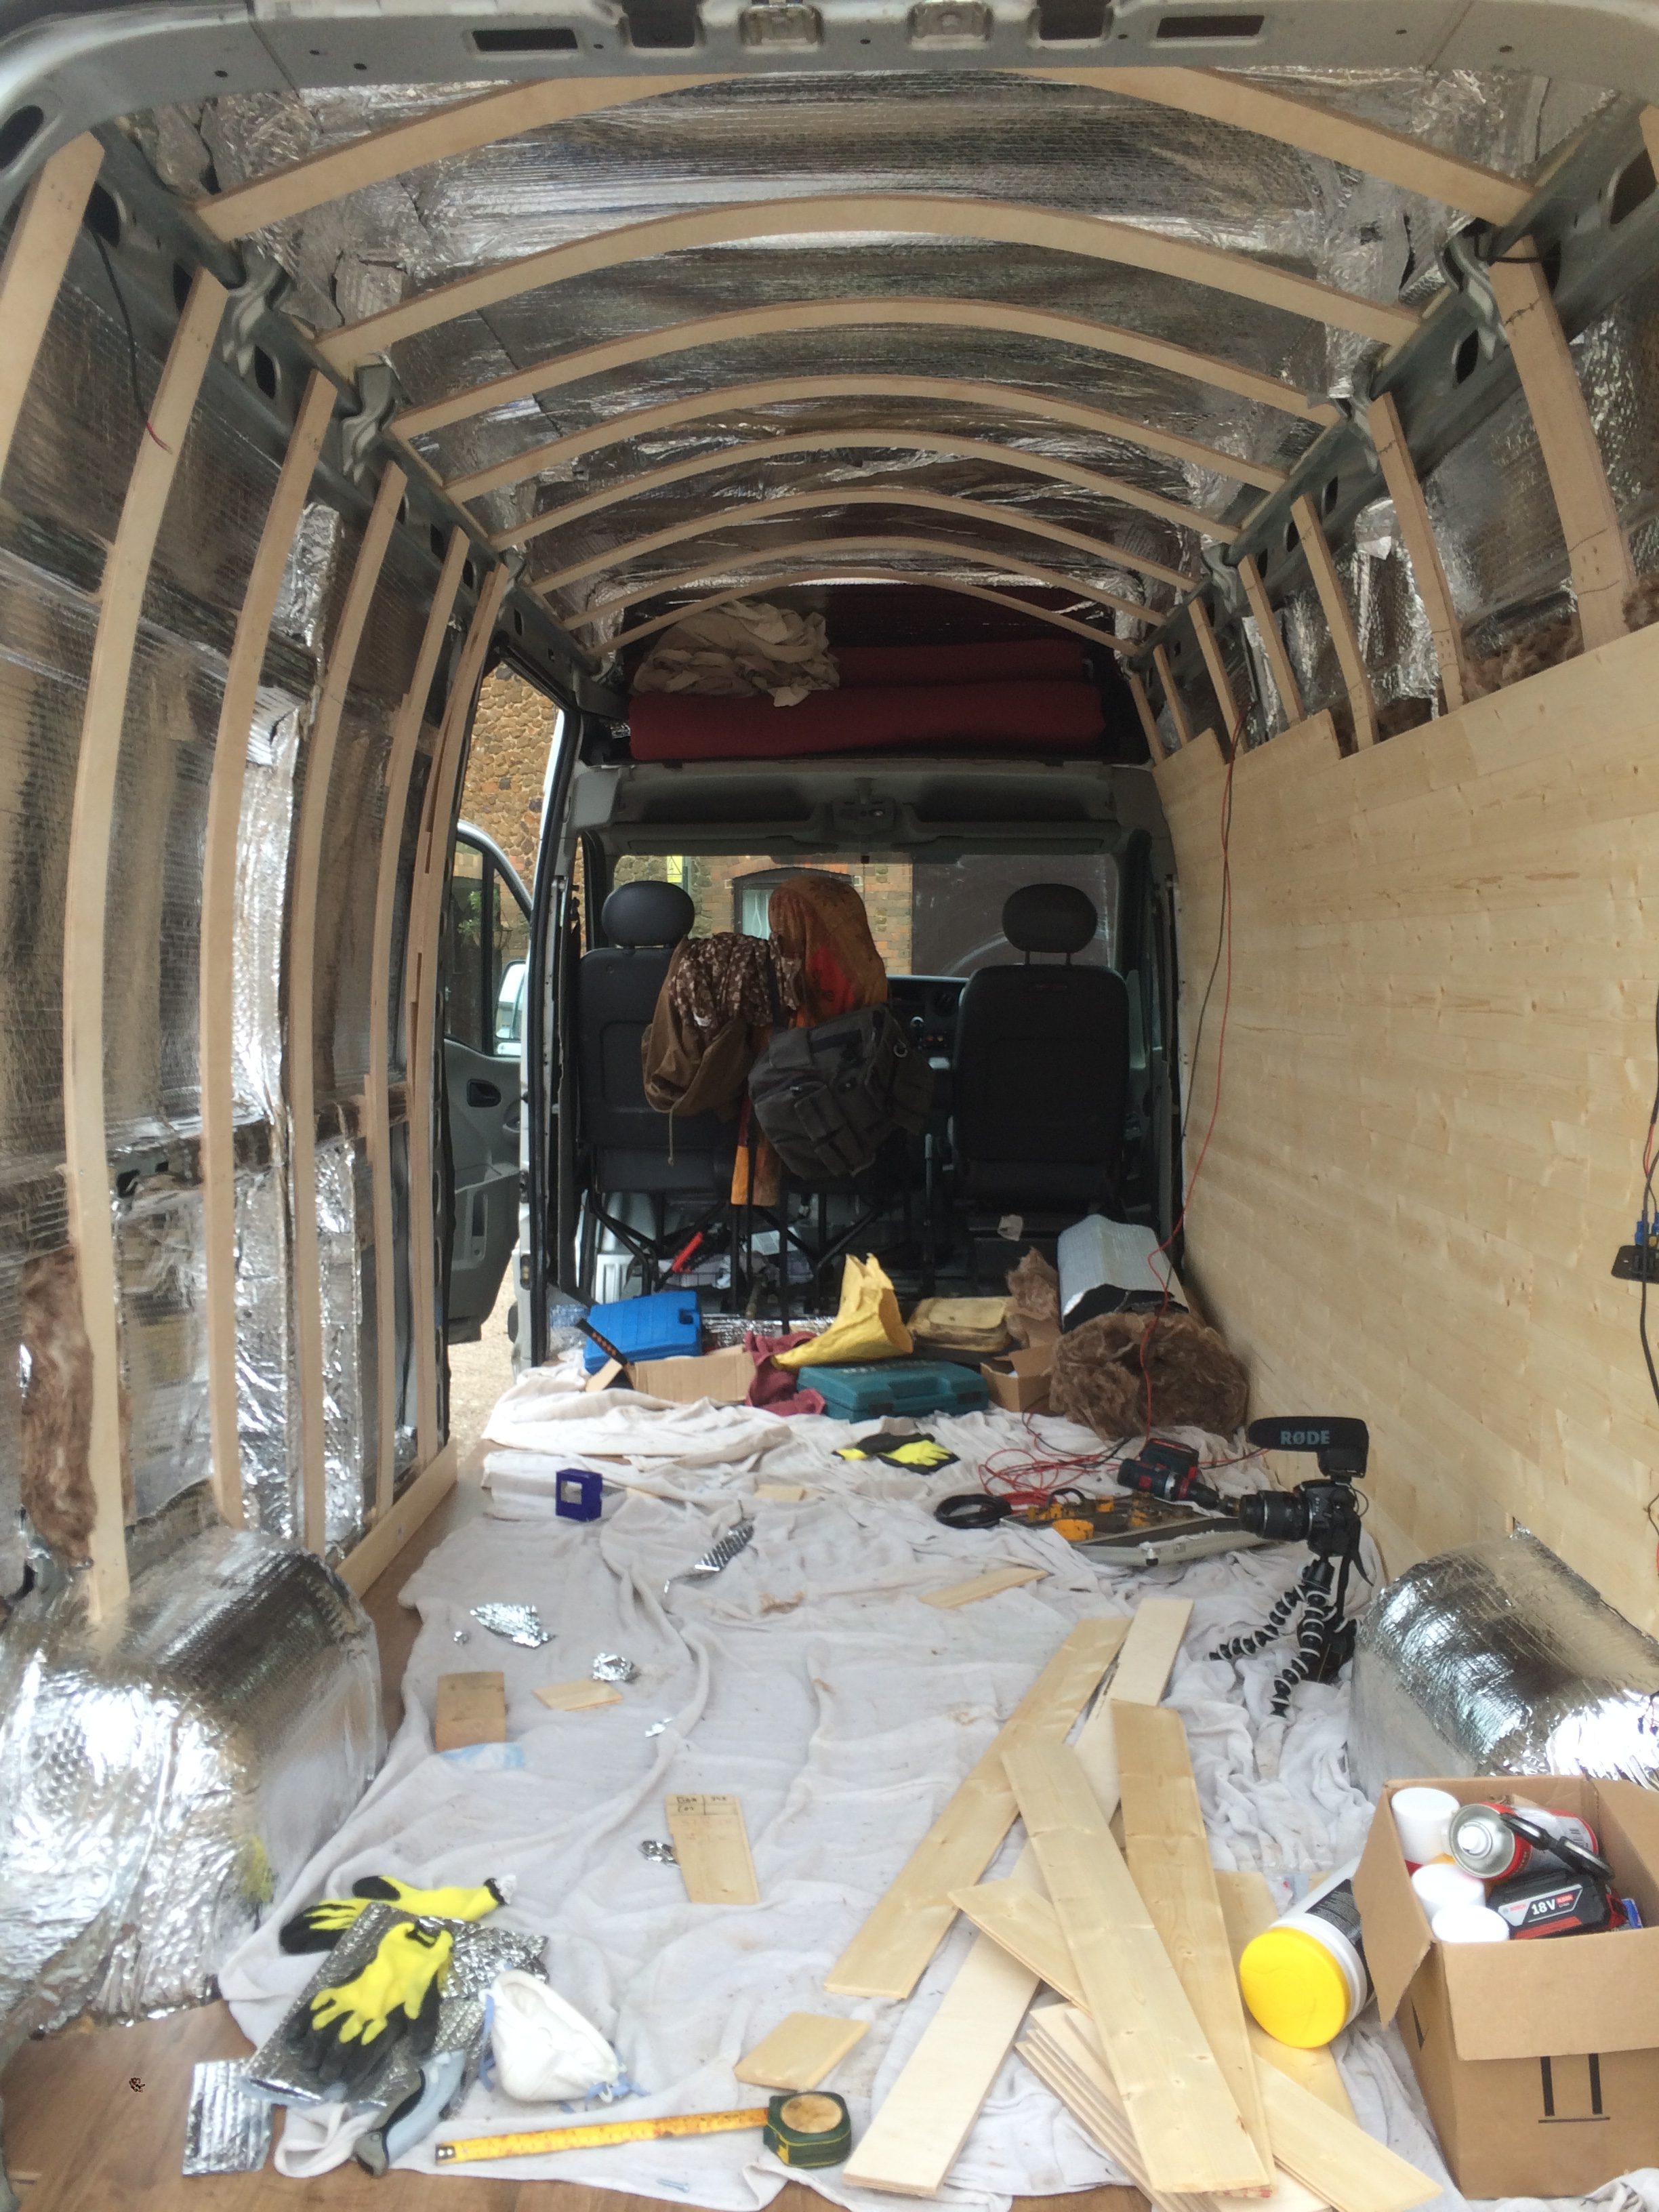
Our van has a horrible, curved roof and walls. I say horrible, because it is a real pain to work with and I wish I had a luton van with straight walls and ceiling. Overcoming this though, we cut lengths of ply and bent them into the roof, forming a skeleton for the van that we could attach the cladding too. Thus our finished shape would be a natural, curved ceiling, following the shape of the van. We didn’t attach the lengths of ply to the ceiling because there was nowhere to attach them without going through the roof. We simply cut them to length (trial and error) and then bent them into place, figuring that the cladding would hold everything together once attached.

There was a slight issue about how we would connect the walls to the ceiling, but rather than worrying about it at this point, we decided to finish the main walls on both sides.
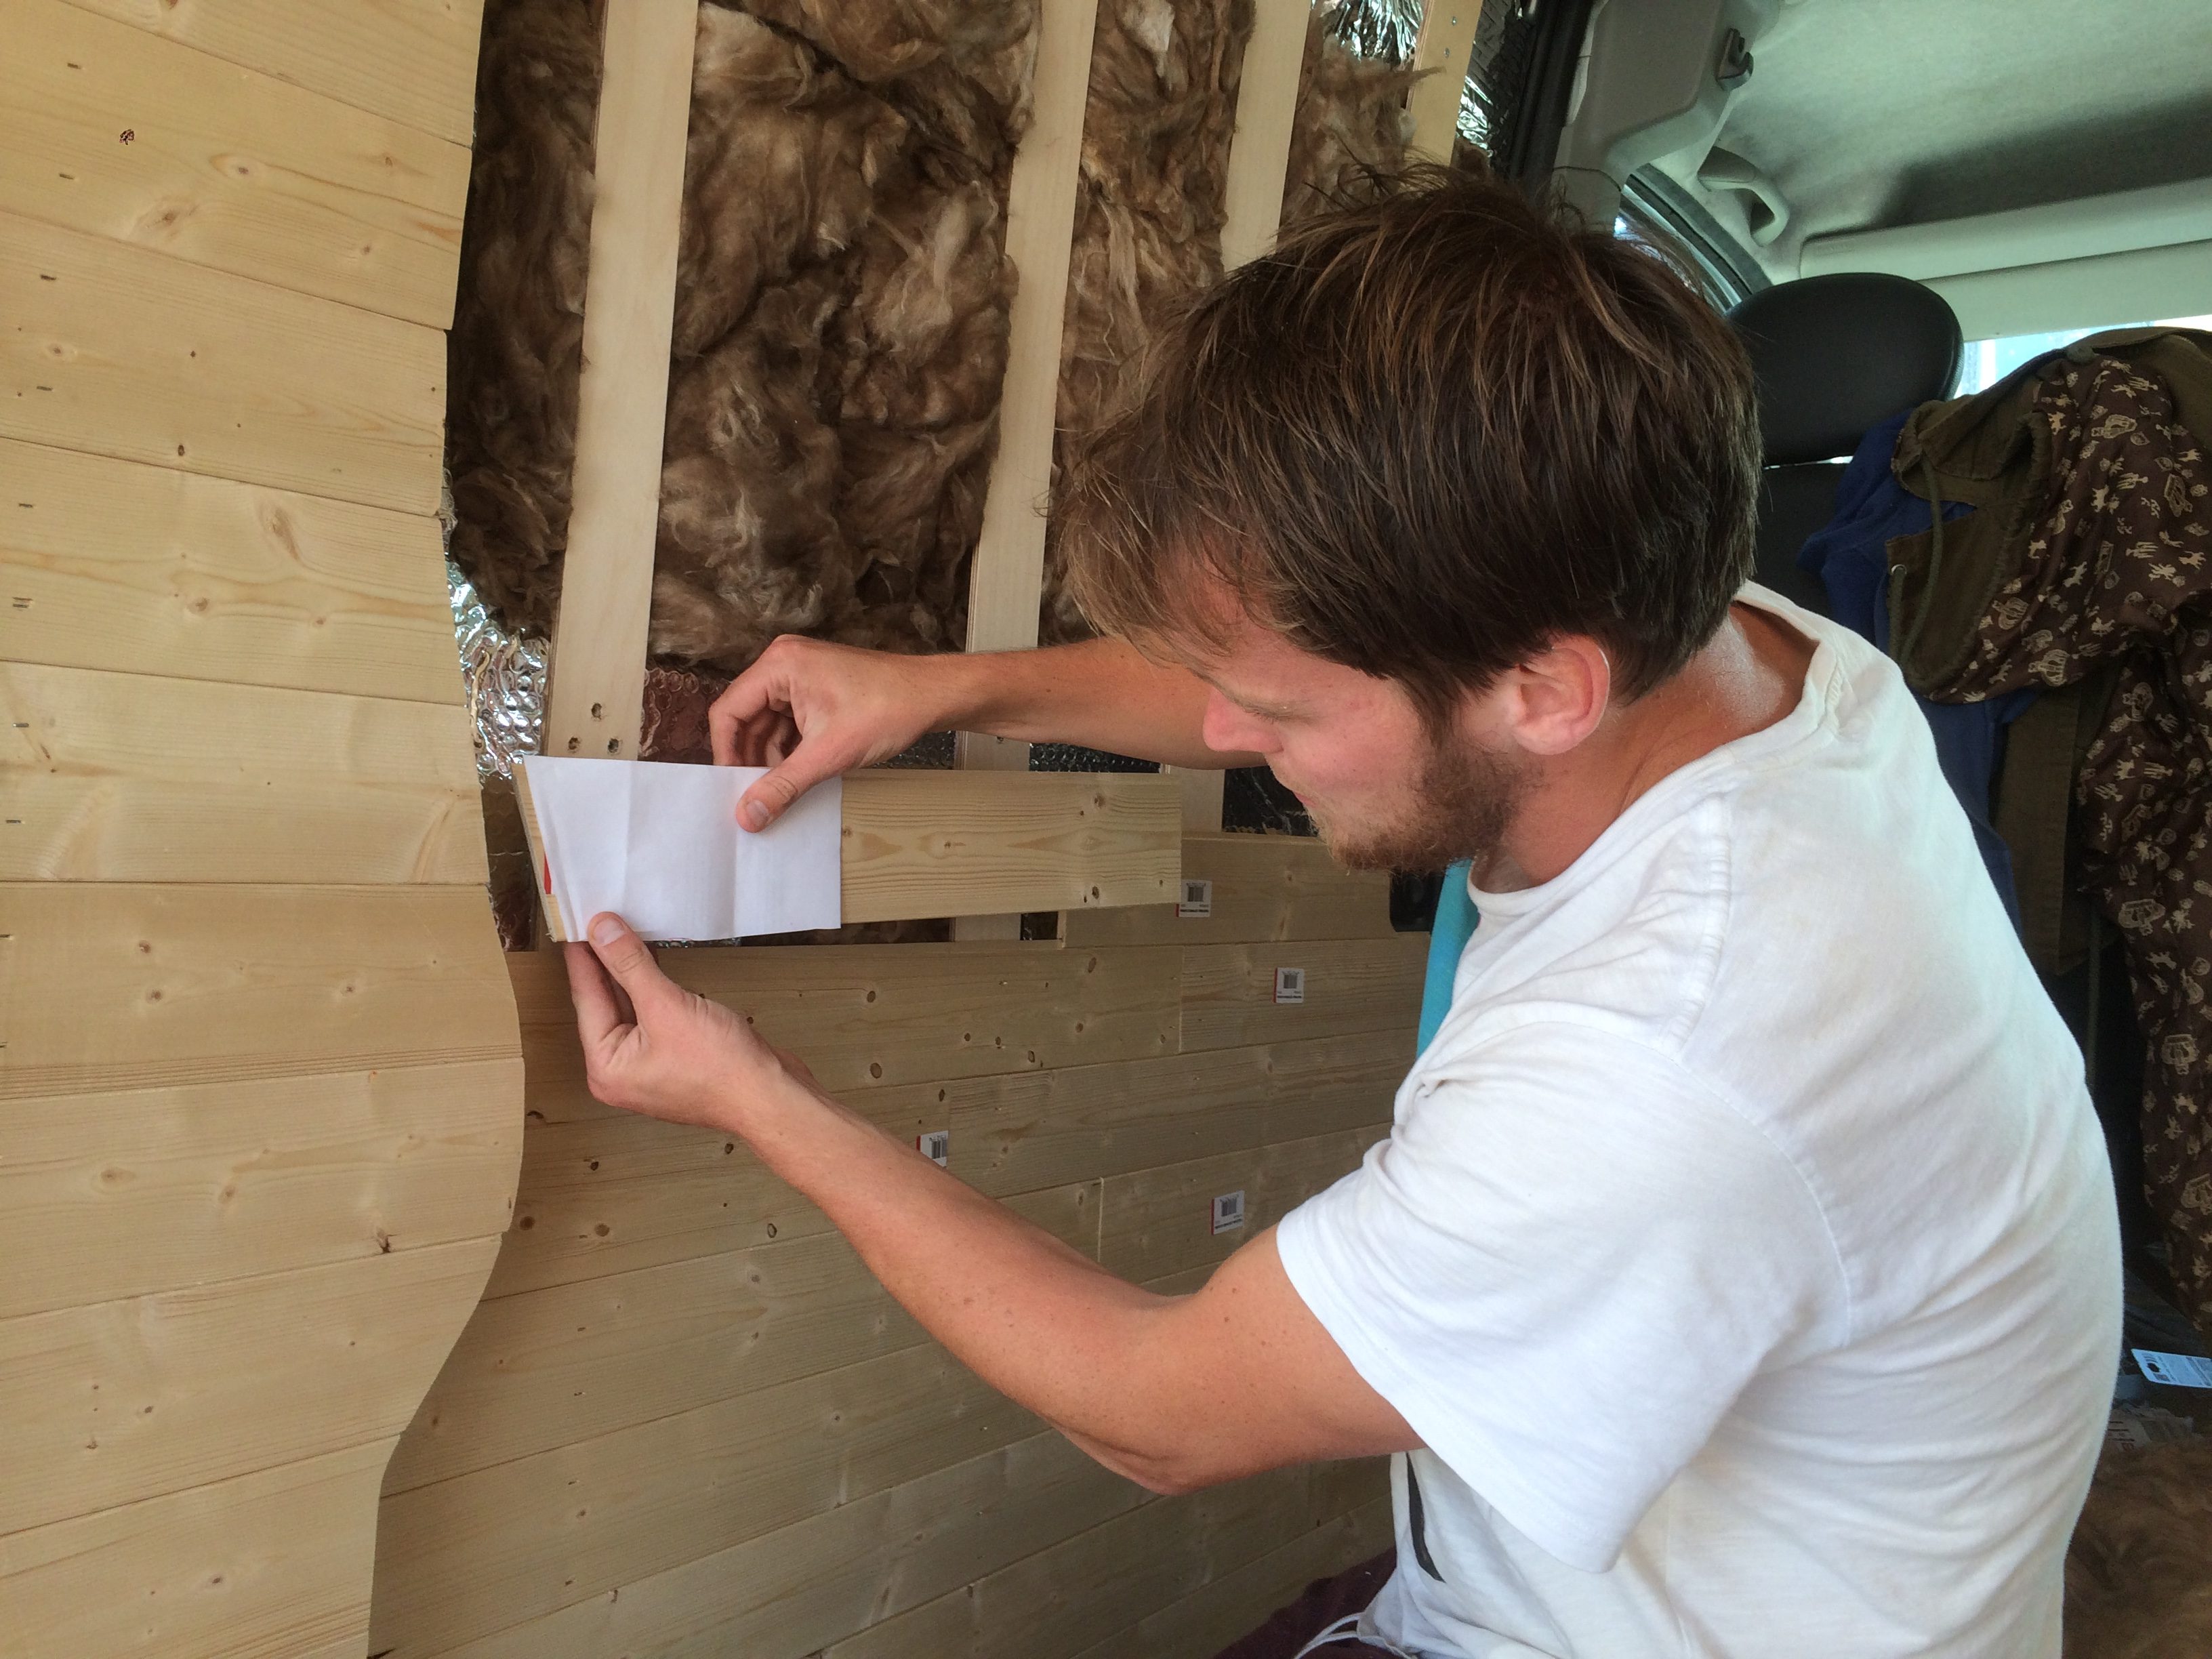
As mentioned, the shape of the van is a real pain, and getting the cladding right for the door involved using lots of bits of paper and masking tape to get the shape. As this is our first try at doing stuff like this, we couldn’t get it perfect, but we did it as best we could.
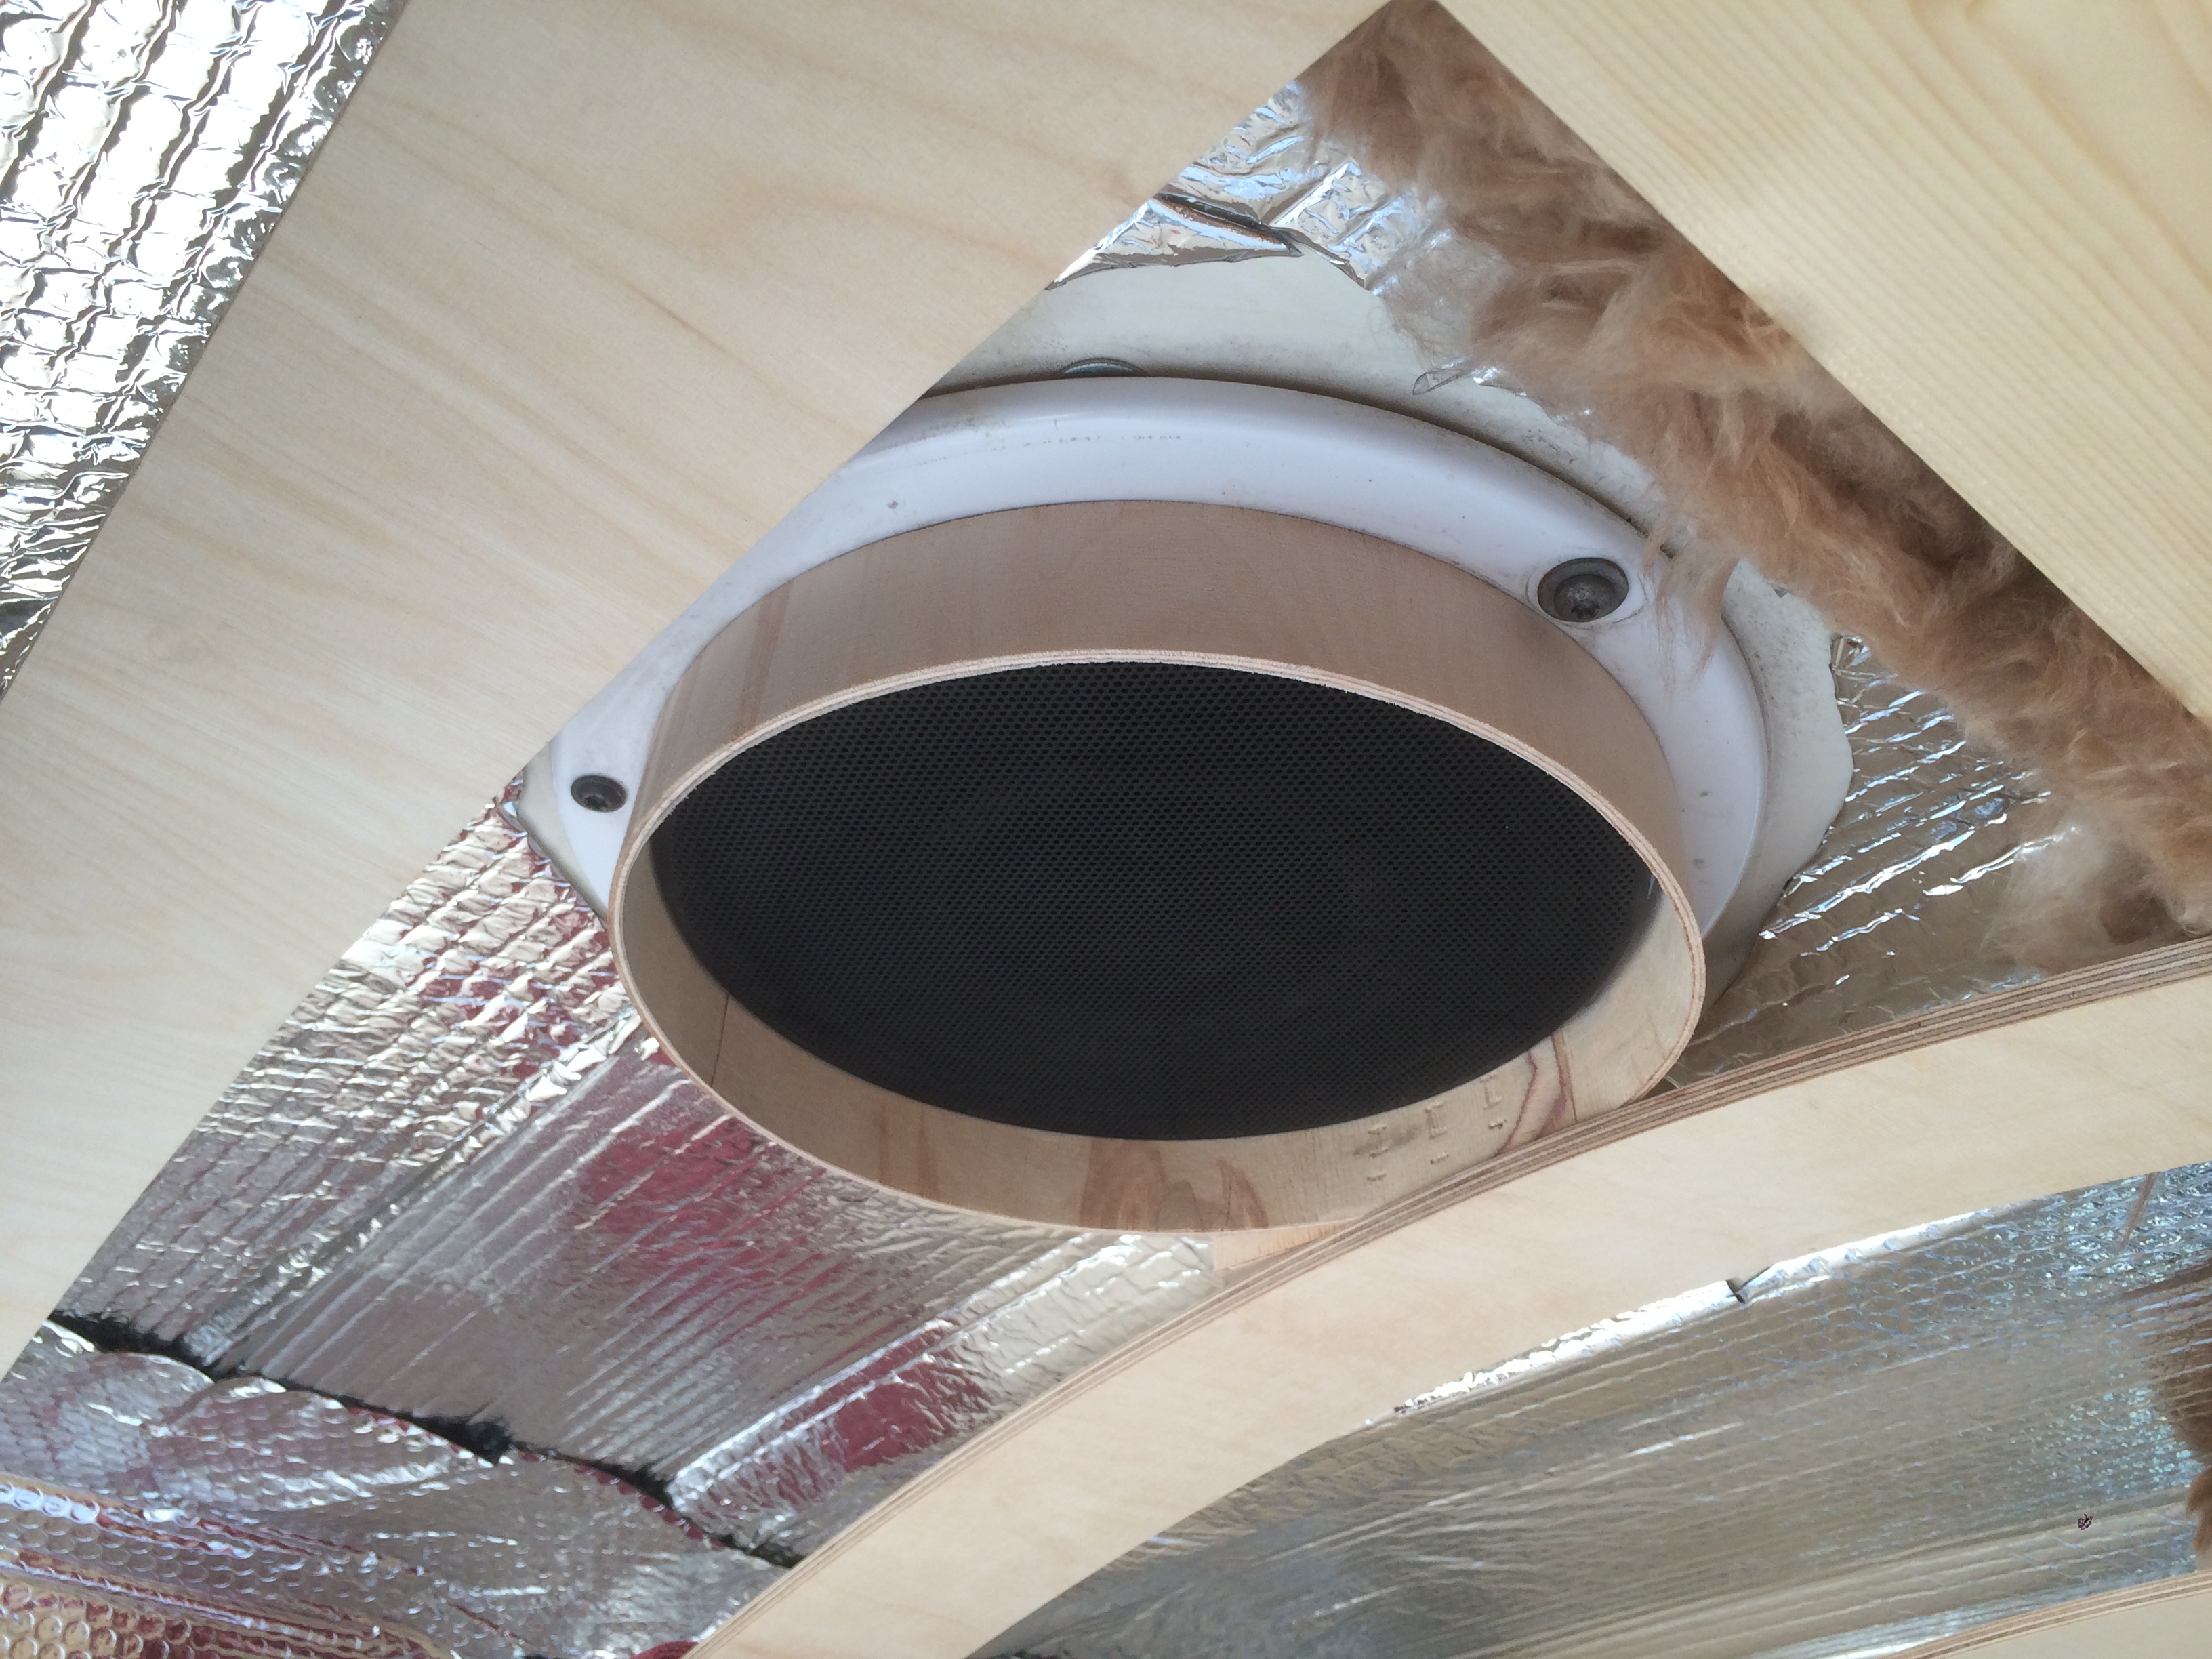
As there was already an extractor fan in the van, I bent a piece of very thin ply into a ring and put it around the fan in an attempt to stop it sucking in bits of insulation.
We then set to work cladding and insulating the ceiling. We did it in exactly the same way as the walls, attaching the cladding with a nail gun and pushing the insulation in whenever we could. It was much more difficult working overhead, especially when dealing with the curvature of the van, but we worked our way from the edges to the middle. Our main concern at this point was that the cladding on the ceiling and the walls didn’t meet up, but we decided to leave a gap and deal with it later on.

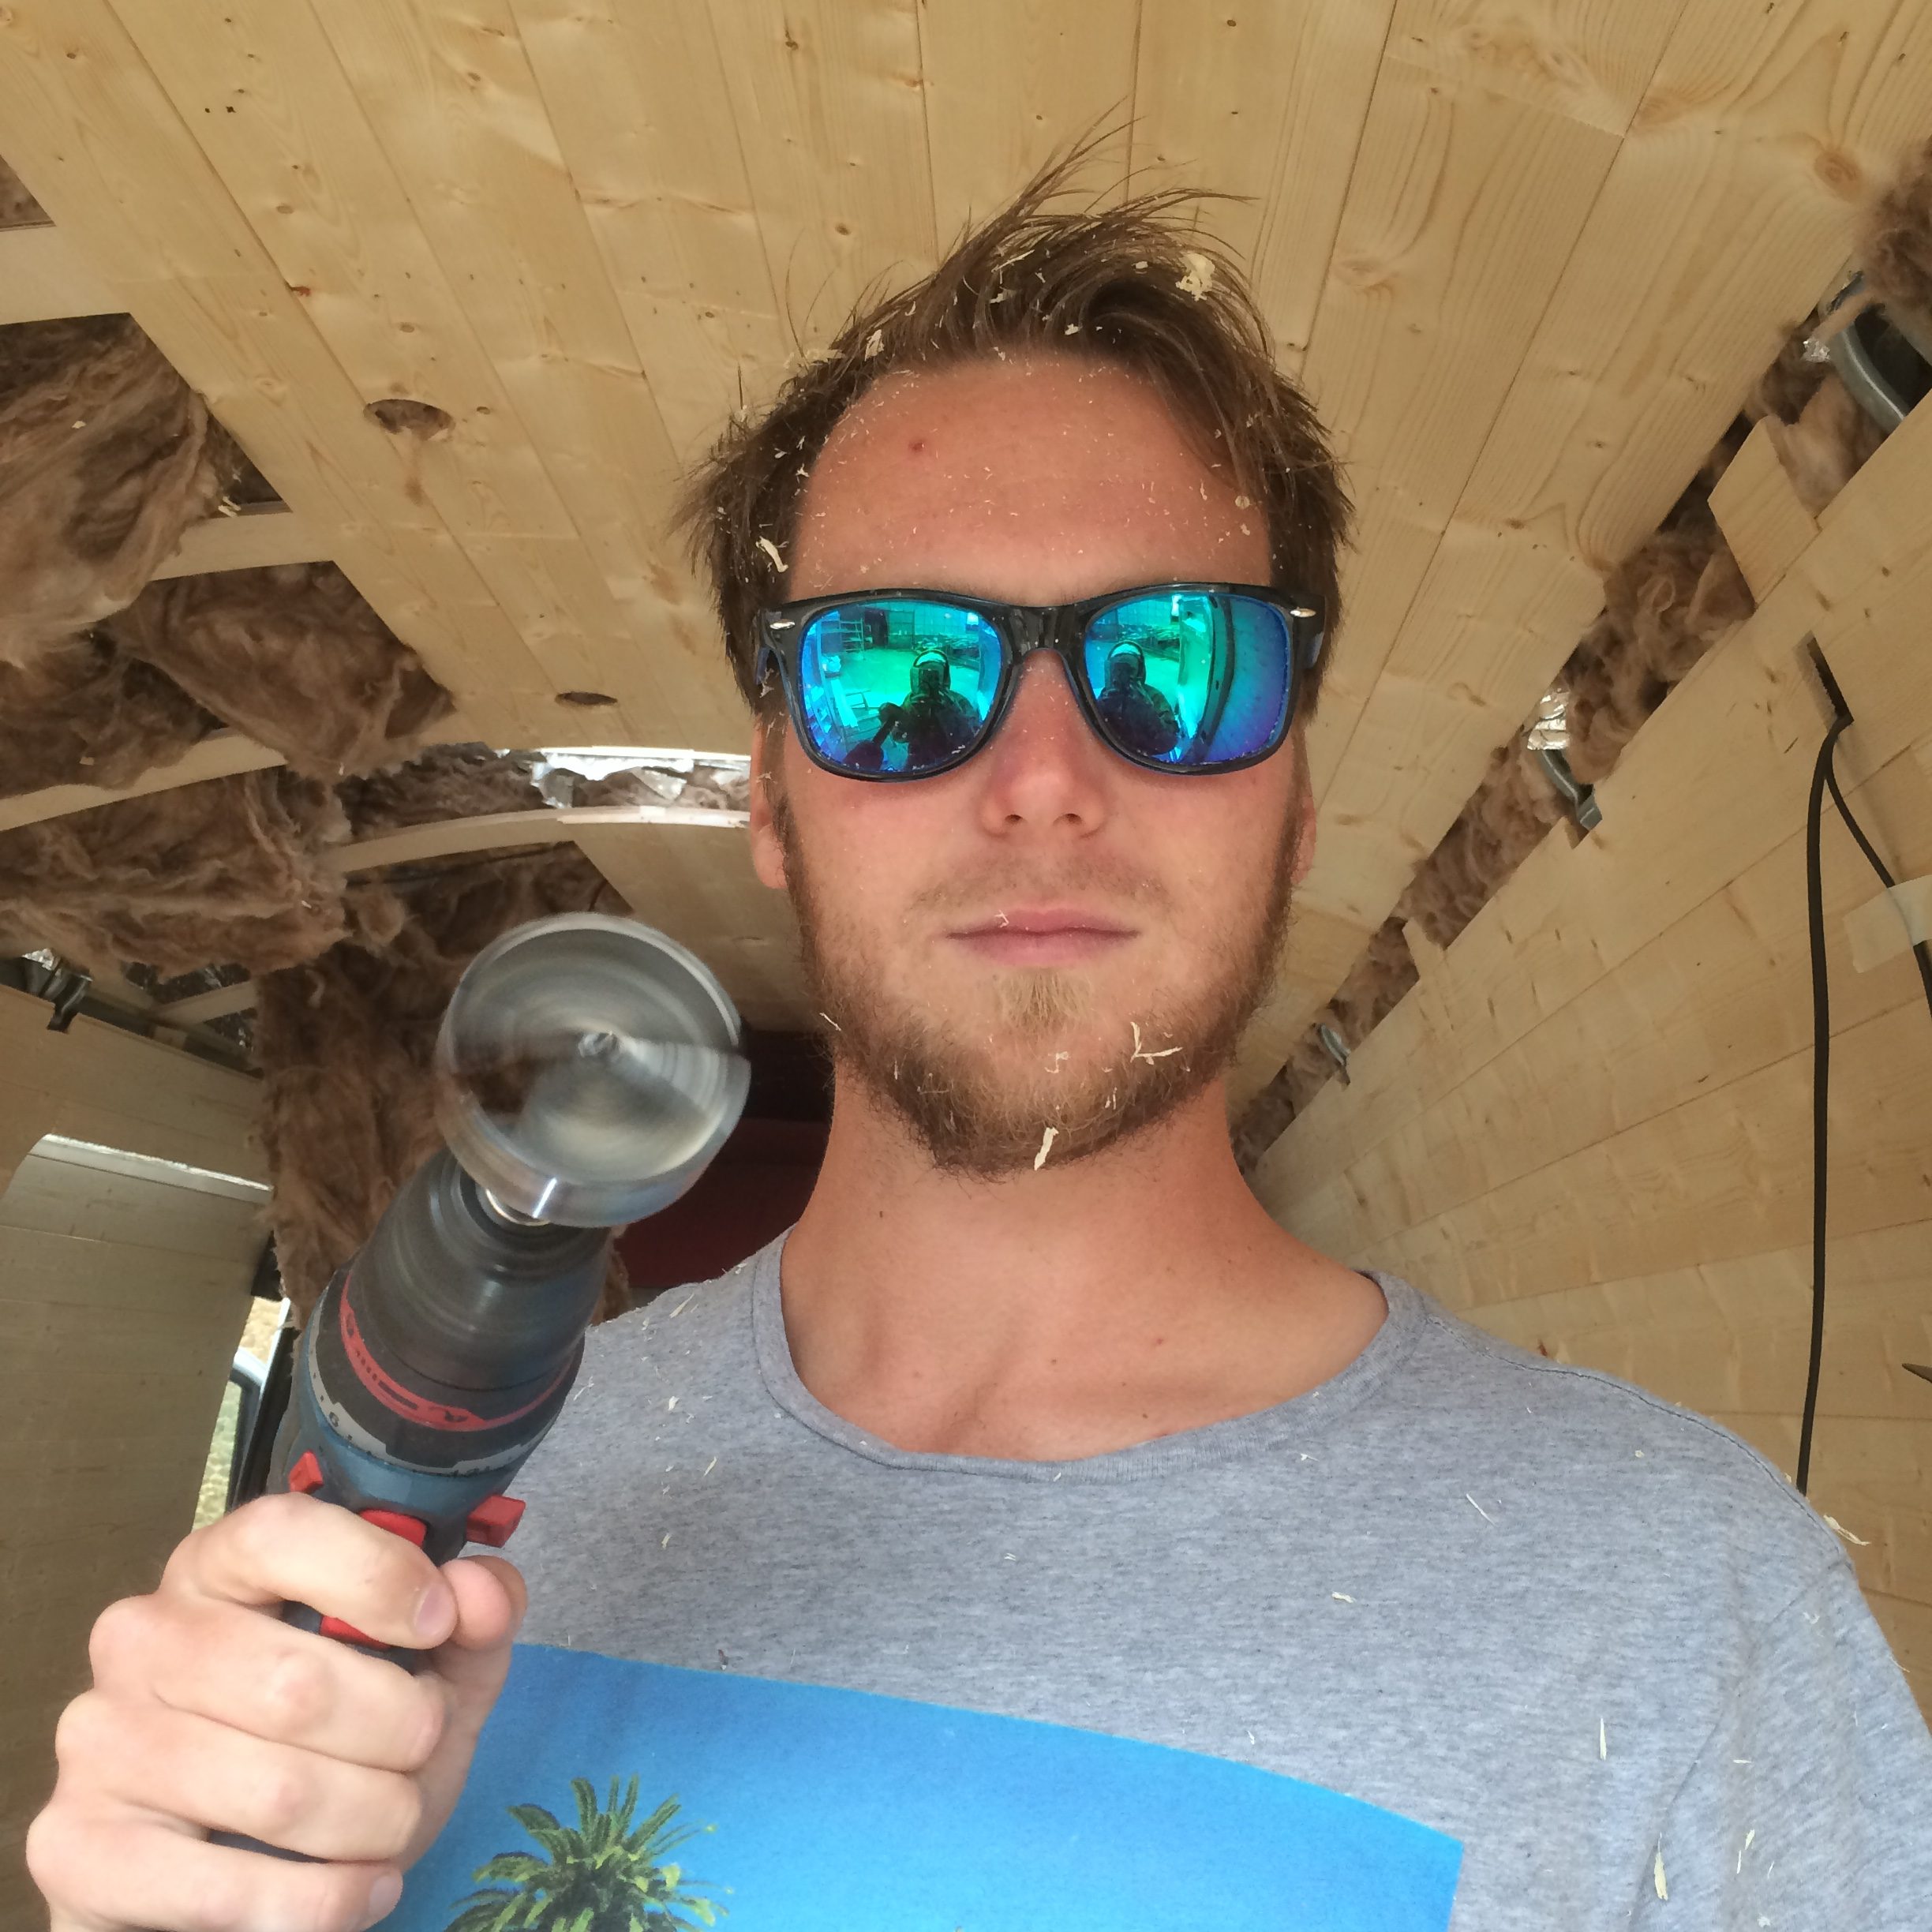
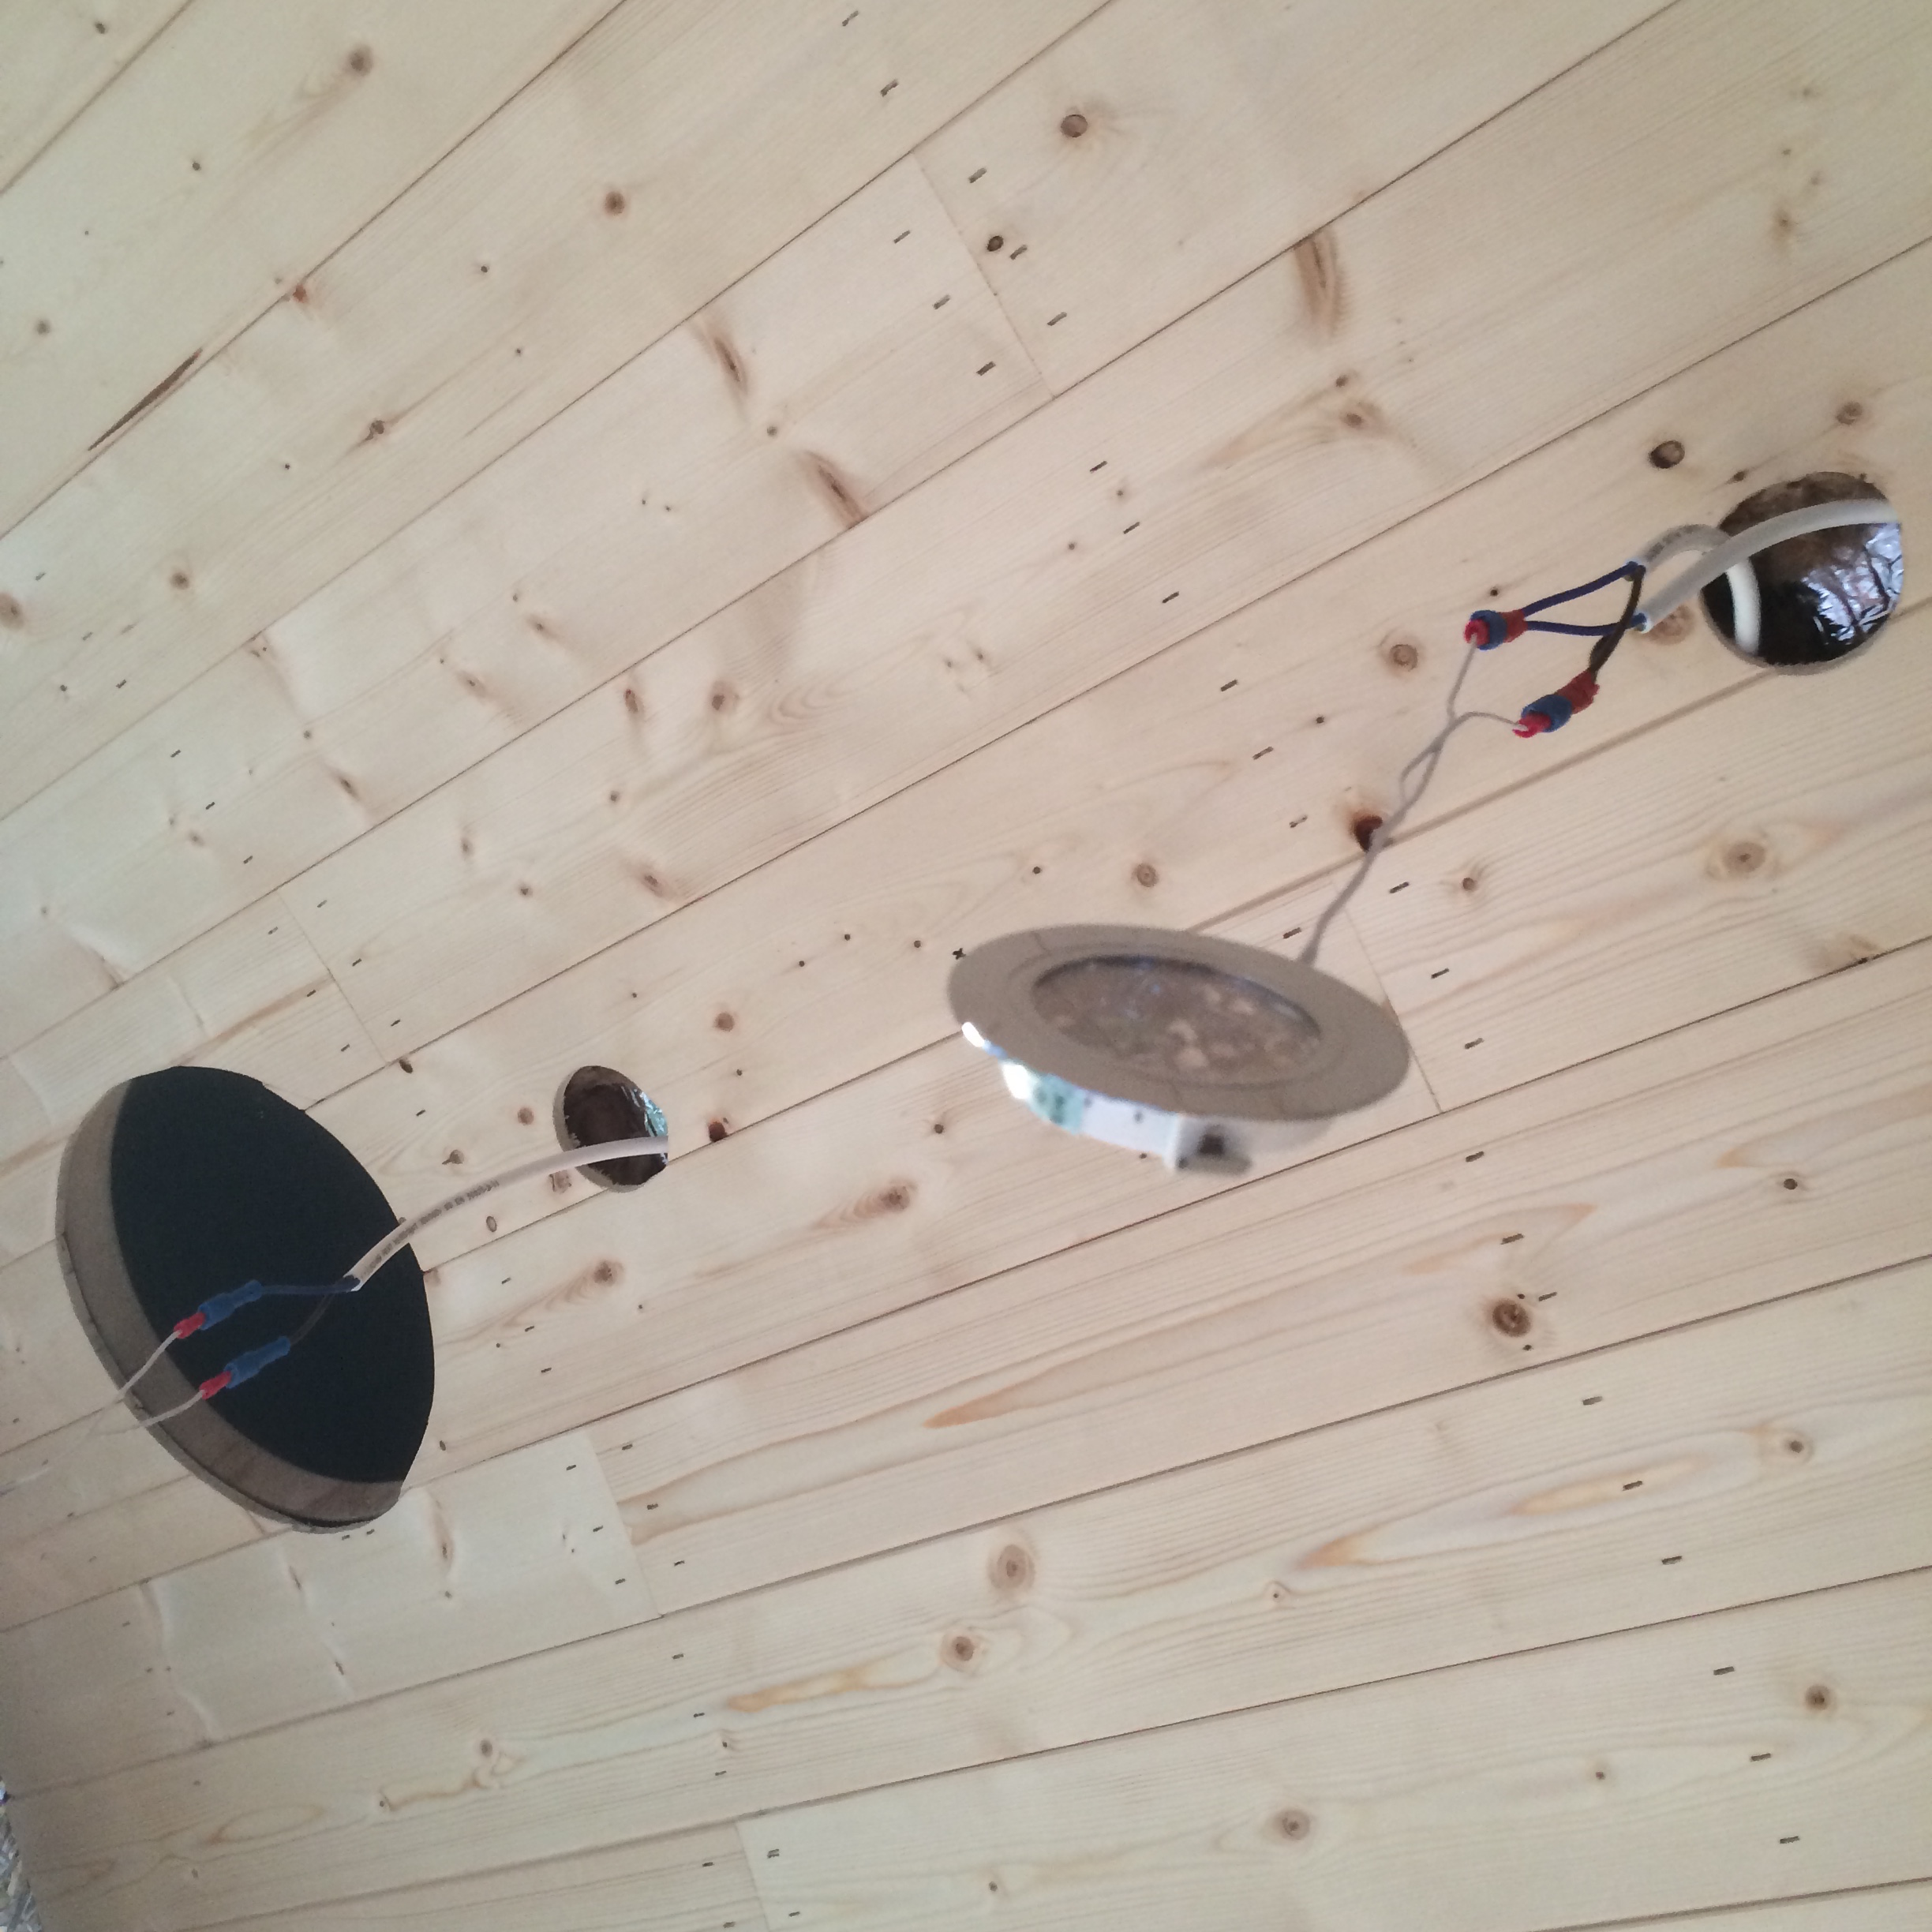
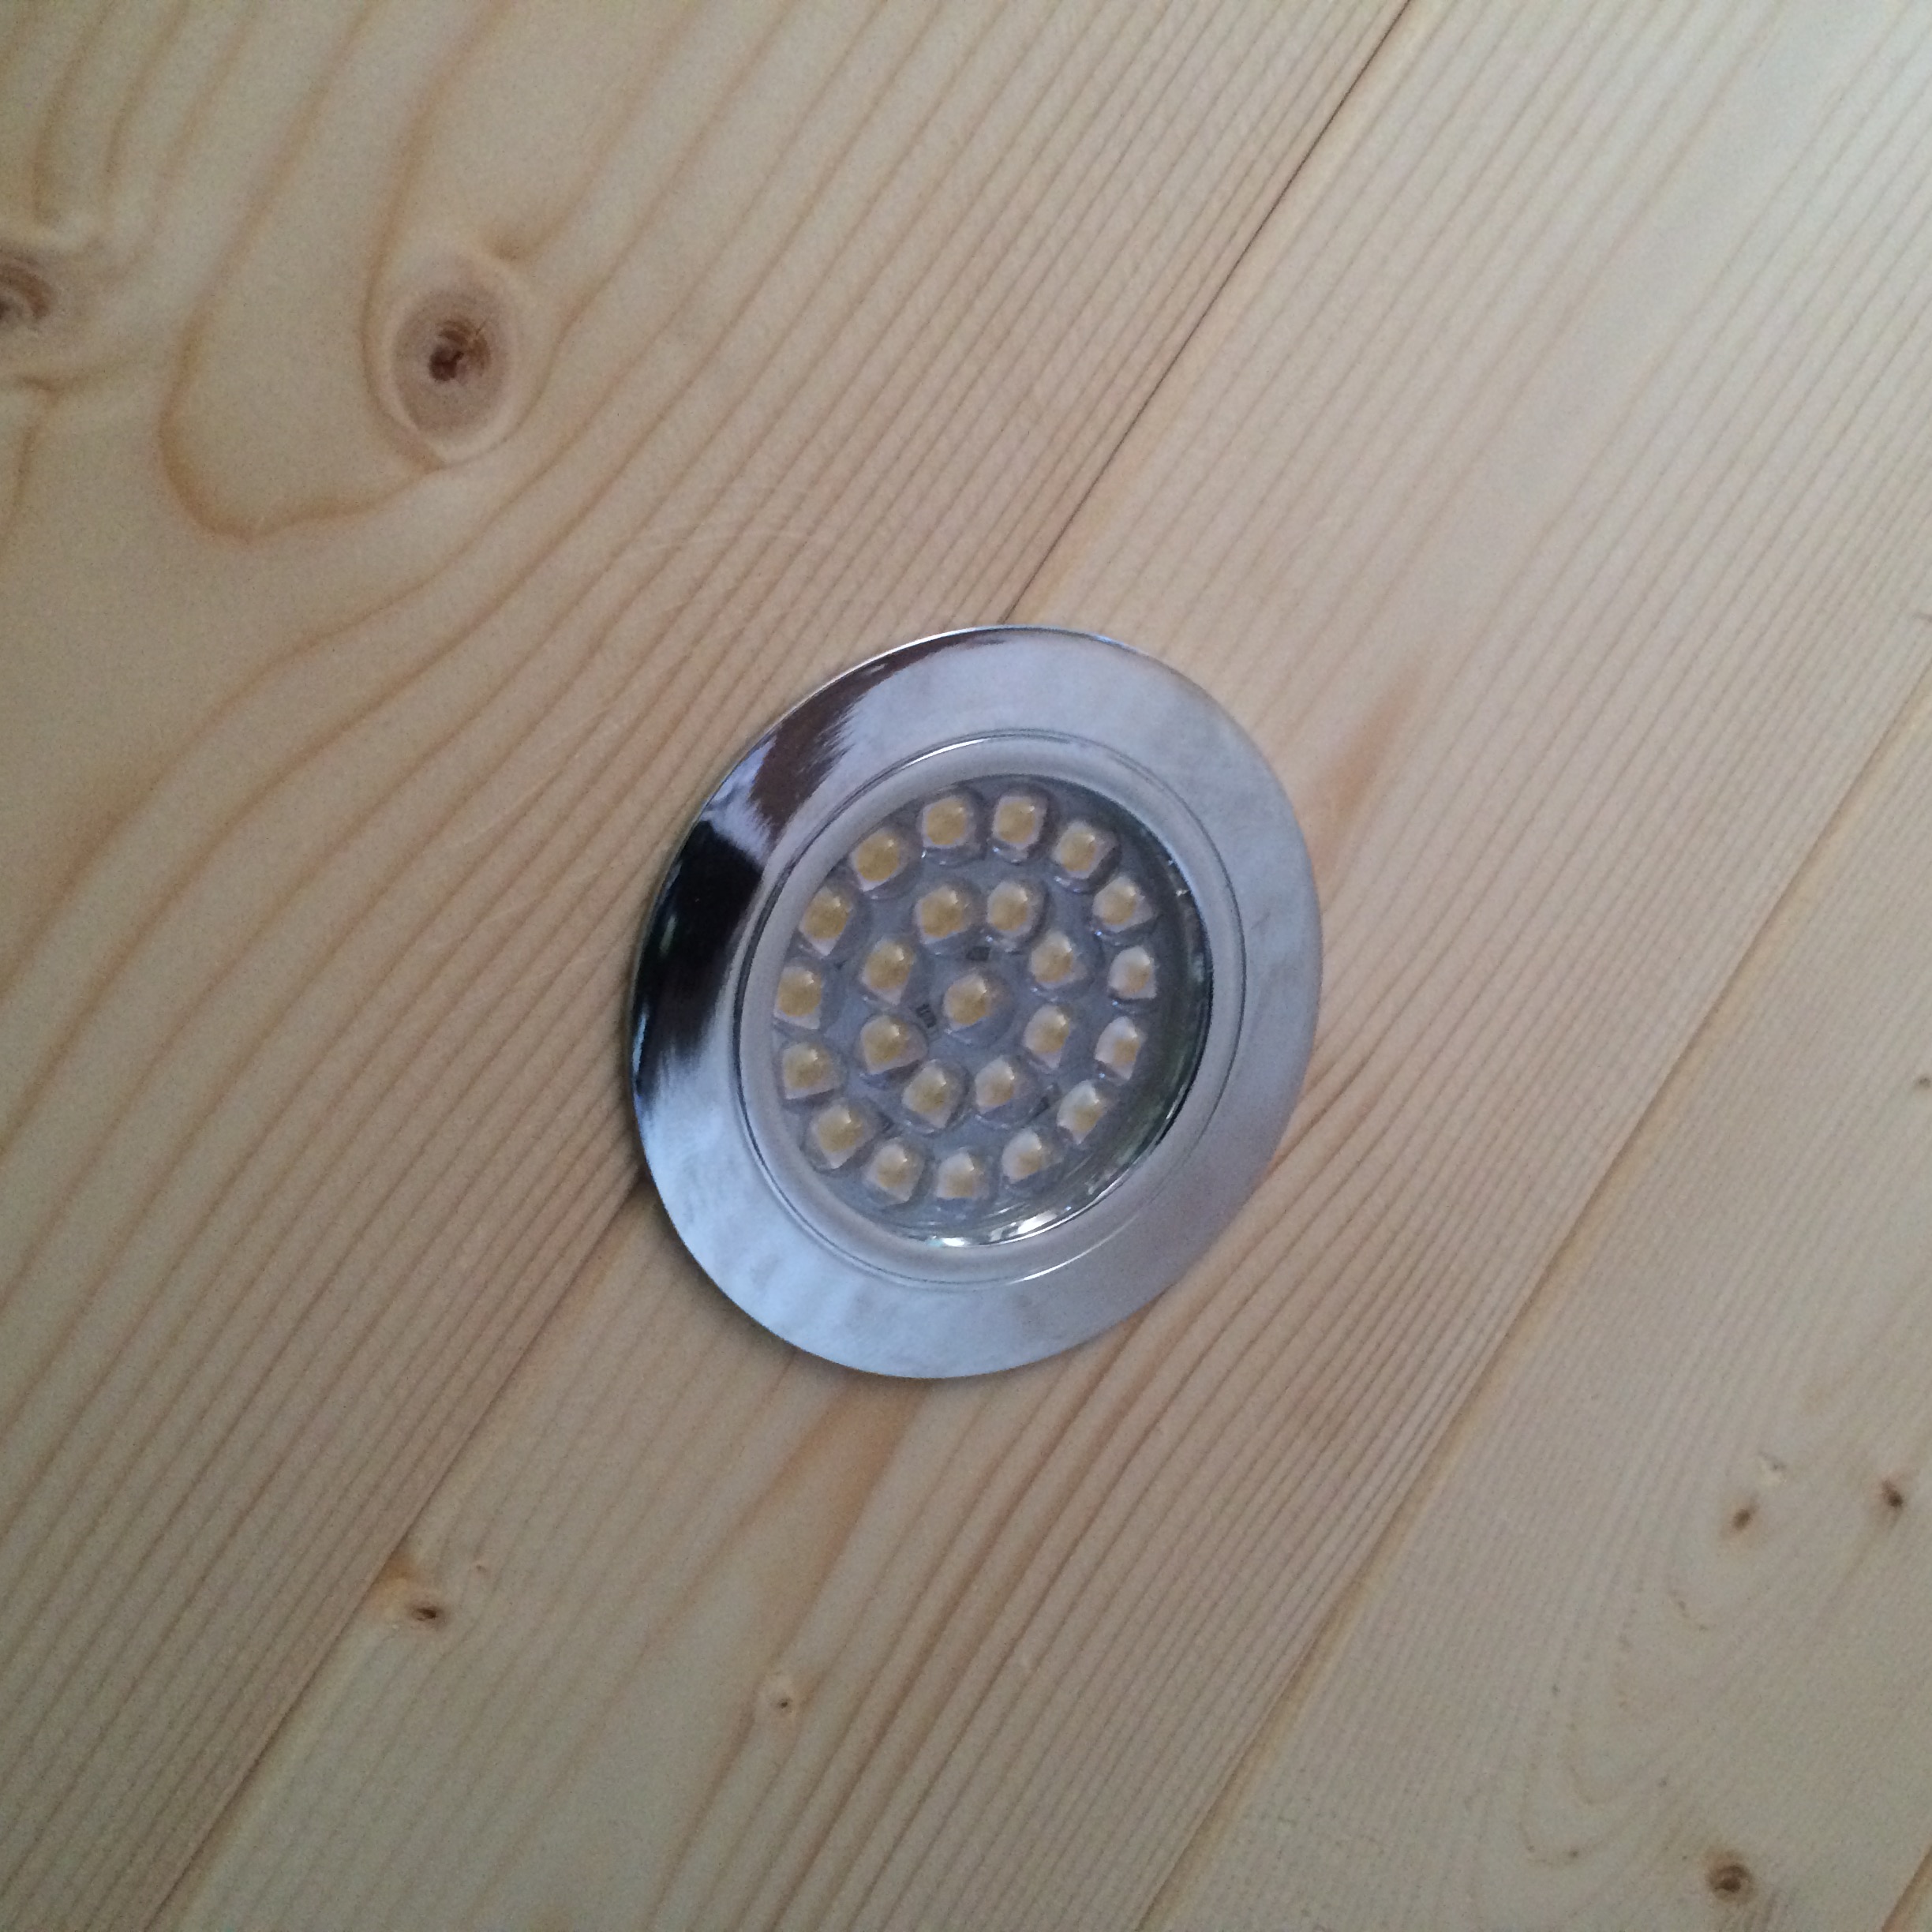
When we reached the middle of the van, I used a hole borer (that’s what I call it) to drill holes for the slim LEDs I had bought. I didn’t have a bit that was the right size, so I drilled them slightly smaller than required, then used a chisel to widen the hole. At the same time I used an angle grinder to cut a hole in the roof and fit the skylight. I siliconed it to the roof and used a bucket full of tiles to hold it down. Unfortunately the fixings for the skylight weren’t long enough for the ceiling cavity in my van and I wish I had thought about this before, because it left exposed insulation that I need to cover.

We broke the joint of several pieces of cladding and attached them at an angle, joining the walls with the ceiling and giving us the completed shape of the van interior. I feel it looks like some kind of wooden van temple.

The final touch was connecting the electronics and putting them into place. Once all the wires were pulled through, we attached the fixing for the lights, then attached the lights, then pushed them into the ceiling.
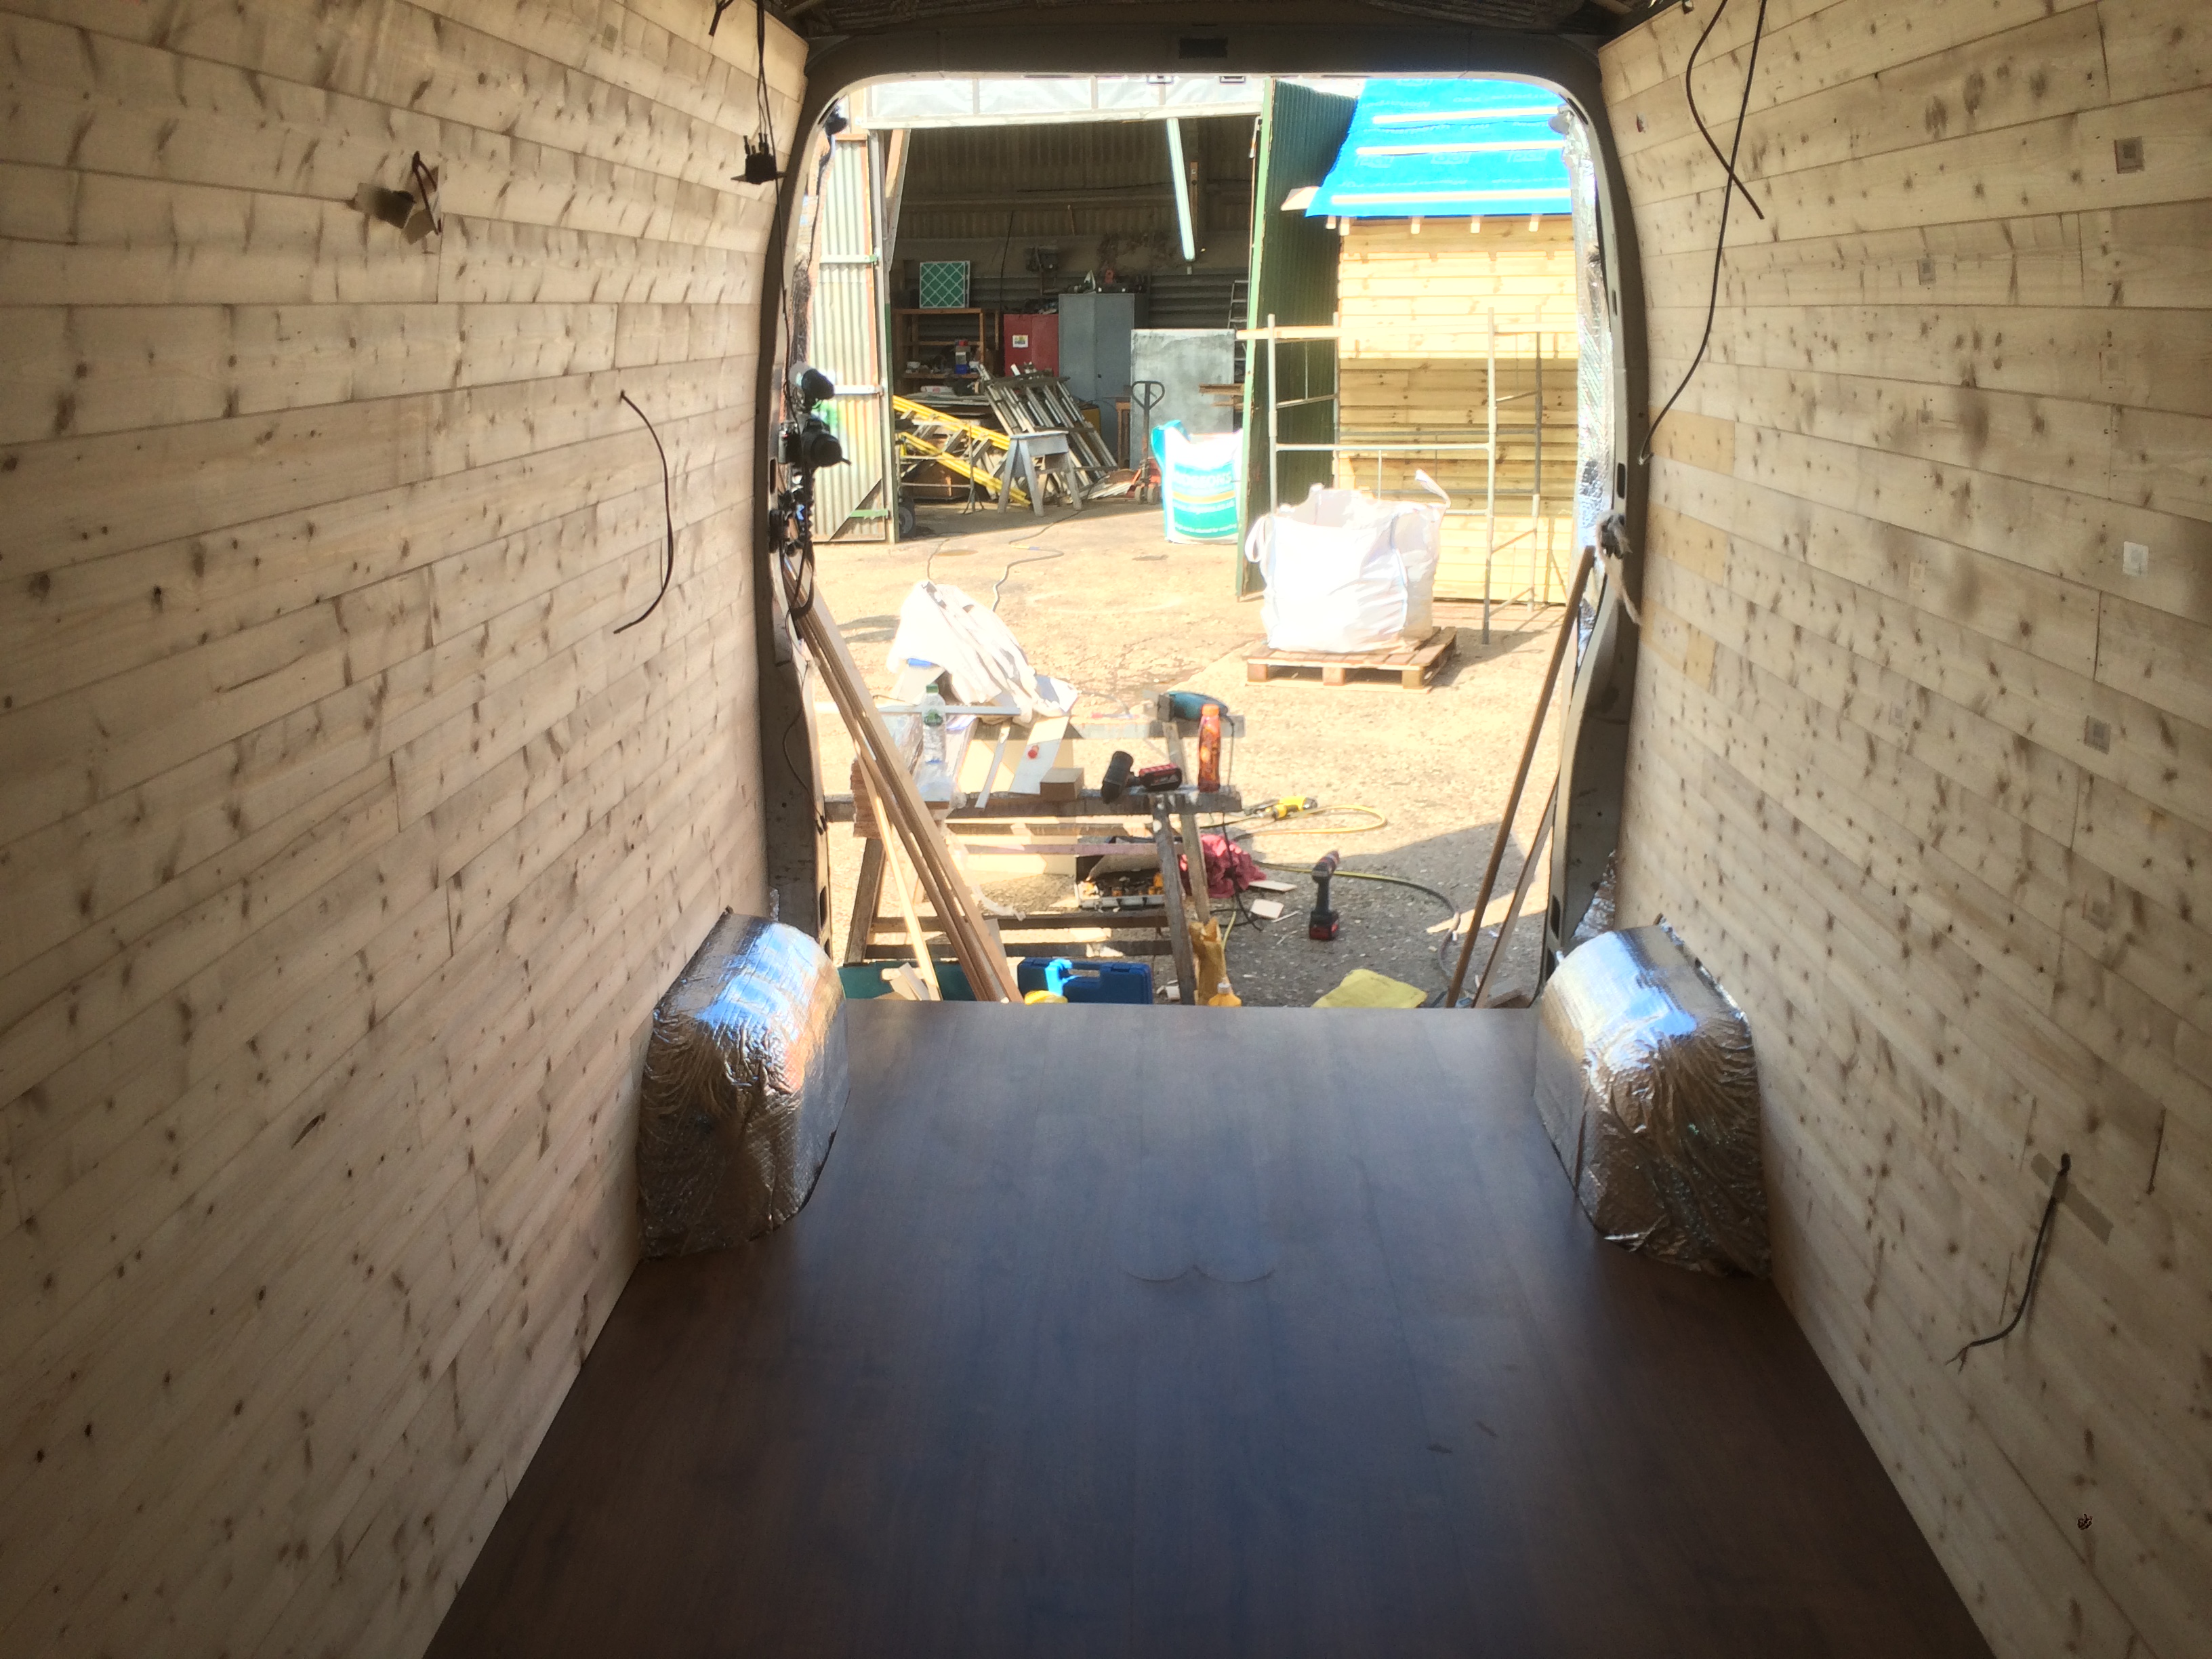
This was a major ‘Wow’ moment for us. For the very first time our van had working electronics, walls, ceiling, and a floor. It was this tiny blank space that would form our home, and the next step for us would be to decorate and furnish it.
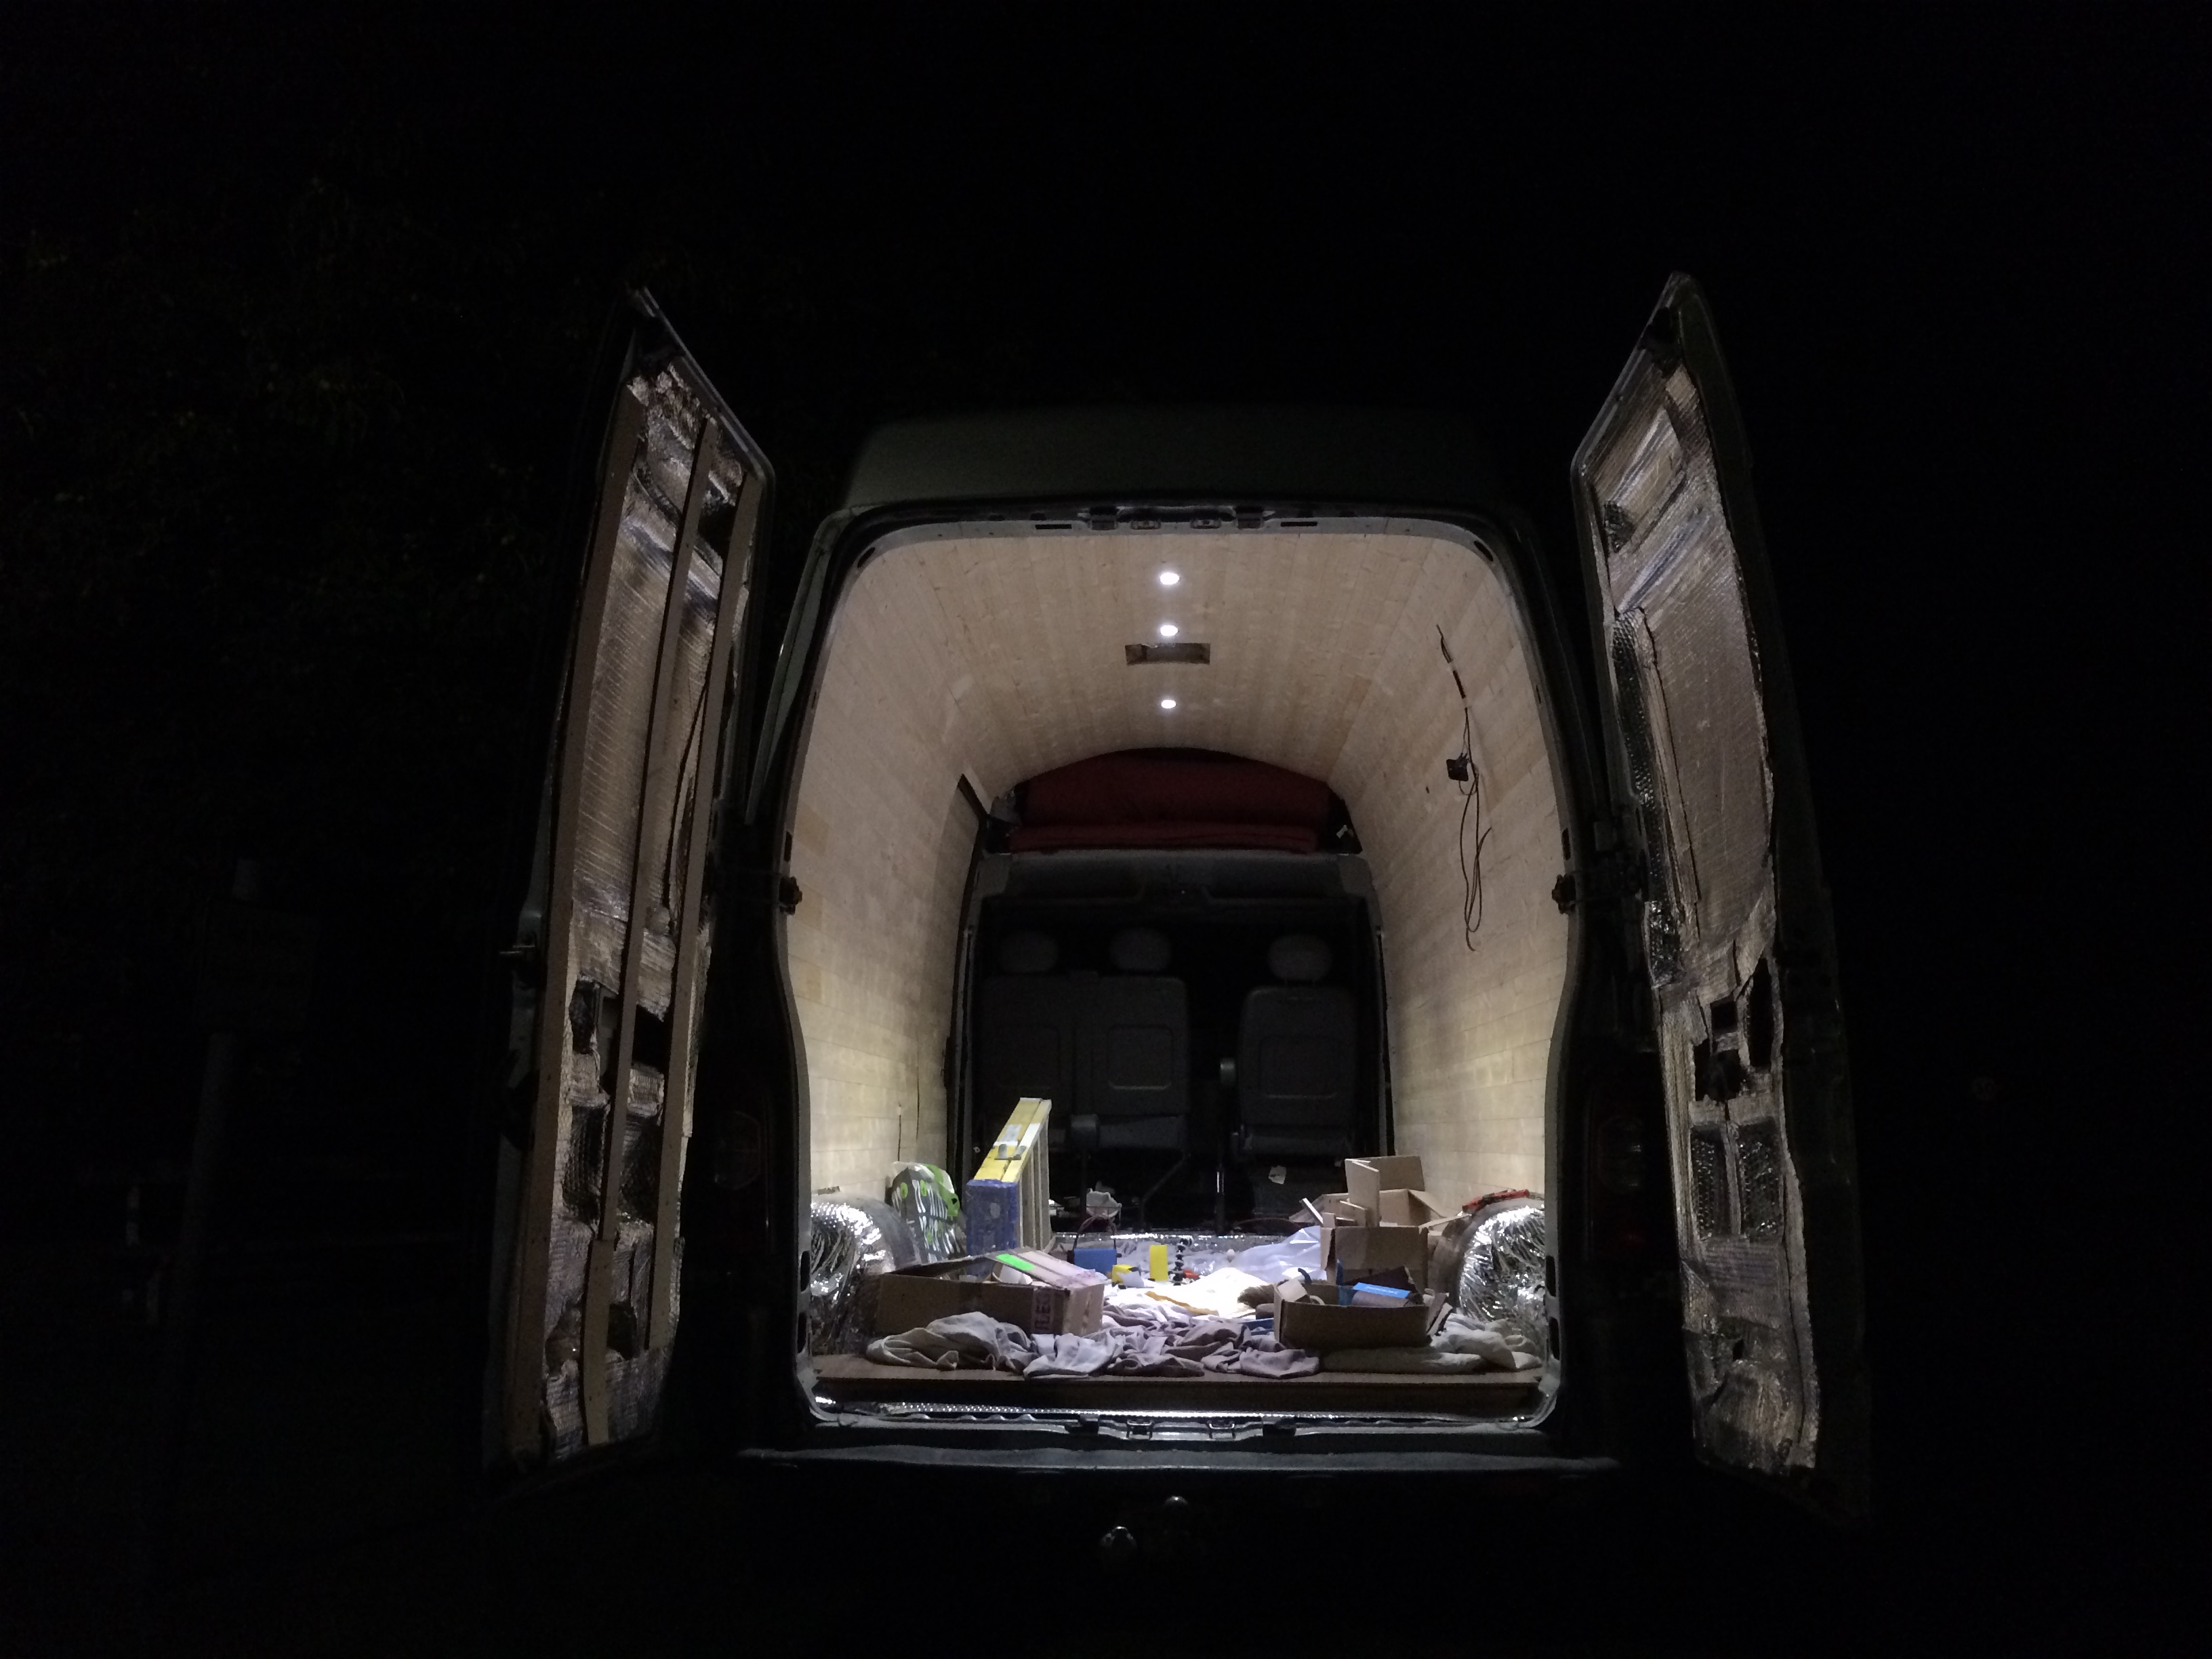
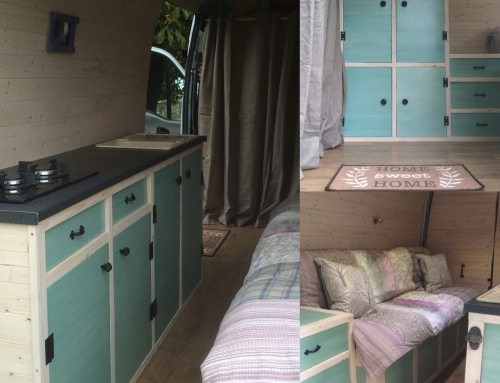
As you can see from the image, we hadn’t clad the back doors at this point, but that would come next, along with building all of the furniture for the van. It was super exciting to see how everything was finally taking shape.
![A Tour Of My Van Conversion [Renault Master LWB 2008]](https://www.greatbigscaryworld.com/wp-content/uploads/2017/02/My-One-Month-Donkey-Van-Conversion-Tour-500x383.png)
Leave A Comment